

Mount the lights without losing hood clearance
2021–2023 Ford F-150 · DD7364P vehicle brackets
This guide covers the existing fender mounting points, bracket alignment, harness routing and pod-clearance checks for the Stage Series ditch-light kit. The manufacturer’s current guide also covers 2024–2026; this BTS guide focuses on the 2021–2023 truck.
Complete kits supply two pods and the matching dual-output harness. The bracket-only option supplies vehicle brackets, without lamps or wiring. Use the correct pod mounting hardware and wiring instructions for the equipment actually supplied.
Before you start
Allow approximately 30–60 minutes. Prepare painter’s tape, a trim tool, a 10 mm socket with an extension, and cable ties. Work on one side at a time so the original panel alignment can be retained.
Do not use an automatic car wash with the kit installed. Verify full hood movement before final tightening, and keep all wiring outside the hood-hinge mechanism.
Manufacturer installation example. Pod housing and output tier may differ from your selected kit; the vehicle-bracket mounting route is shared.
1. Protect the paint and mount the bracket
Protect the fender
Cover the top of the fender beside the cowl with painter’s tape before placing tools or brackets near the painted surface.
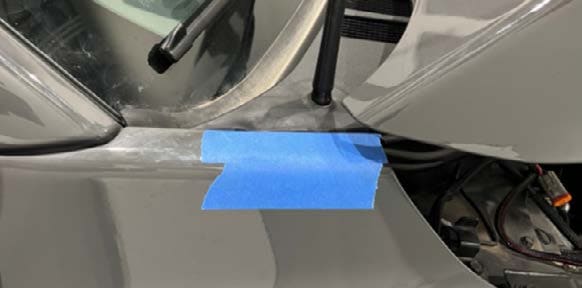
Remove the indicated top fender bolt
Gently move the rubber cowl trim aside. Use the 10 mm socket and extension to remove the indicated fender bolt. Keep the original bolt for reinstallation.
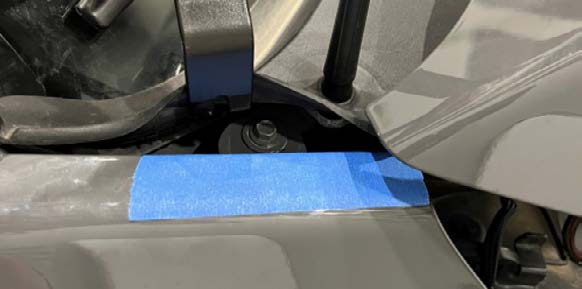
Position the vehicle bracket
Fasten the bracket using the original bolt. Place it close to the fender while leaving clearance so the bracket cannot rub the paint. Confirm the top of the fender still aligns with the hood and A-pillar. Remove the tape and repeat on the opposite side.
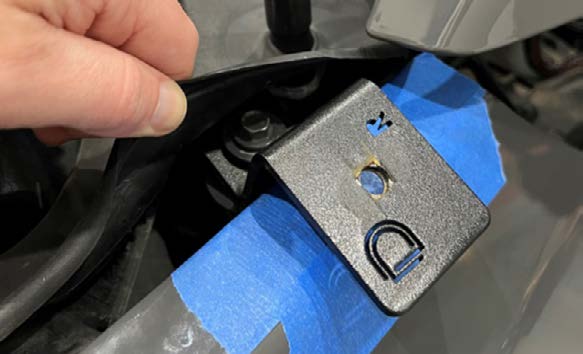
2. Route the harness clear of the hinges
Run the kit harness along the fenders, outside the hood-hinge assembly and beneath the bracket mounting location. Secure it so raising or lowering the hood cannot trap, stretch or cut the wires.
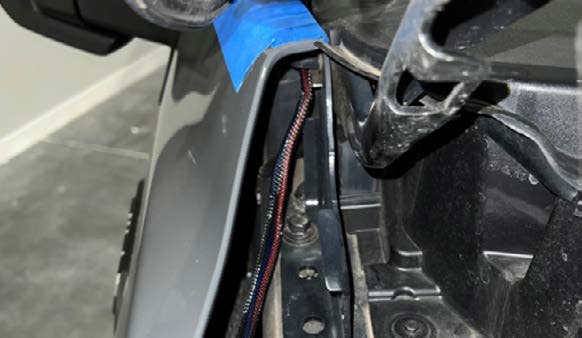
Use the wiring diagram supplied with the exact dual-output harness for battery power, fuse, switch and separate backlight connections. A mounting guide does not replace that harness diagram. Keep power isolated while completing connections and protect any firewall pass-through.
3. Mount, aim and check both lamps
Attach the lamps to the vehicle brackets using the supplied pod mounting hardware. Before fully tightening, slowly check the hood through its complete travel. Adjust the lamp and bracket positions to maintain clearance, then secure the hardware and repeat the check.
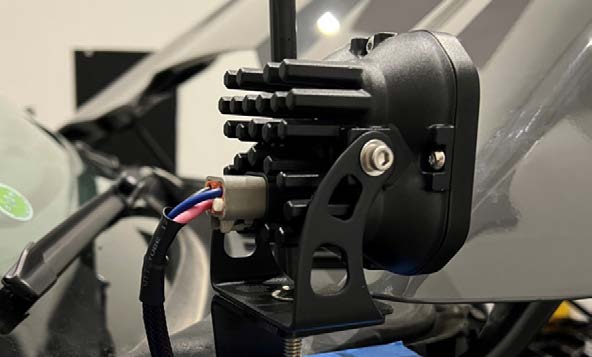
Aim the main beams for the intended off-road use. Confirm the main-light switch and separate backlight circuit operate correctly, then inspect the routing and fasteners again.
The C2 and SS3 configurations on this product use Amber backlights. The supplier’s separate SS5 colour-programming instructions do not apply to these native kit choices.