

BTS installation guide
Install a Morimoto XBG grille on your F-150
Follow the factory-equipment checks, illustrated removal sequence and original-part transfer for the supported 2021–2023 application.
Start with the correct application
This guide covers the supported 2021–2023 F-150 XBG grille application, excluding Raptor. Check the 2023 hood-profile photograph before beginning. Park securely and work with the lights and ignition off.
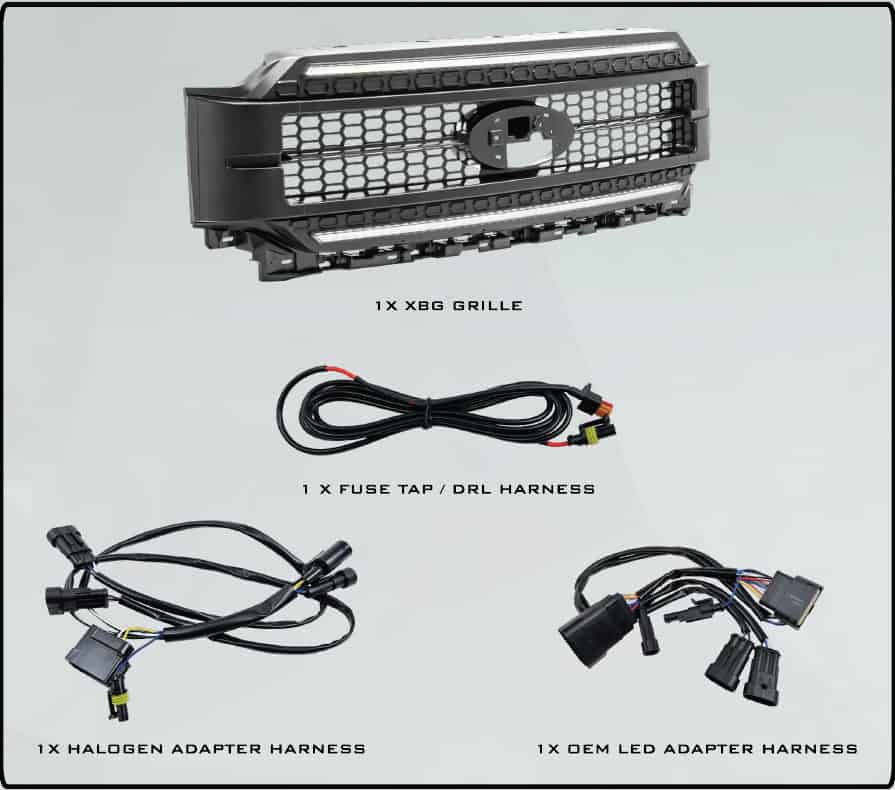
Factory LED projector: XBG21H is required. Use the instructions included with that adapter for its connections. The manufacturer’s older illustrated manual below covers halogen / LED reflector routes and older XB headlights; those diagrams are not an Evo-specific or projector-harness wiring diagram.
Have a ratchet, 7mm, 8mm and 10mm sockets, flat screwdriver or trim tool, Phillips screwdriver and needle-nose pliers ready. Keep fasteners grouped by step.
1. Remove the grille and front trim
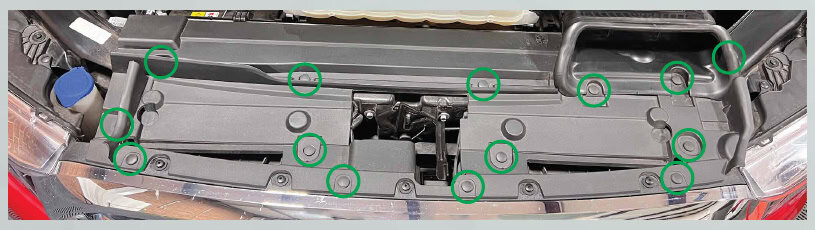
- Remove the 14 plastic grille-cover clips and lift off the cover.
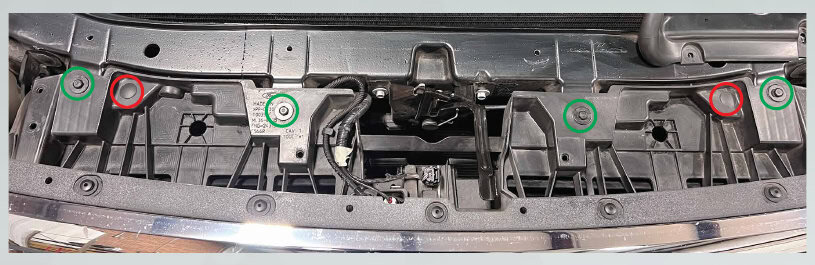
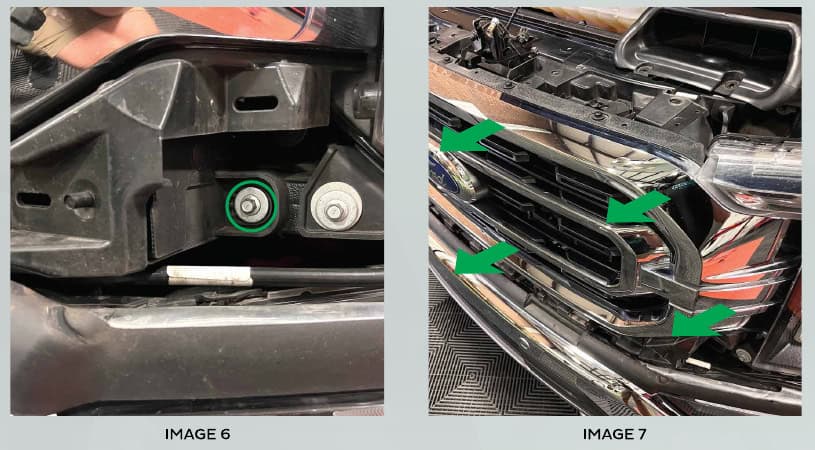
- Remove the four 10mm grille-top bolts and two plastic clips.
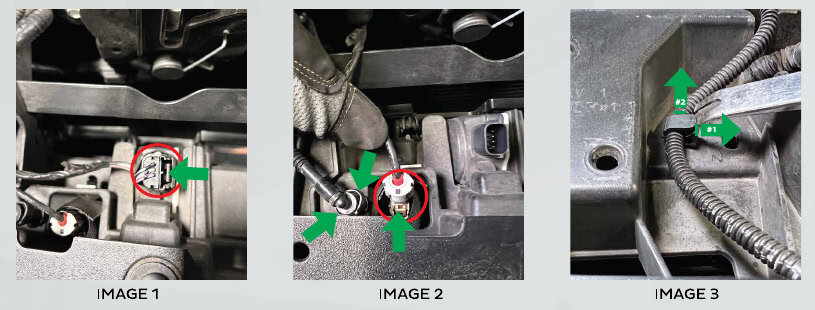
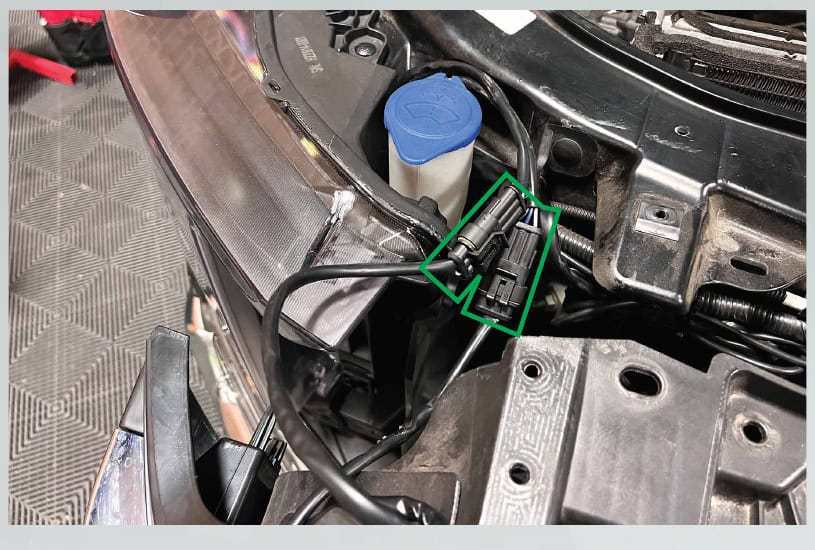
- Disconnect the active grille motor and front camera wiring. Release the camera-washer fitting by pressing its two edges and sliding it out; free the hose from its holder.
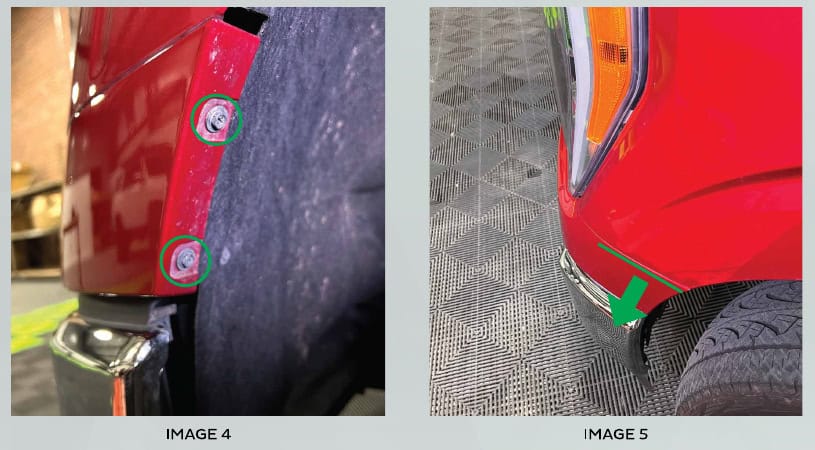
- Remove the two 7mm trim-end screws, release the trim away from the fender, and repeat on the other side.
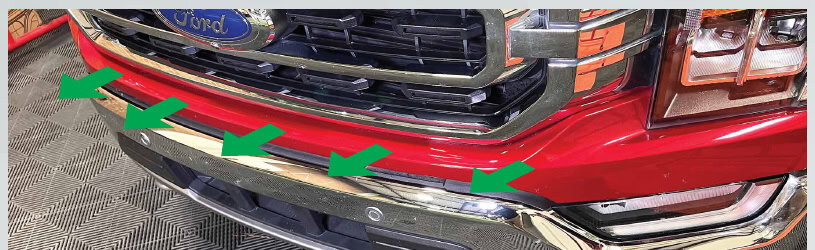
- Pull the bumper trim forward to release it from the grille.
- Remove the two lower 8mm grille screws, one on each side, and pull the grille forward off the truck.
2. Reach the passenger-side wiring
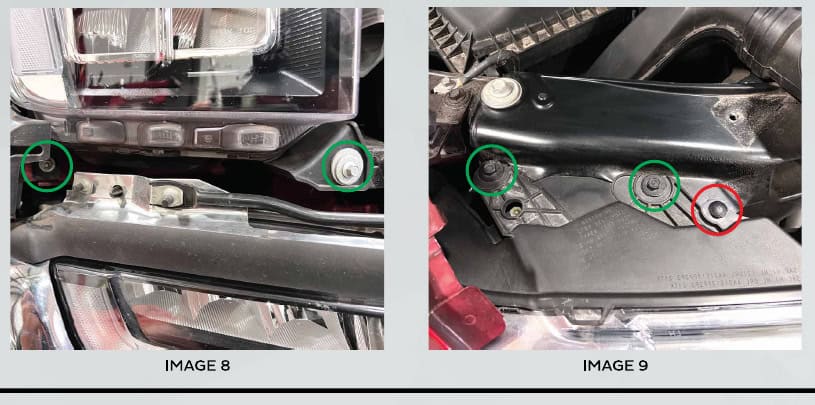
- At the bottom of the passenger headlight, remove the 8mm screw and 10mm nut. At the top, remove two 10mm screws and the plastic clip.
- Slide the headlight forward and unplug its three connectors.
- Find the fuse box at the passenger-side firewall. Remove fuse 25 and install the included fuse-tap harness in that position, then route the harness toward the passenger headlight.
If using Morimoto headlights, the grille manual directs you to use the fuse-tap harness included with those headlights.
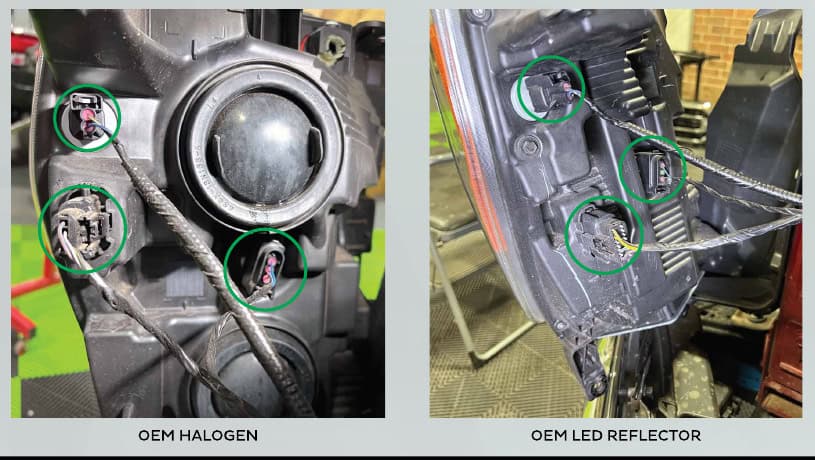
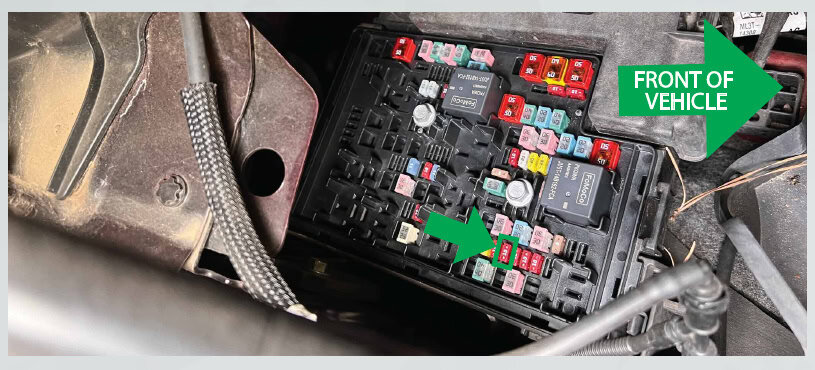
3. Match the illustrated connector route
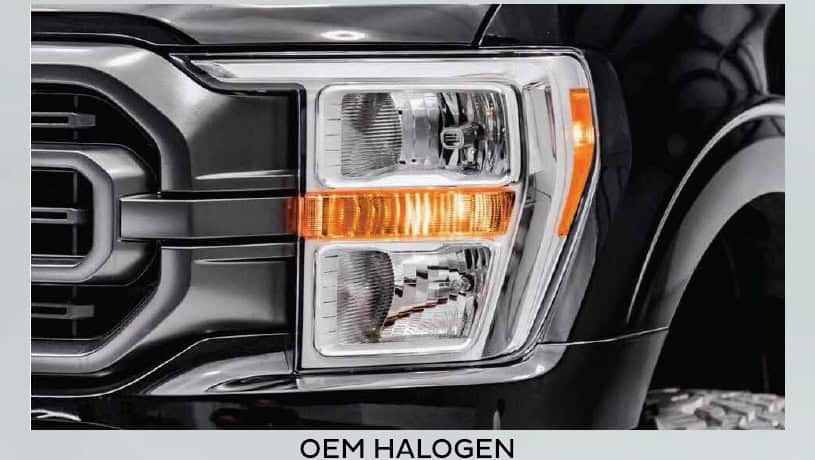
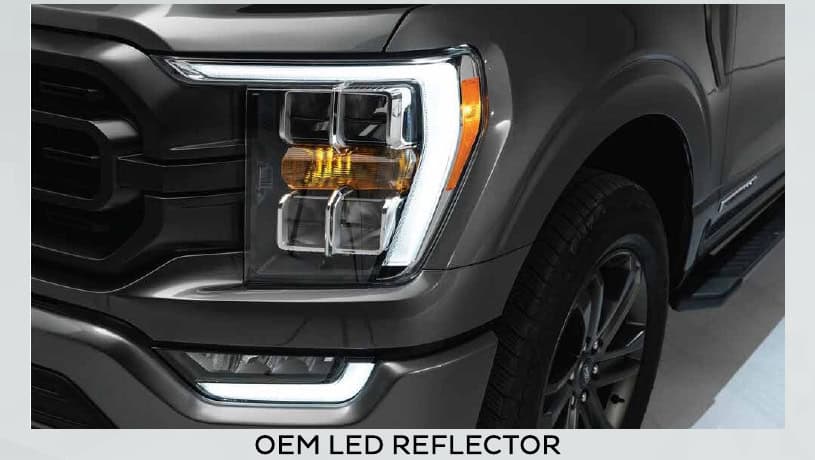
Connect the correct included adapter inline between the truck wiring and headlight. Route the two grille connectors toward the grille opening, then reinstall the headlight. Use the original-equipment route that matches your truck and fitted headlights.
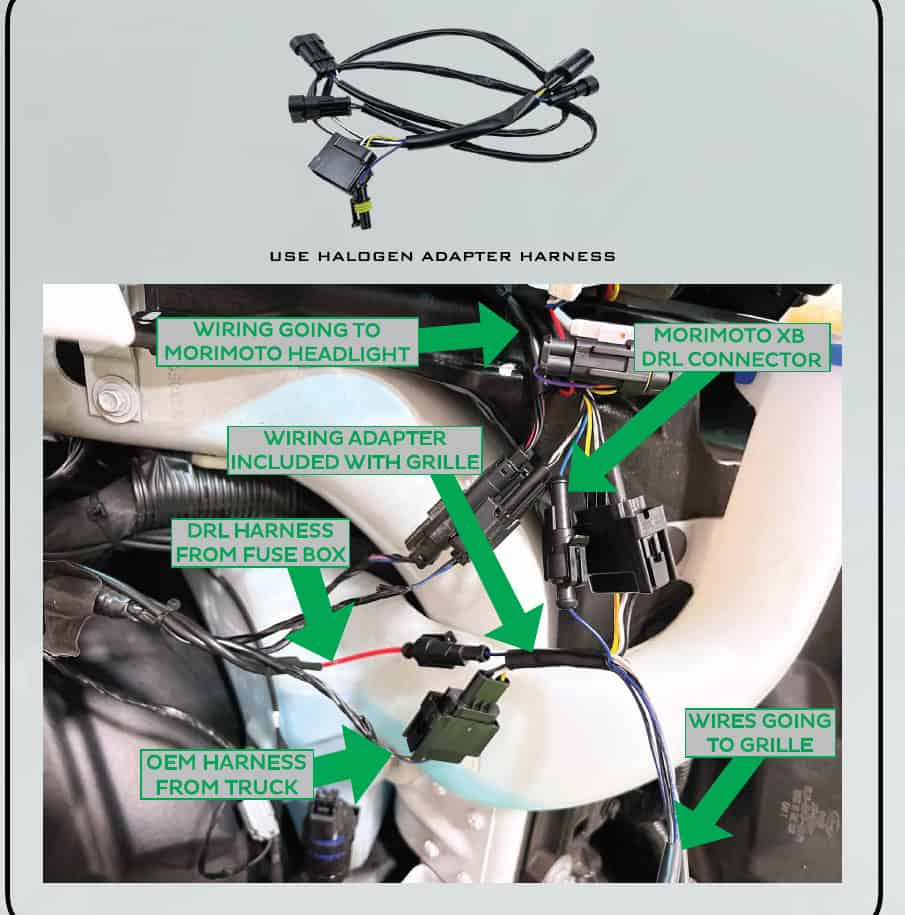
Original halogen truck with older Morimoto XB headlights
The manufacturer shows the included halogen adapter. Follow the labelled original truck, headlight, DRL and grille connections.
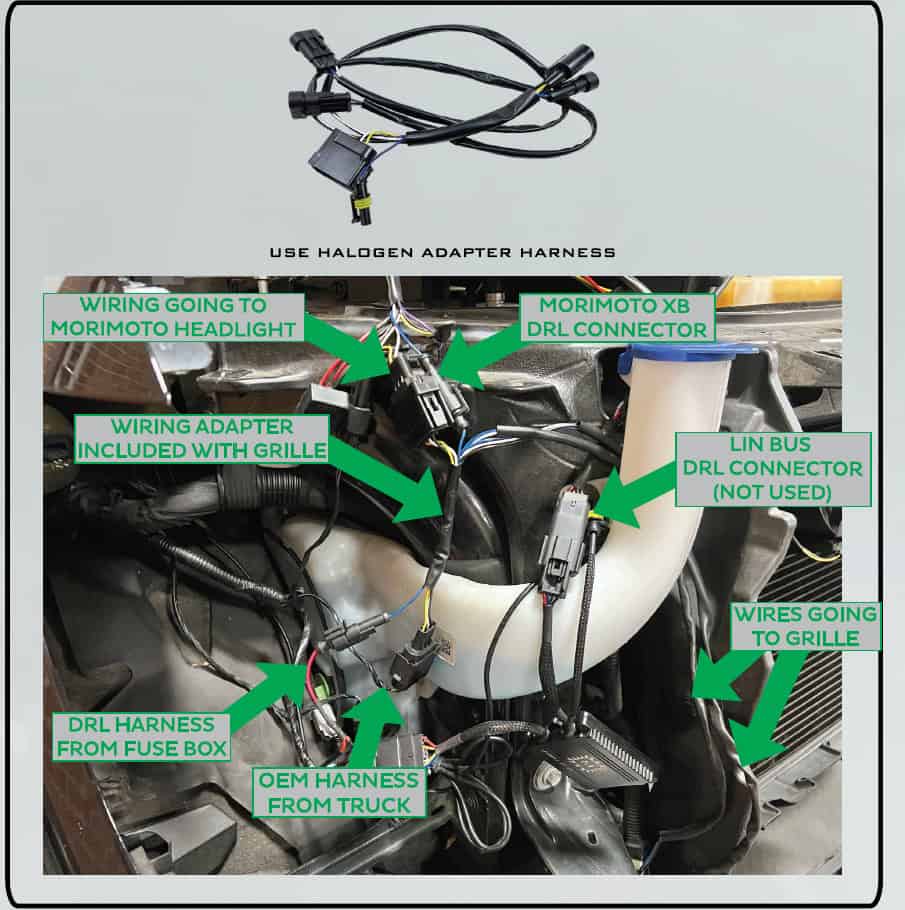
Original LED reflector truck with older Morimoto XB headlights
This illustrated route also uses the halogen adapter. The diagram marks the LINBUS DRL connector as unused.
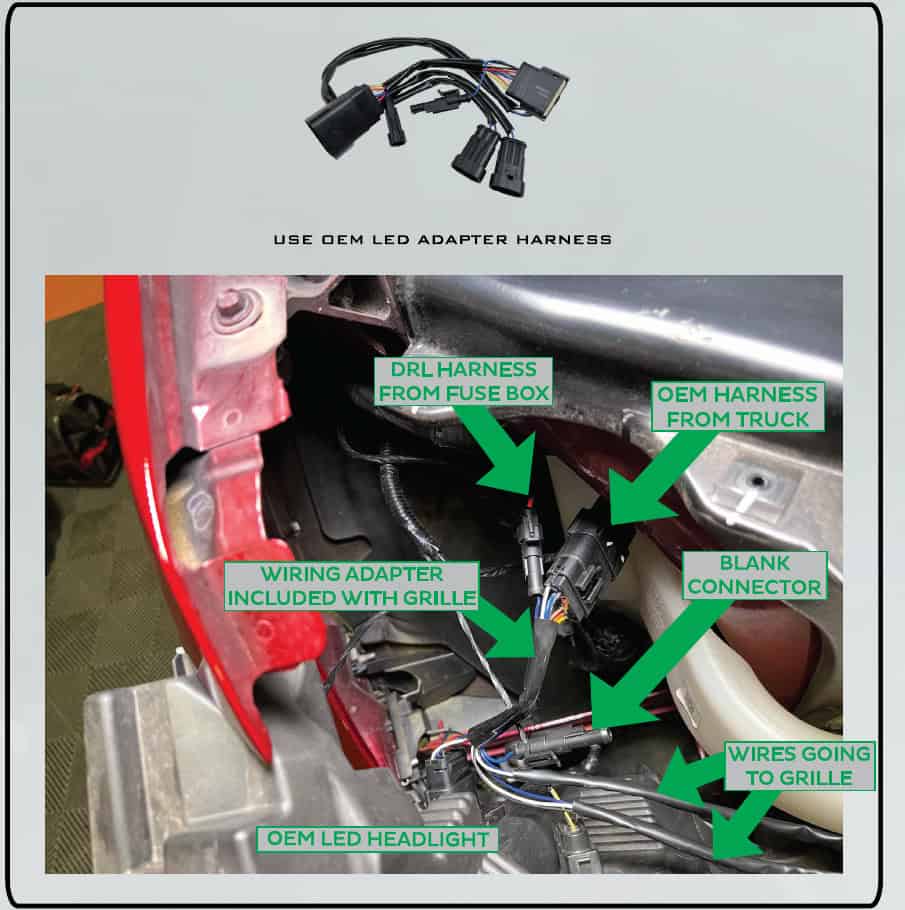
Original LED truck retaining its OEM headlights
The manual shows the OEM LED adapter and identifies the blank connector. Match the pictured original connectors; this is not the separate XBG21H projector diagram.
For original LED projector headlights, use XBG21H and its supplied instructions. If the fitted headlight or connector layout differs from the diagrams, confirm the correct route with BTS before connecting it.
4. Transfer the original grille equipment
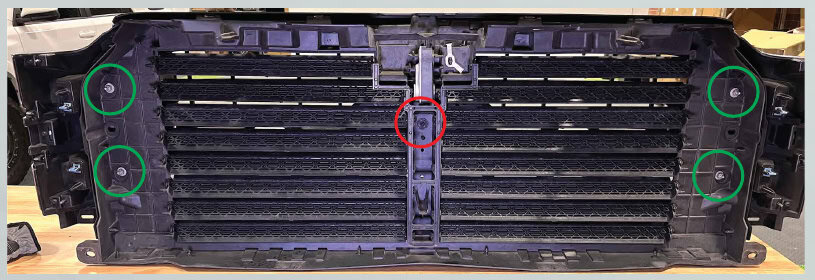
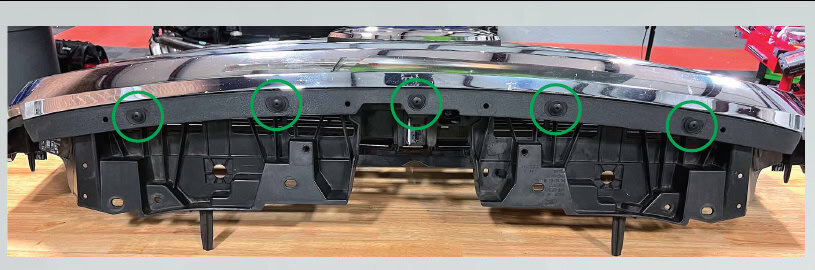
- Remove four 10mm nuts from the sides of the original active grille assembly and the 8mm screw at the centre.
- Remove its five upper push clips.
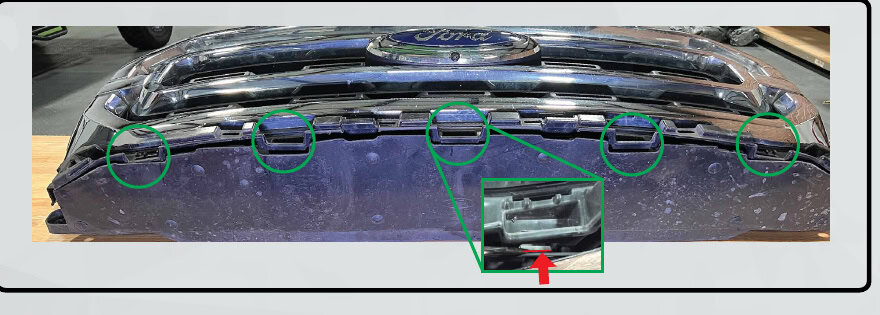
- Release the five bottom clips by pressing up on the illustrated lip. Separate the grille halves gradually as the clips release.
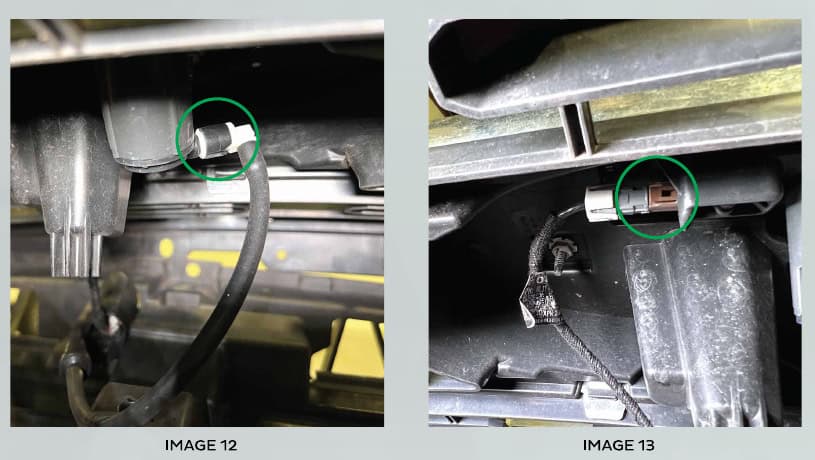
- Once open, unplug the front camera washer line and camera connector where fitted.
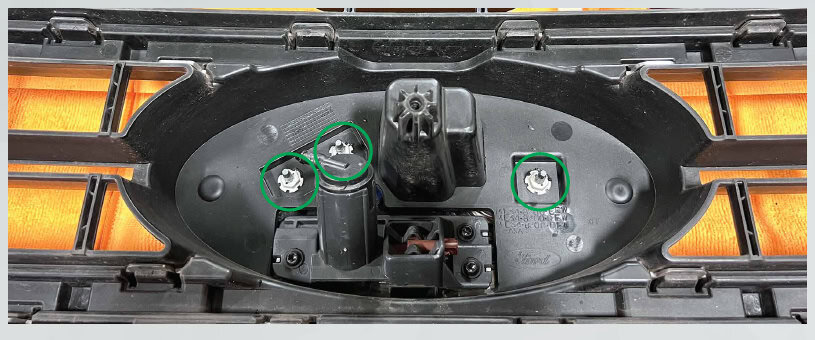
- Remove the three 10mm nuts holding the Ford emblem, then transfer the emblem to the XBG grille. Handtighten only.
5. Reassemble, connect and test
- Fit the XBG grille to the original active grille assembly. Route XBG wiring out of the passenger side, clear of both halves.
- Reconnect the camera and washer before locking the halves together where fitted.
- Seat the bottom metal clips, reinstall the four 10mm side nuts and central 8mm screw behind the emblem, then refit the five top clips.
- Set the grille on the bumper and connect its two plugs to the wiring routed from behind the passenger headlight. These two connectors are interchangeable.
- Tuck wiring behind the headlight so it cannot obstruct the grille, then seat the grille and reconnect original wiring at the top.
- Turn the truck on and check every lighting and retained-equipment function. Reassemble the remaining trim and cover in the reverse order of removal.
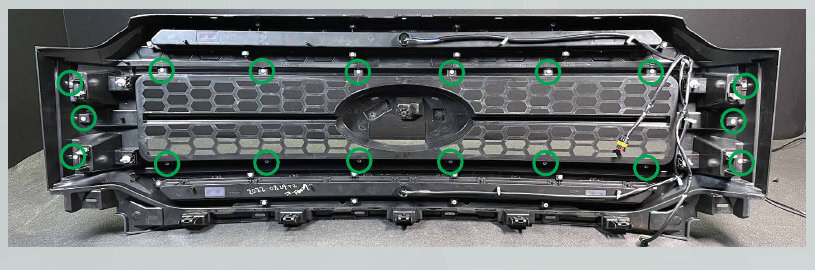
Optional: remove the front trim
For professional painting or wrapping, remove the 18 Phillips screws shown below to separate the removable trim. Handtighten the screws when reinstalling it.
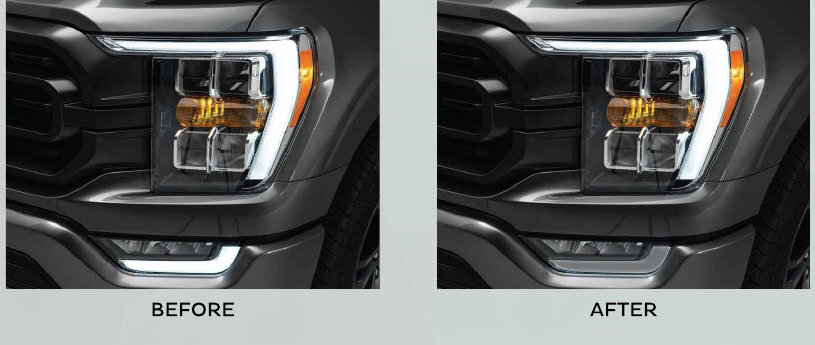
Optional: manufacturer fog-DRL procedure
View the separate OEM fog-DRL procedure
This is an optional procedure from the manufacturer manual, not a required grille-installation step. Use it only for the matching factory LED-truck connector shown. If the connector differs, confirm the correct procedure before removing any terminal.
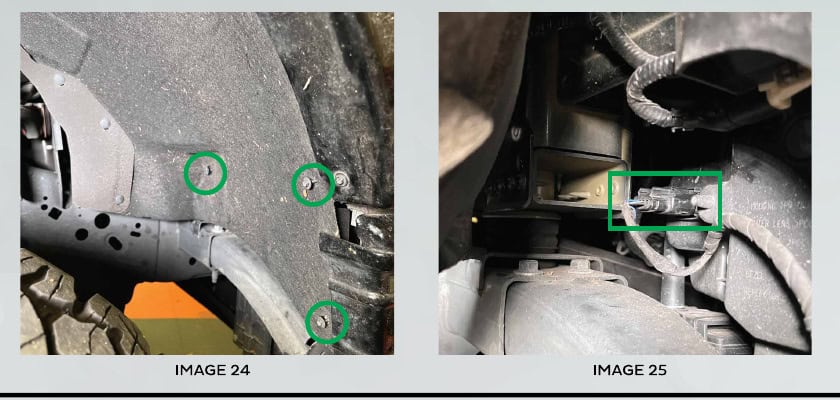
- Remove the two 7mm screws and plastic clip at the fender liner. Pull the liner back and unplug the fog light.
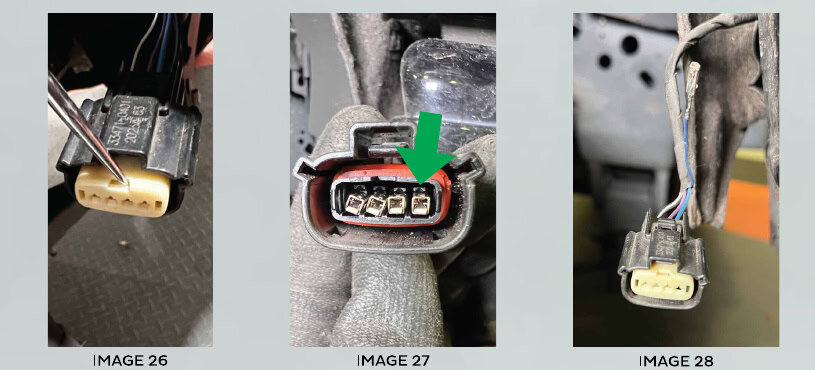
- Using a straight pick, release the white connector insert through the illustrated slot.
- Lift the indicated terminal release tab while pulling that wire from the back of the connector. Follow the exact illustrated terminal; do not choose a wire by an assumed colour.
- Reinstall the white insert and wrap the removed pin with electrical tape as directed.
- Repeat on the other side, switch the truck on and test all functions, then reassemble in reverse order.
Finish your F-150 lighting
Shop XBG23 Chrome / White · XBG21H projector adapter · F-150 lighting collection
Original BTS instructions based on Morimoto’s XBG grille manual and current XBG23 / XBG21H application information, reviewed October 23, 2026. Photographs and diagrams: Morimoto. Current product compatibility controls the supported years; the older manual’s 2021+ heading does not expand them. Open the original manufacturer manual.