

BTS installation guide
Install the Jeep JL cowl mounting brackets
Fit DD6089 over the factory mounting points, then install and wire the lights selected for your package.
Match the vehicle and package
Jeep Wrangler JL, 2018–2026: the manufacturer lists Sport, Sport S and Sahara. Do not use this mount on an Unlimited 4xe or 392 XR Rubicon. Confirm the exact cowl and hood layout before ordering for another trim; an aftermarket hood or nearby accessory can change clearance.
Jeep Gladiator JT, 2020–2026: Sport, Sport S, Overland and Rubicon are listed; Mojave is excluded. These are JL/JT mounts, not 2007–2018 JK mounts.
Prepare a T40 Torx bit and protect the painted panel. DD6089 brackets alone do not include lights or a harness. The complete SS3 kits contain four pods; an SS6 kit is a separate two-lightbar package.
Fit the brackets in three steps
1. Remove the three factory bolts marked yellow in the original photo. If wiring access is needed, remove the fourth bolt marked green and lift the panel. Route wiring next to the windshield hinge, then reinstall the trim.
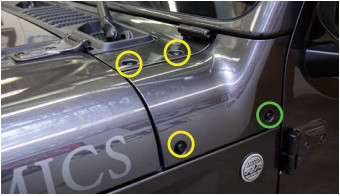
2. Place the supplied spacers over all three mounting points. Align the bracket and secure it with the included extended OEM-style bolts. Repeat on the other side.
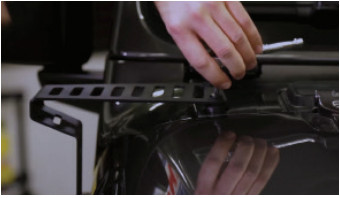
3. Attach the auxiliary lights to the appropriate slotted cutouts. Confirm clearance with the hood and windshield before tightening and testing.
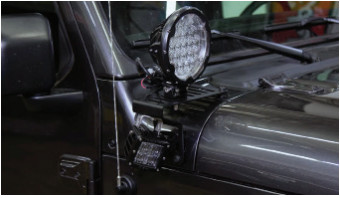
Use the harness for the selected lamps
A bracket-only package requires separately suitable wiring. Complete kits include a fused power harness. Follow its connector layout, secure the loom away from heat and moving parts, and test all outputs before closing the panels. If using a factory auxiliary switch, use the supplied adapter and the harness instructions; do not substitute the switch lead for the fused main power connection.
The demonstration includes different lamp layouts; only the selected product package is supplied.
Keep the original instructions
Open the original DD6089 installation PDF · Shop the bracket-only package · Shop the four-pod SS3 kit