

Morimoto 18+ Jeep Wrangler & 20+ Jeep Gladiator JT Sealed7 LED Headlights
Check the exact lamp, equipment notes and supplied parts before starting.
BTS INSTALLATION GUIDE · JEEP JL / JT
Fit the JL / JT Sealed7 pair using its supplied adapters, then test and aim the lamps before driving.
This guide follows the original Morimoto 2018–2022 JL / JT installation manual for this lamp. Match your vehicle and factory equipment to the current product listing; the manual cover is not a separate fitment approval.
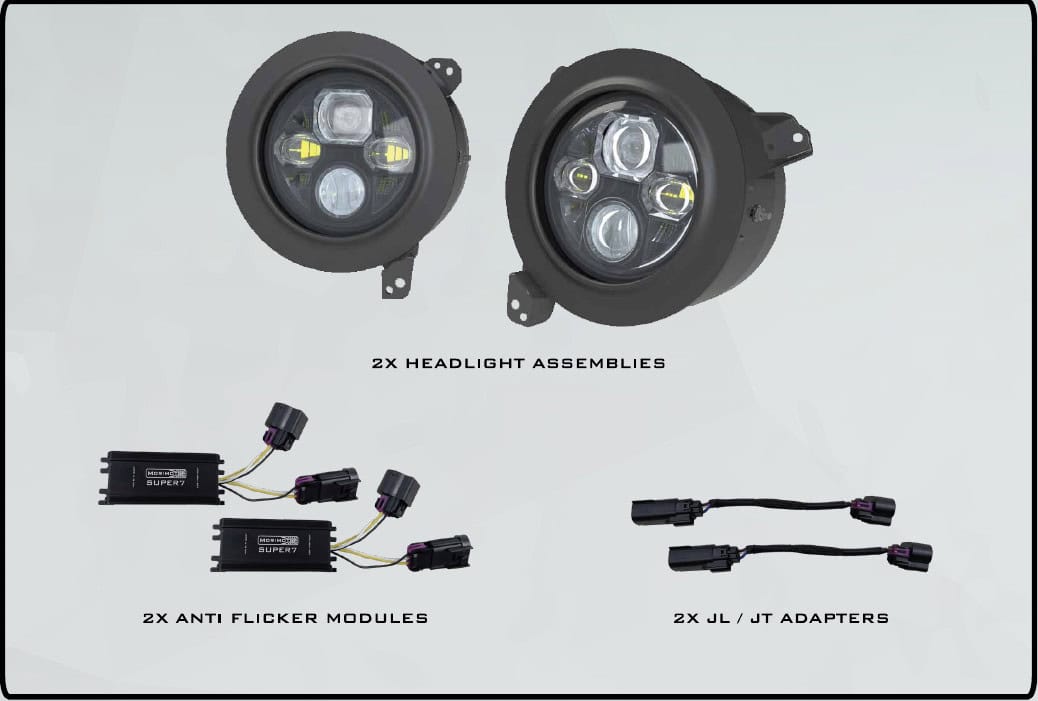
Tools: ratchet, 10 mm socket and #2 Phillips screwdriver, and a flat screwdriver or plastic trim tool. Keep the original fasteners for reassembly. If the connectors or mounting parts differ, stop and confirm the kit before modifying anything.
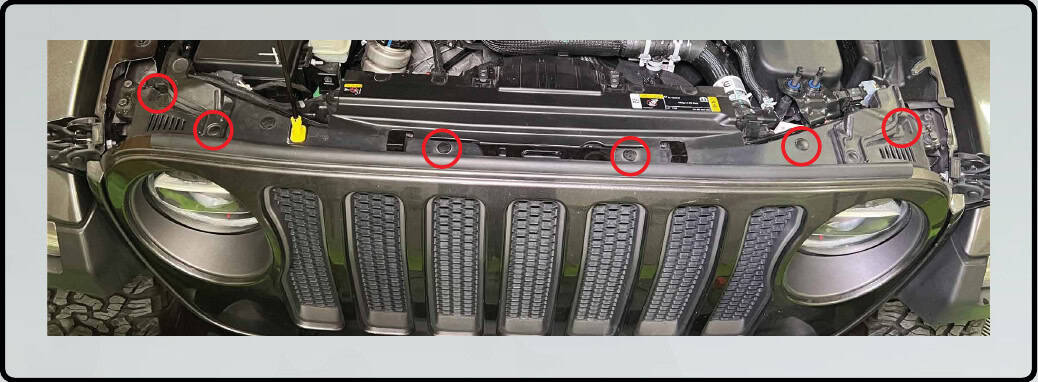
Remove the six push retainers across the top of the grille.
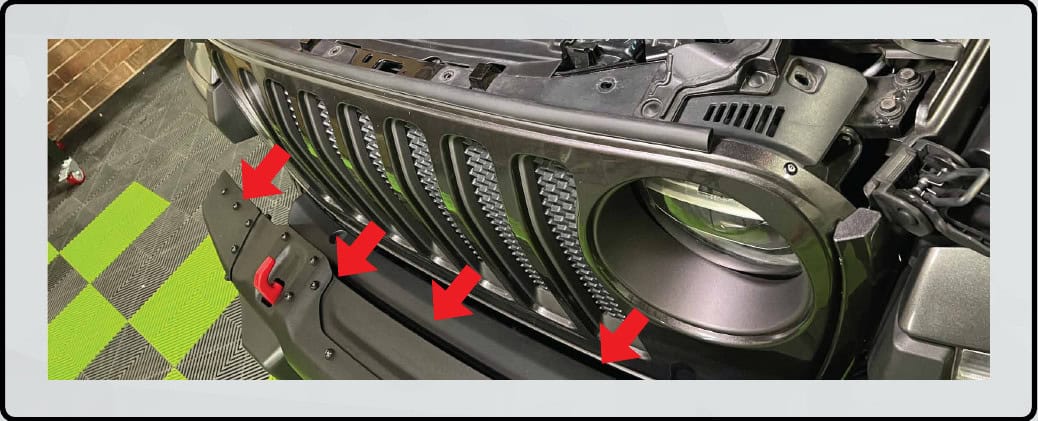
Pull forward to release the lower clips and set the grille safely aside.
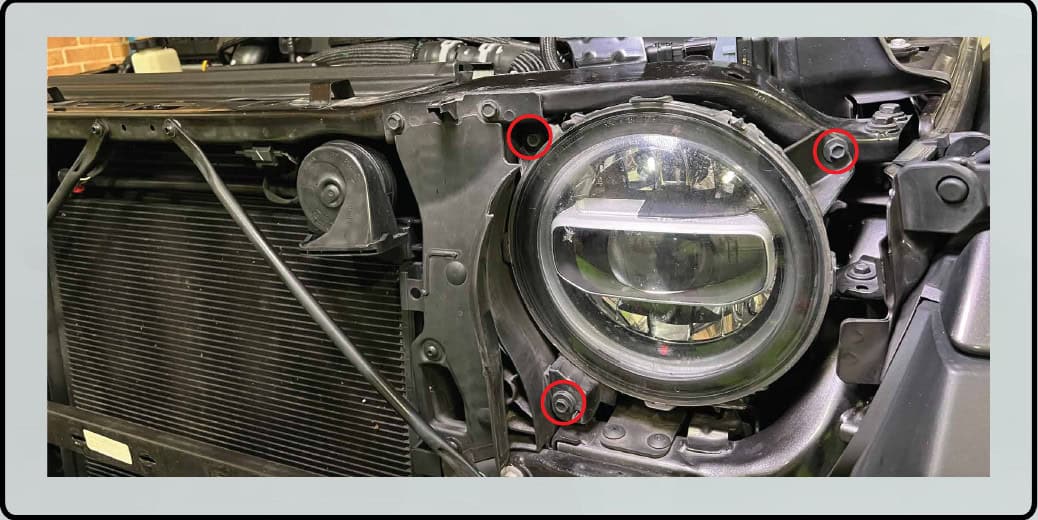
Remove its three 10 mm mounting bolts and support the headlight.
Press the indicated release tab and pull the connector apart without pulling on the wires.
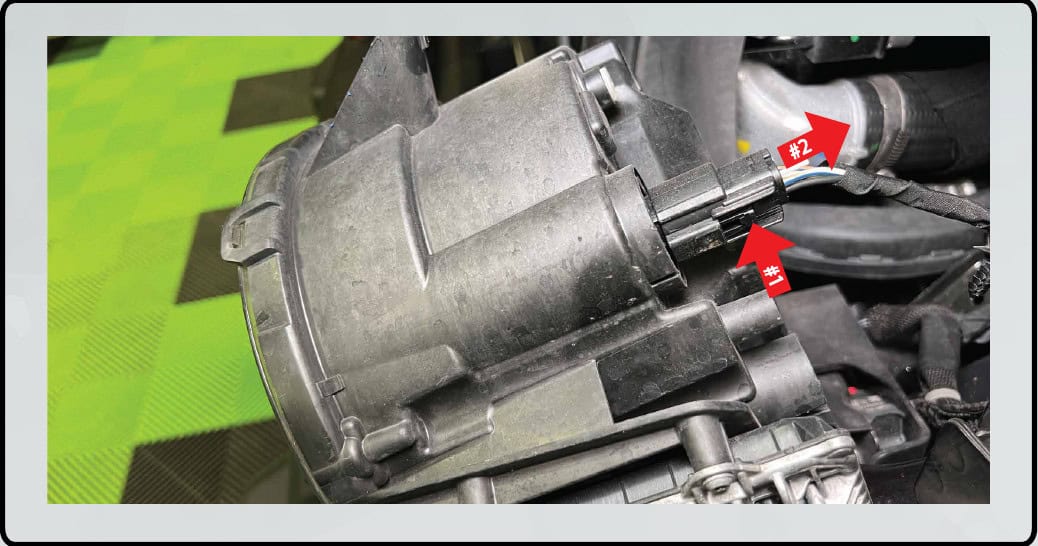
Repeat the mounting-bolt and connector steps on the other side.
Use the lamp marked L. Connect the anti-flicker module and JL / JT adapter in the order shown, connect to the factory multi-pin harness, align the housing and reinstall the original bolts.
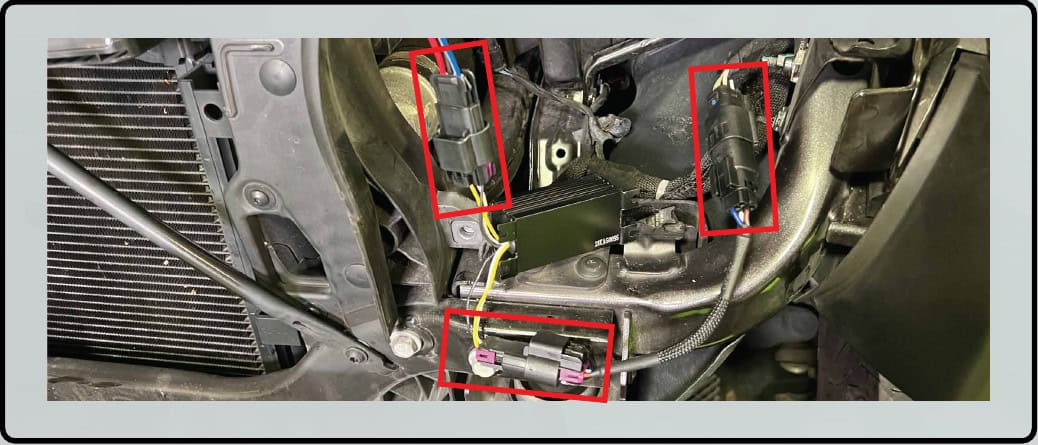
Repeat with the other lamp. The JL / JT wiring path is the one shown here; do not substitute the JK optional-wire instructions.
Check low and high beam operation. Morimoto specifically states that the Sealed7 turn-signal feature does not operate on the Jeep JL because of its CAN bus system.
Engage its lower clips and reinstall the upper retainers.
Use a #2 Phillips screwdriver through the opening shown. Make small turns while watching the cutoff move, then set the aim against the original 25-foot (7.6 m) reference.
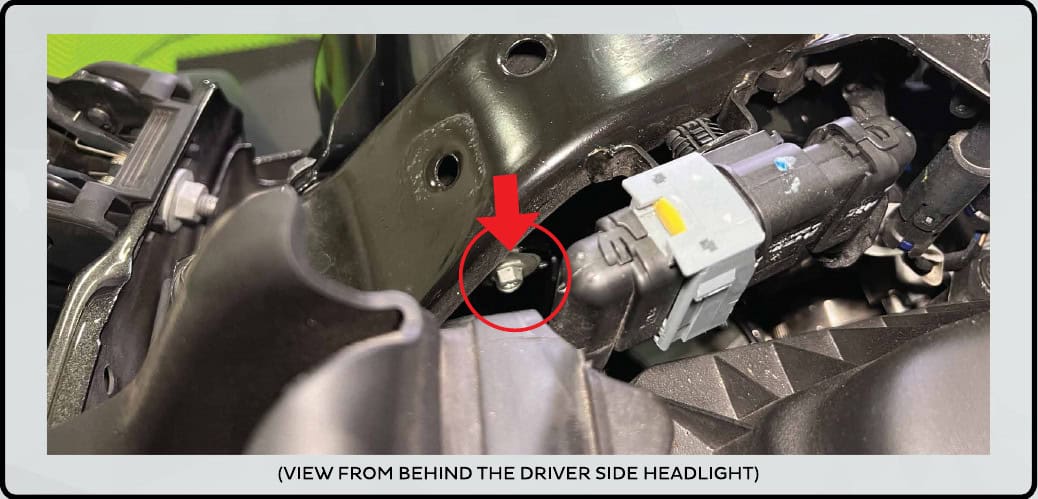
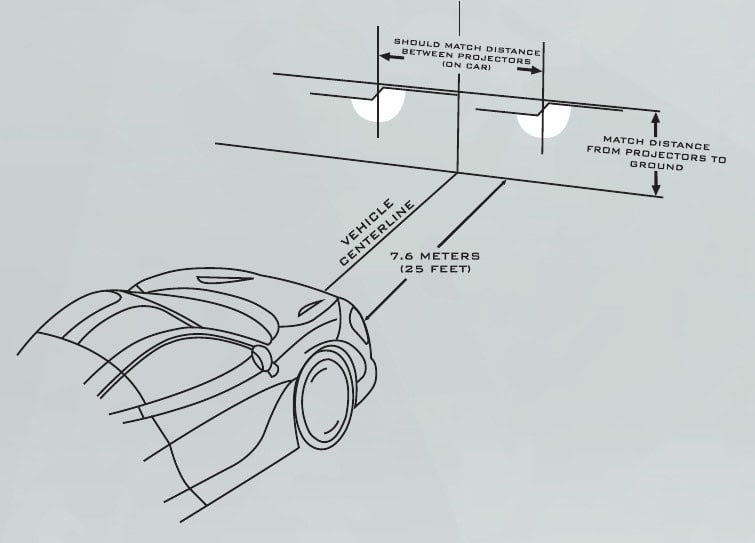
Original Morimoto PDF, unchanged and linked below. Its technical illustrations are reproduced here with their original markings. The linked video is the Super7 family overview supplied on the manufacturer page; use the Sealed7 written steps and PDF for this installation.
Open original manufacturer instructions
Open the original 5-page PDF hosted by BTS
Morimoto Super7 JL manufacturer overview
Check the exact lamp, equipment notes and supplied parts before starting.
Planning a Wrangler installation? Compare the matching lighting products and the checks that matter for JK and JL builds.
Compare Jeep Wrangler JK and JL lighting · Read the Wrangler lighting upgrade guide