

BTS installation guide · Jeep lighting
Jeep JL/JT Morimoto Side-Vent Marker Installation
Fit the LF210447 side-vent markers and route their two-wire connection through the fender.
These are the illuminated side vents behind the front wheel openings for Wrangler JL and Gladiator JT. They are not the separate bumper/fender marker replacements. Their red/black leads require a correctly identified 12 V positive and negative connection.
Have a ratchet, 10 mm socket, trim tool or flat screwdriver, wire cutters and pliers ready. Keep the lighting circuit off while preparing connections. The manual notes that other aftermarket turn-signal or tail-light changes can affect flash behaviour; check the complete system after installation.
Parts and access
1. Check the parts
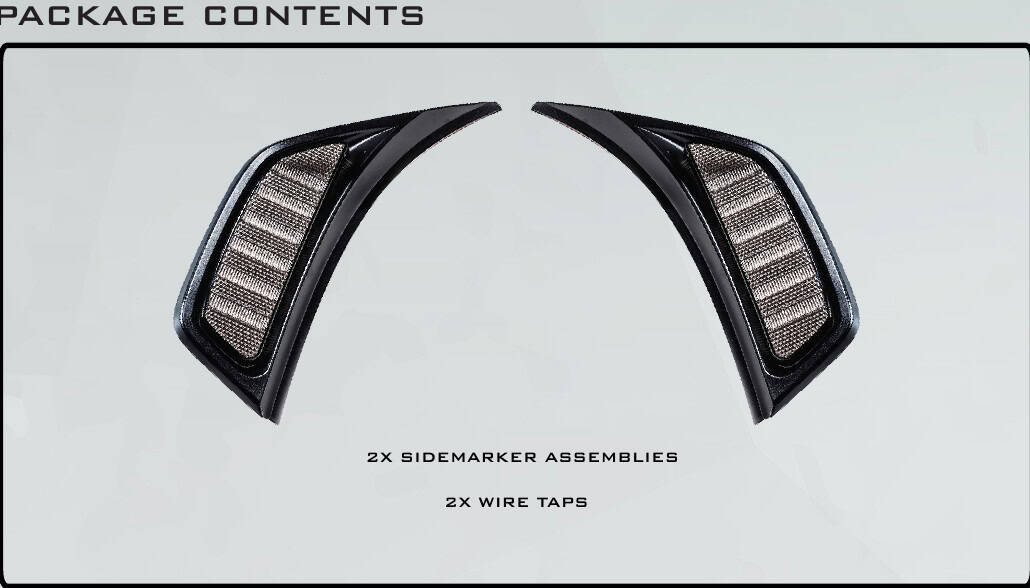
The manual identifies two side-marker assemblies and the included wire taps. Retain the original annotations in the figures below when locating the clips and harness.
2. Lower the driver-side liner
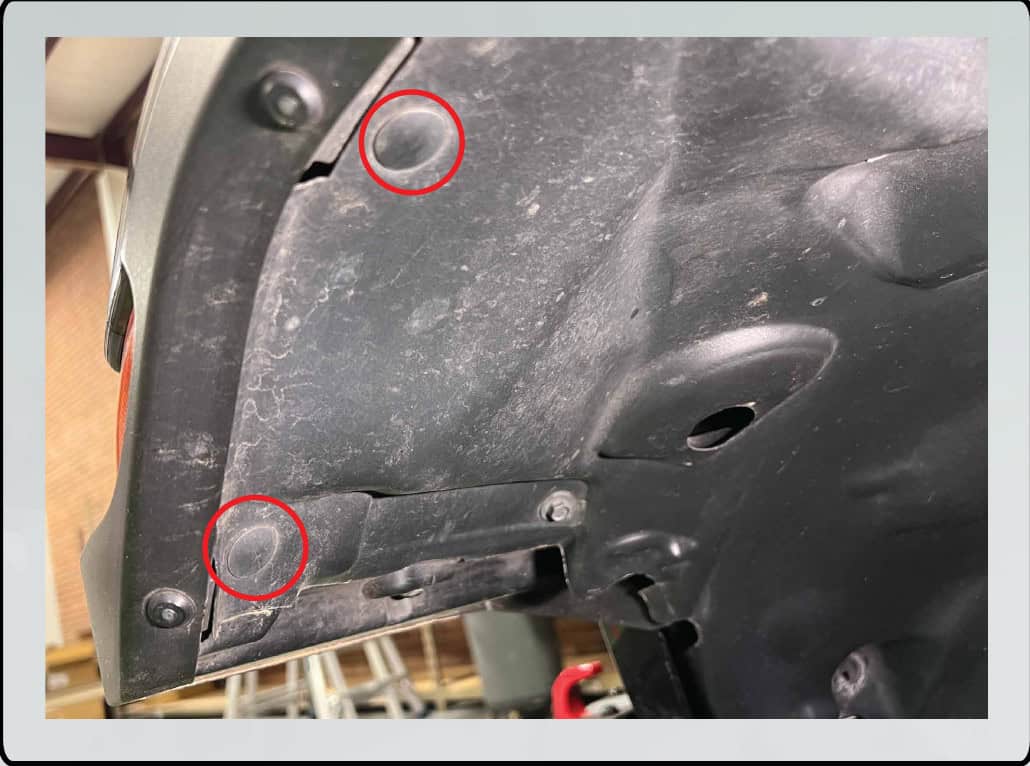
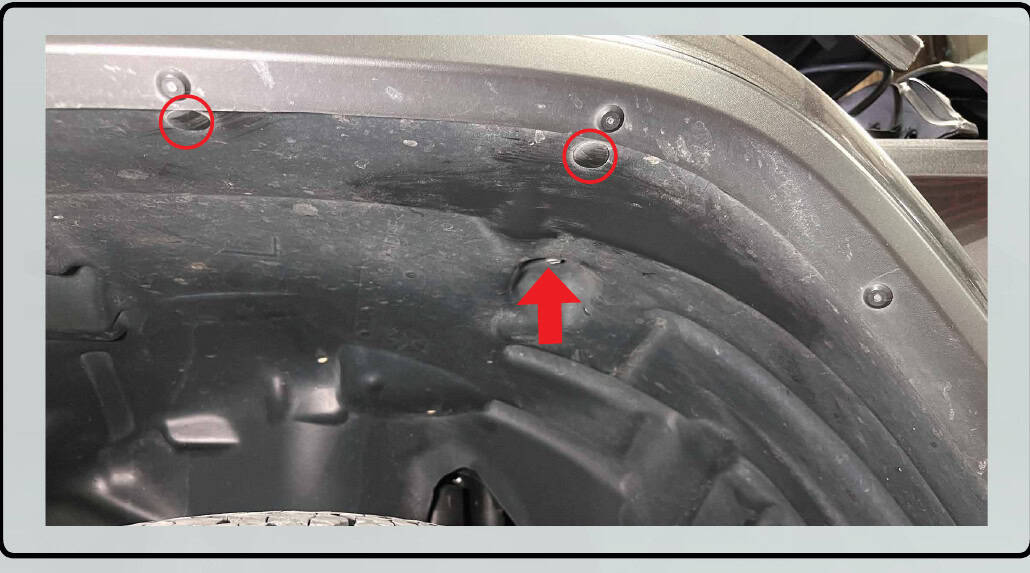
Remove the two push clips shown at the front portion of the liner. At the rear of the fender, remove the 10 mm bolt and two more push clips. Lower the liner enough to reach the connector.
3. Disconnect the fender harness
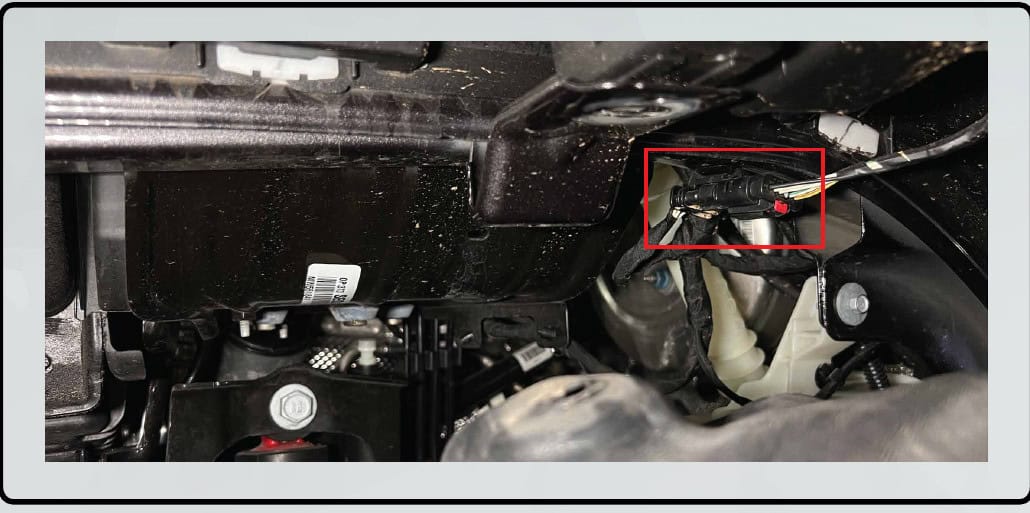
Find the connector near the middle of the fender. Slide its red lock back, press the release and separate it.
Install the illuminated vent
4. Remove the original vent
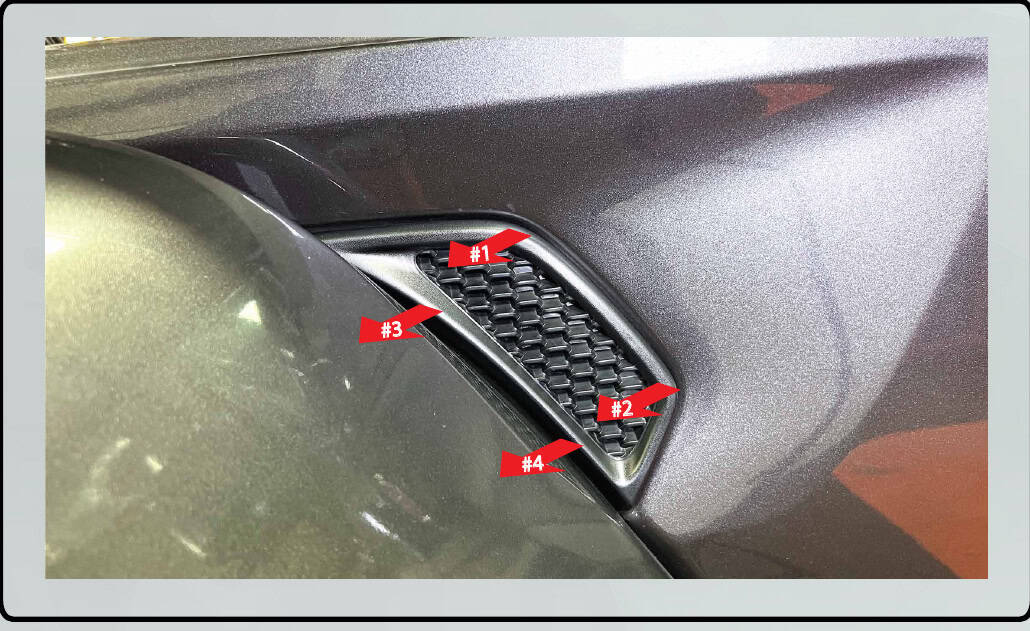
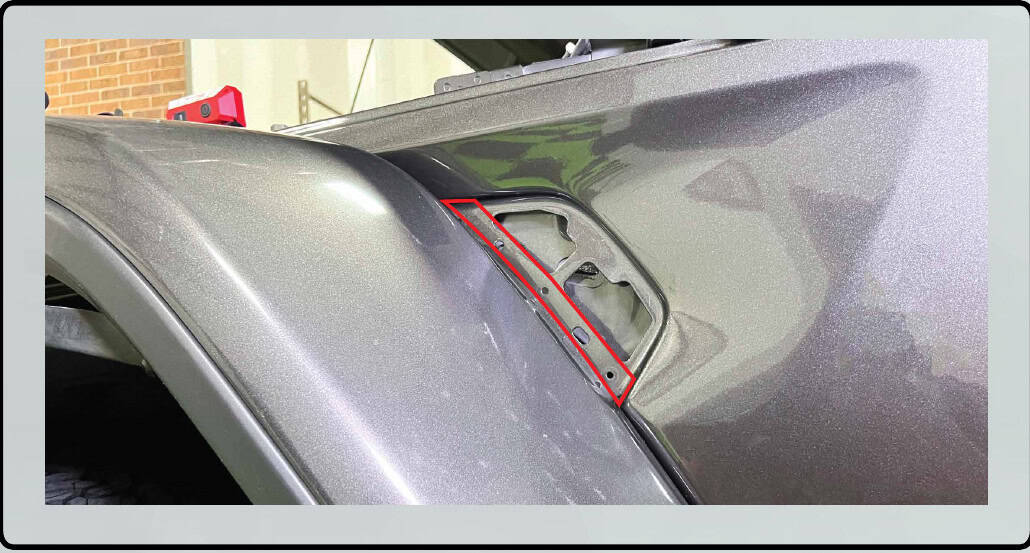
Use the plastic trim tool to release the vent in the numbered order marked by Morimoto. Work around the clips without levering against unprotected paint.
5. Prepare the supplied leads and taps
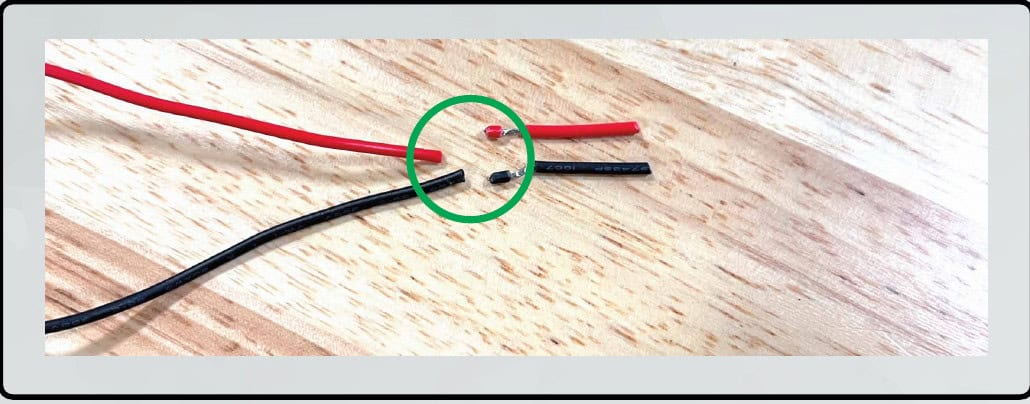
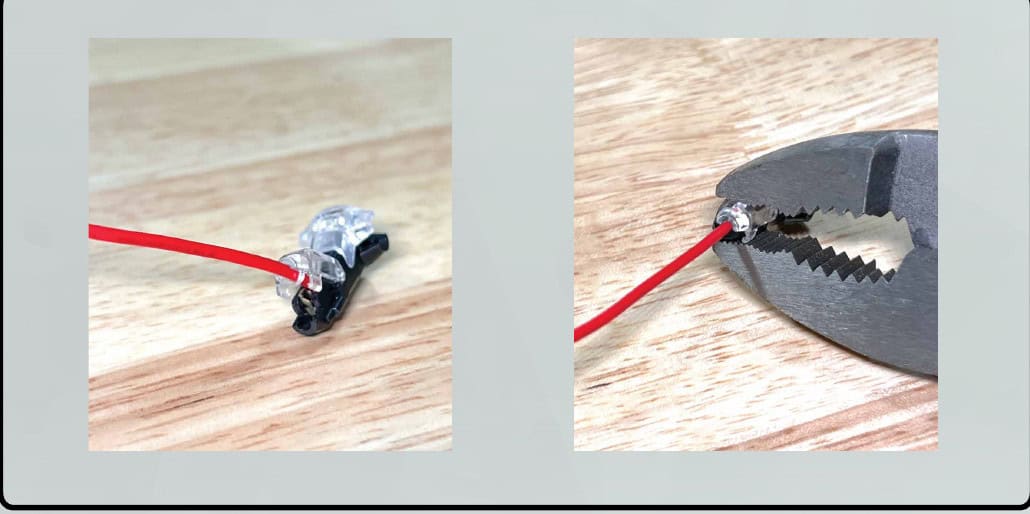
Cut off the pre-stripped ends as shown in the manual. Insert a lead into its tap and squeeze the cover with pliers until it clicks closed; repeat for the other lead.
6. Route and attach the marker
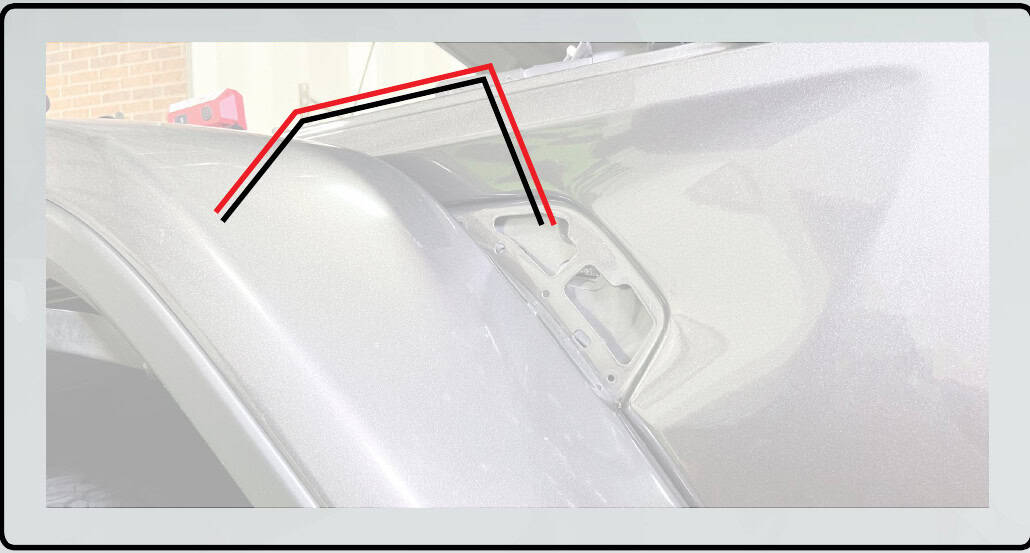
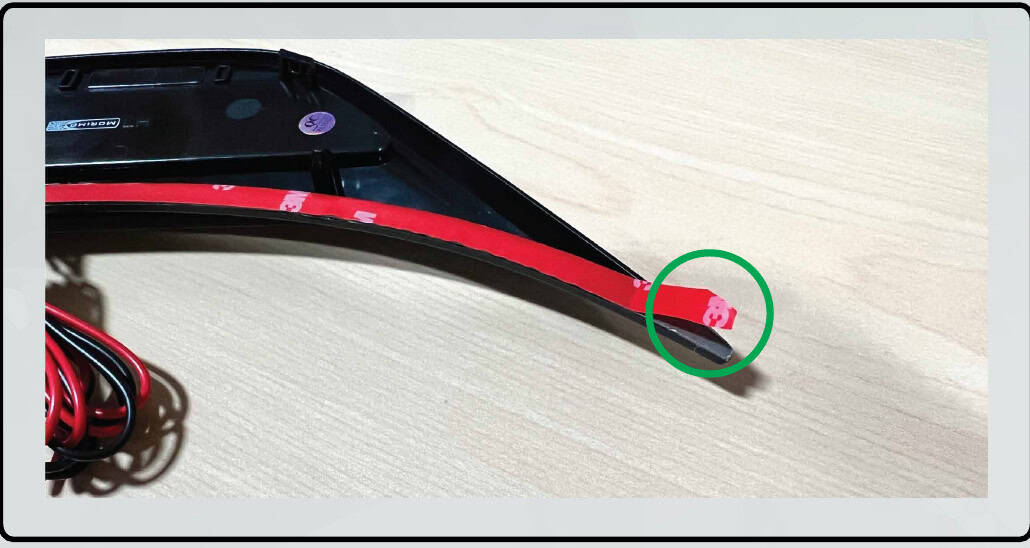
Pass the wires through the fender opening into the engine bay, then into the fender area. Clean the illustrated mating surface with isopropyl alcohol and a clean cloth. Peel the adhesive backing and seat the new marker.
Connect and finish
7. Complete the two-wire connection
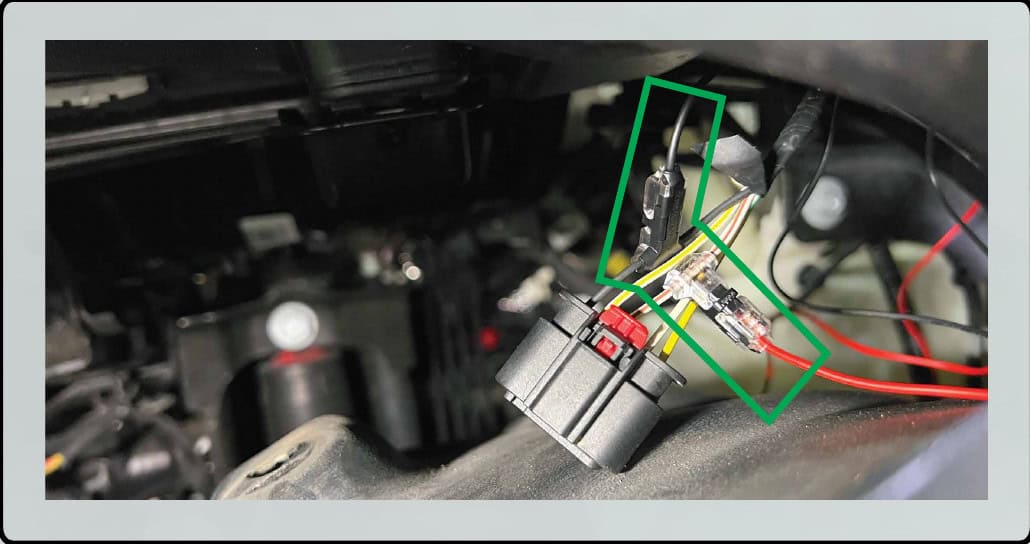
Connect the marker leads to the matching fender circuits illustrated by Morimoto and close each tap cap fully with pliers. Verify the circuit and polarity on the actual vehicle; the illustration is not a numbered connector-pin diagram, and no universal vehicle wire colour is specified.
8. Reassemble both sides
Reconnect the factory fender connector and its lock. Refit the liner in the reverse order. Repeat the complete fitting and wiring procedure on the other side, then check both markers and the original lighting functions before driving.
Watch the manufacturer video
Manufacturer video linked from the exact product or installation page. Follow the written equipment branch for your vehicle.
Instructions and matching products
Open the original Morimoto PDF (7 pages)
Original technical photographs and diagrams: Morimoto. BTS explanatory text prepared from the linked instructions and current product information, checked October 24, 2026. No revision number is printed on the retained manual unless shown in the original file.