

BTS installation guide · Jeep lighting
Jeep JL Morimoto XB Tail Light Installation
Fit the LF746/LF747 lamps, transfer factory blind-spot modules when fitted, and follow the separate optional BoostBar branch.
This guide covers the red- and smoked-lens Morimoto XB low-profile lamps for the Wrangler JL. Both lens finishes use red rear signalling and white reverse light. Confirm the JL lamp and connector configuration before disassembly; Morimoto describes its testing as US-spec.
Work with the vehicle parked and lighting switched off. Protect painted panels and place removed lamps on a clean, soft surface. Have a plastic trim tool, a #2 Phillips screwdriver and a ratchet with a 10 mm socket or T40 bit ready.
Choose your equipment branch
Lay out the parts
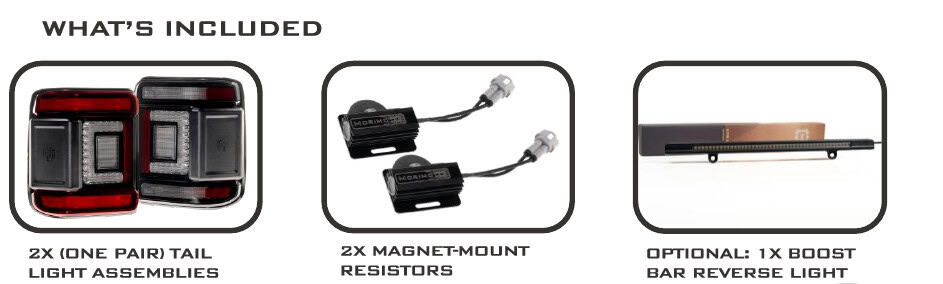
The lamp set includes two tail lights and two magnet-mount resistors. The BoostBar shown in the manufacturer illustration is optional and sold separately.
Check for blind-spot hardware
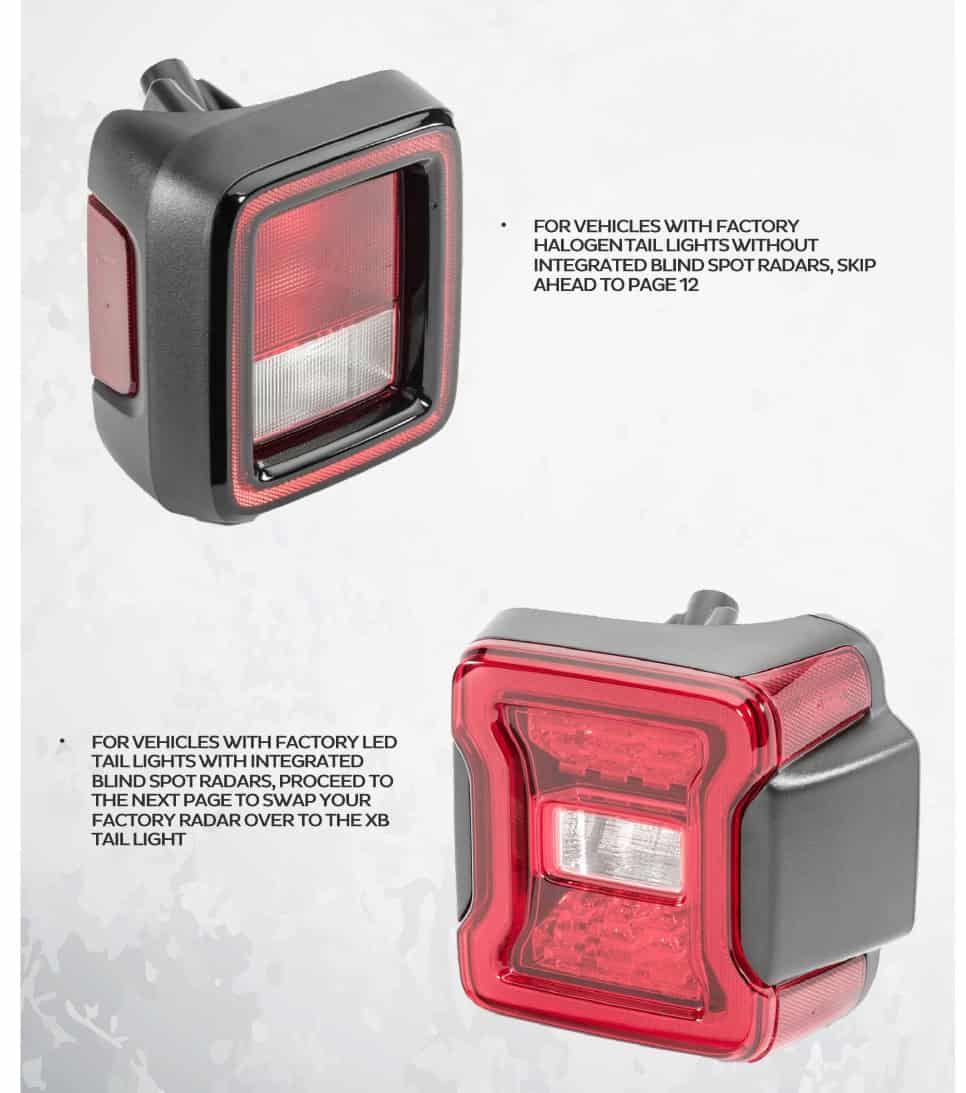
A factory halogen vehicle without blind-spot radar skips the radar-transfer section. If the original LED lamp contains a blind-spot module, transfer that original module to its corresponding new housing. The new lamp does not add a radar system to a vehicle that lacks one.
Remove the factory lamps
1. Open the inner access covers
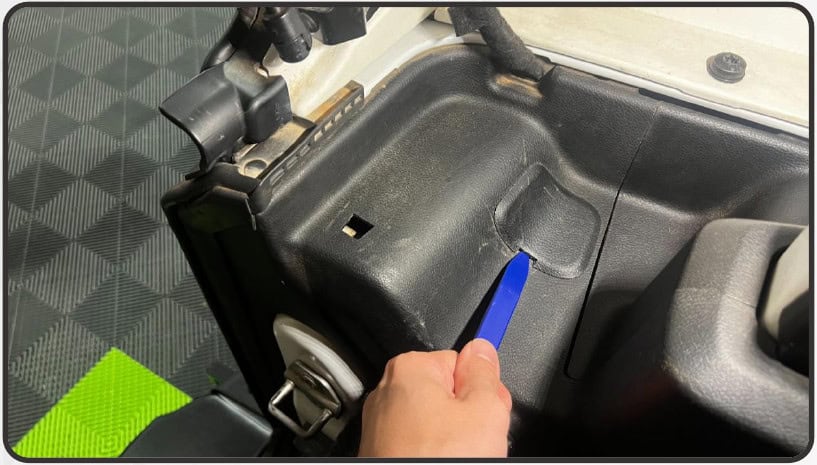
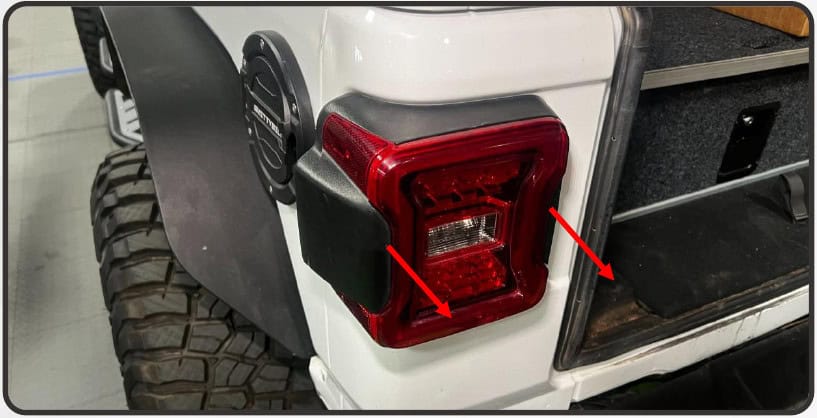
Use the plastic trim tool to lift the small interior cover behind each lamp.
2. Release the plastic mounting bolt
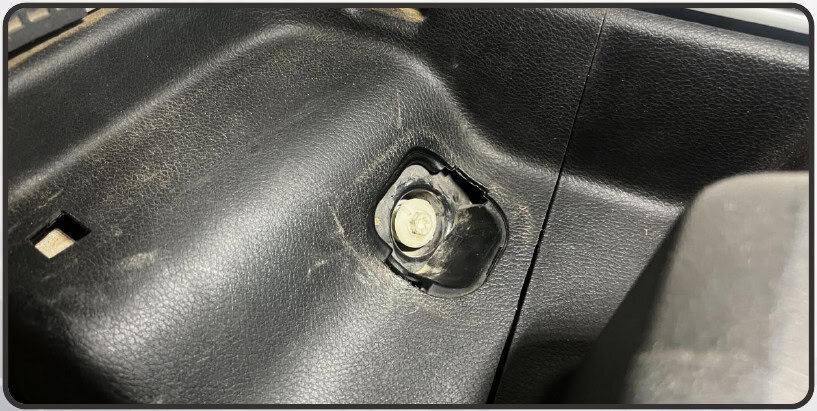
Undo the plastic retaining bolt with the 10 mm socket or T40 bit. Use hand tools; do not use a power tool on this fastener.
3. Pull the lamp rearward and unplug it
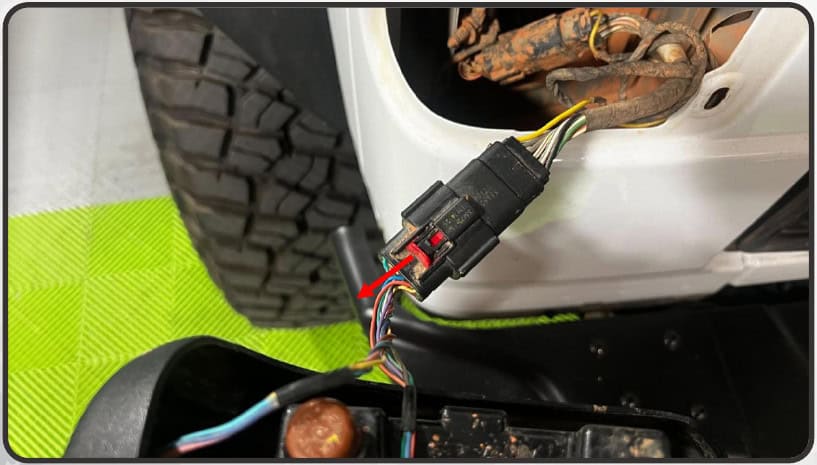
Support the lamp and pull it straight back from the body. Slide the connector’s red lock back, press the black release and separate the connector. Repeat on the opposite side.
Transfer blind-spot modules
For vehicles with factory radar modules only. Keep each module with its original side and preserve its outward-facing position in the new housing.
4. Remove the original brackets
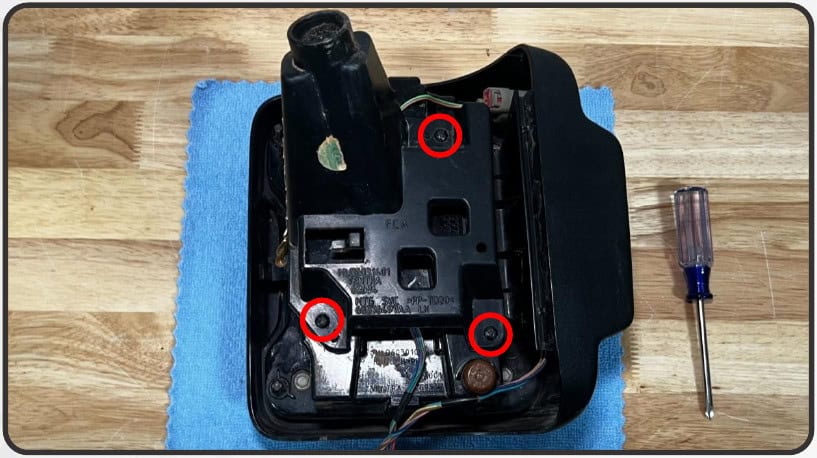
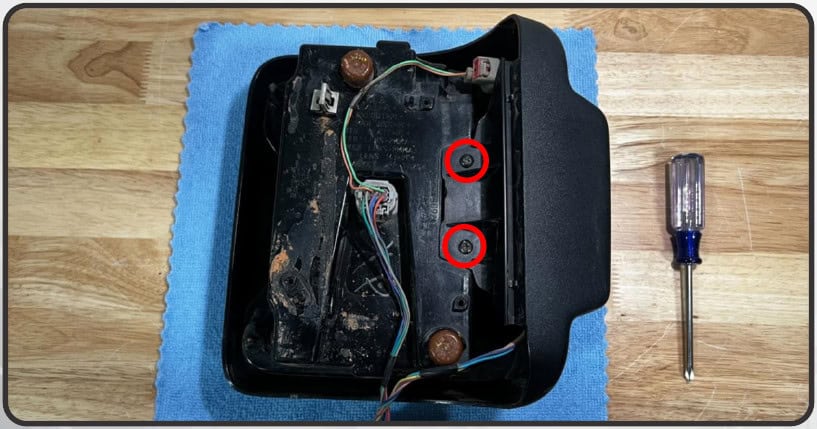
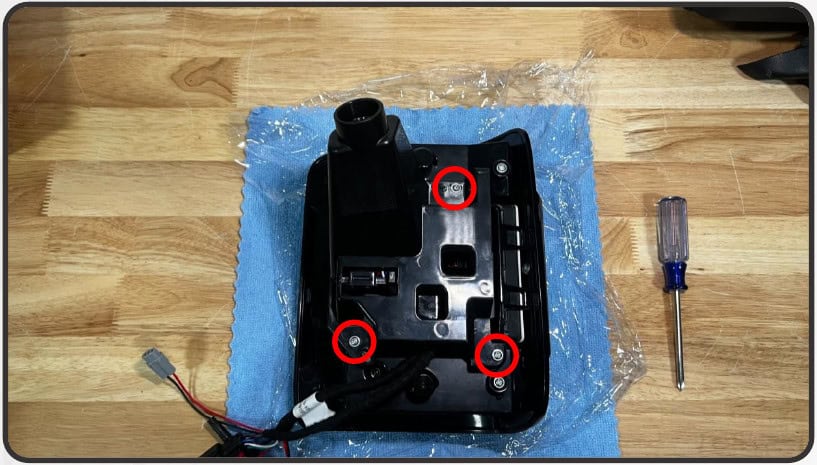
Place the old lamp lens-down on a soft towel. Remove the three Phillips screws from the outer mounting bracket, release its clip and lift it away. Remove the two Phillips screws from the radar cover.
5. Release the radar from its carrier
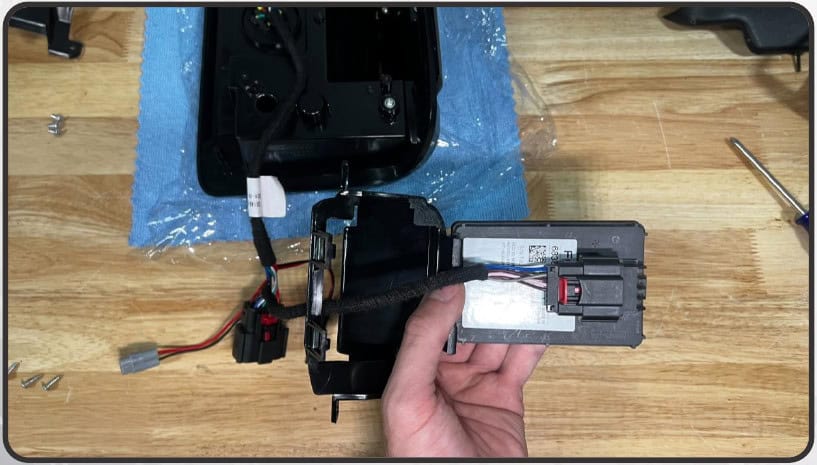
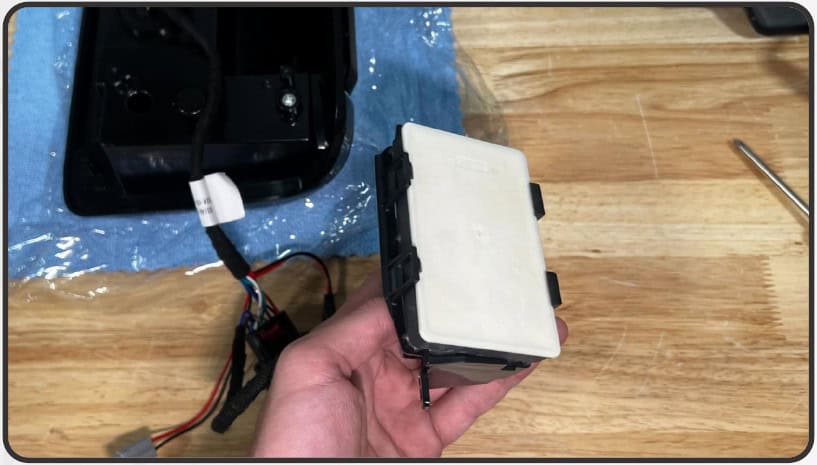
Lift the radar and bracket out of the lamp. Gently release the four plastic retaining tabs around the module, then unlock and unplug its connector.
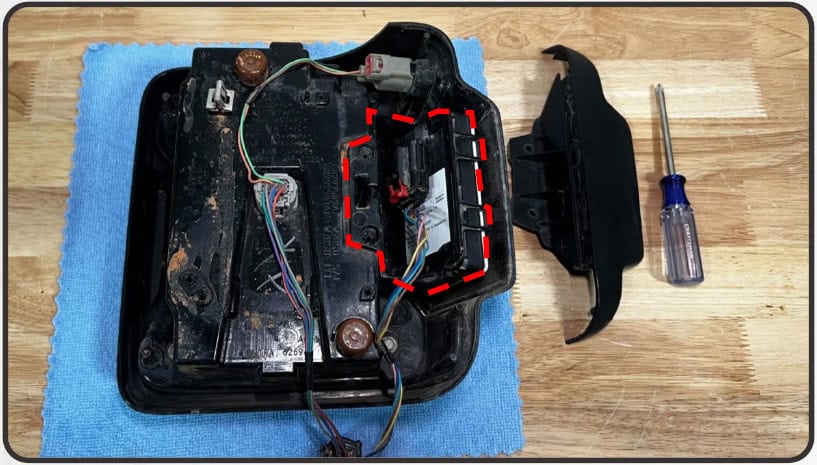
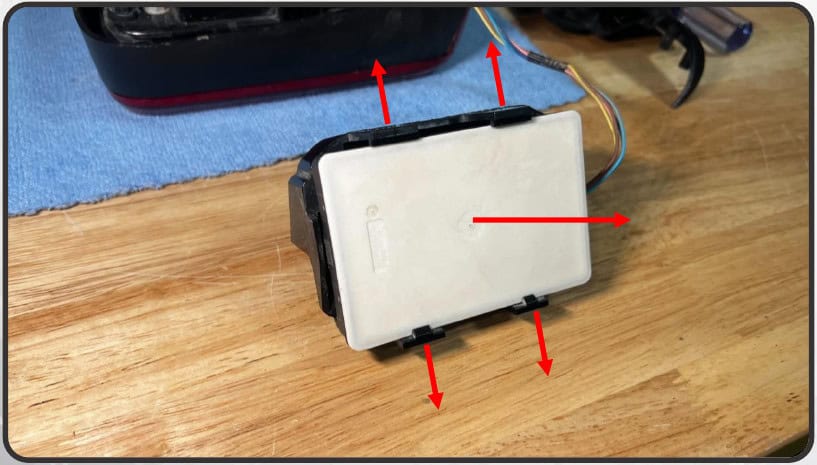
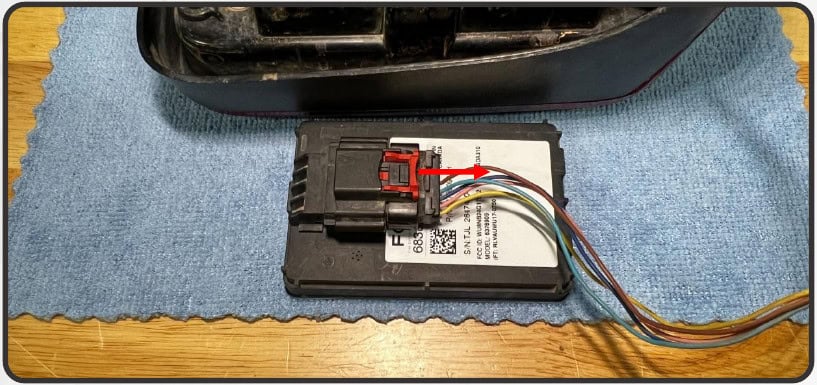
6. Open the new lamp’s radar mount
With the new lamp protected lens-down, remove its three mounting-bracket screws and release the clip. Remove the three screws retaining its radar bracket.
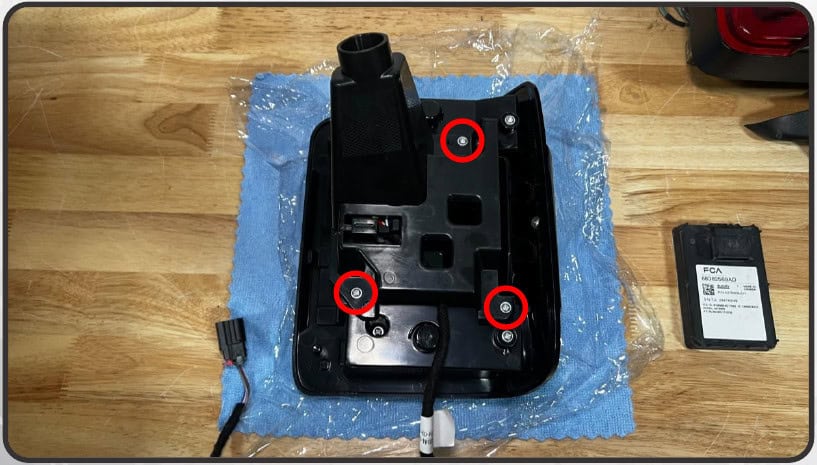
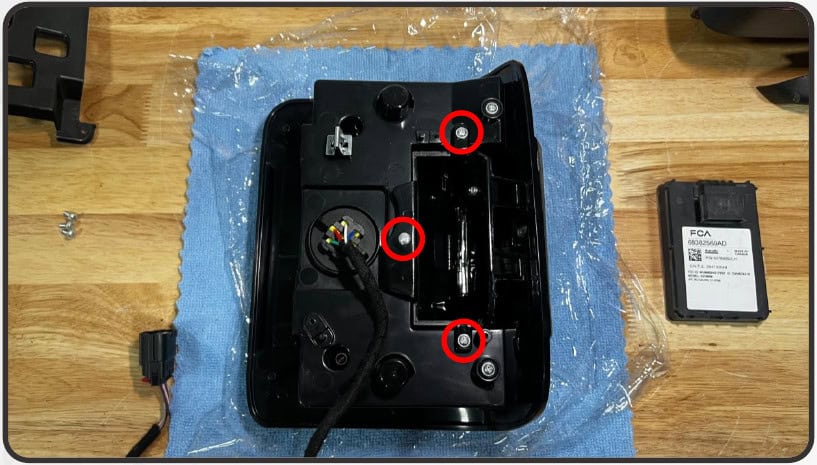
7. Connect and secure the module
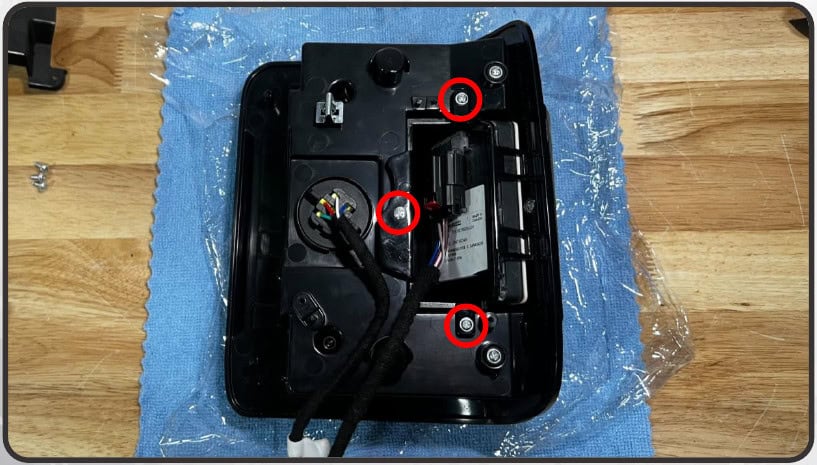
Feed the lamp wiring through the carrier, reconnect the radar and engage the red lock. Clip the module into all four retaining tabs. Install the radar carrier with its three screws, then refit the outer mounting bracket with its three screws. Repeat the transfer for the other lamp.
Optional BoostBar installation
Skip this section if you are installing the tail lamps alone. The separate BoostBar may require drilling on the factory bumper.
8. Make room above the license plate
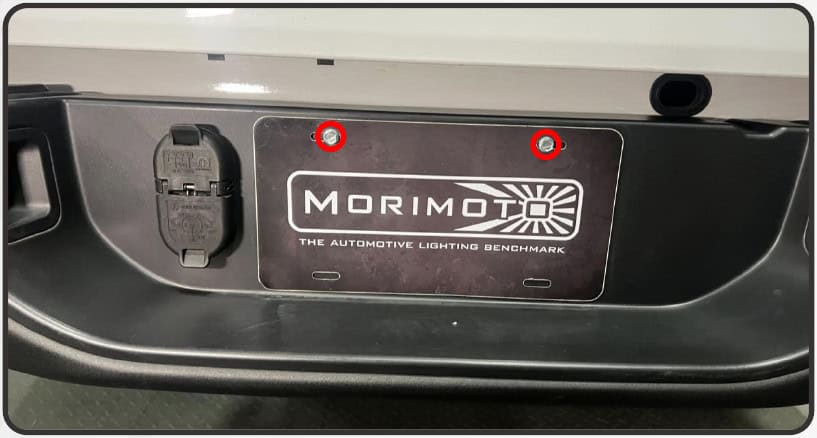
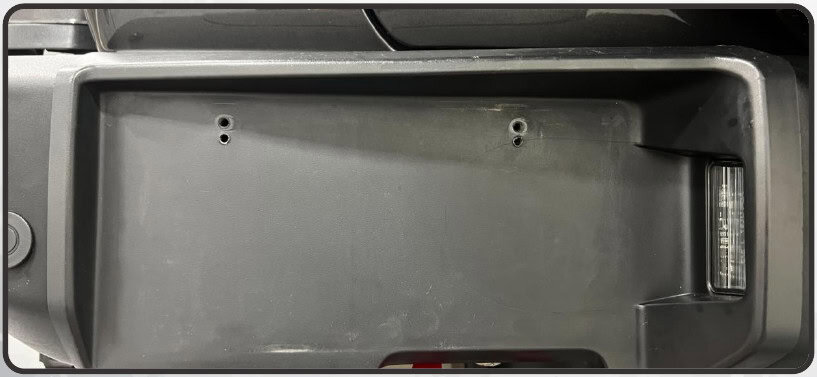
Remove the two plate screws. If the original holes leave too little space above the plate, remove the plate trim panel and relocate the mounting holes as illustrated: drill 3/16-inch holes 3/8 inch below the original holes. Check behind the bumper before drilling.
9. Route the bar’s cable
Test-fit the bar and mark its wire pass-through. Check clearance behind the panel, then drill the 5/16-inch pass-through. Feed the cable through and secure the plate and bar.
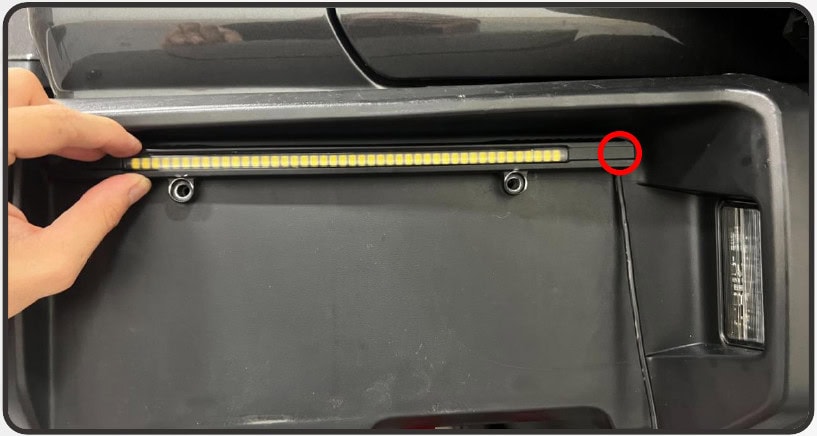
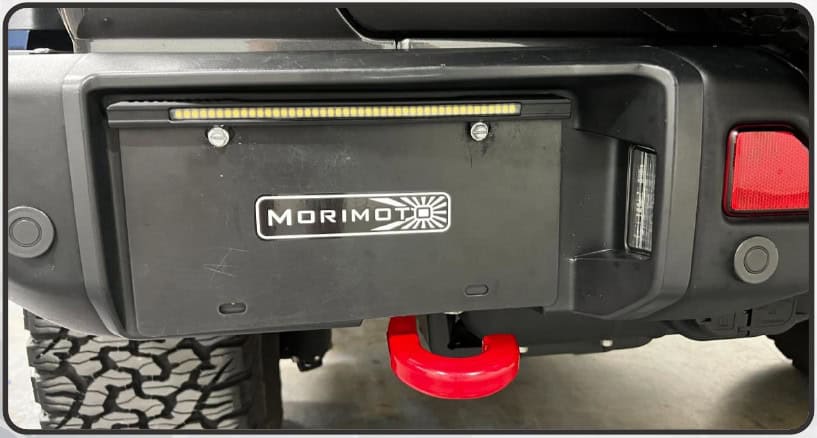
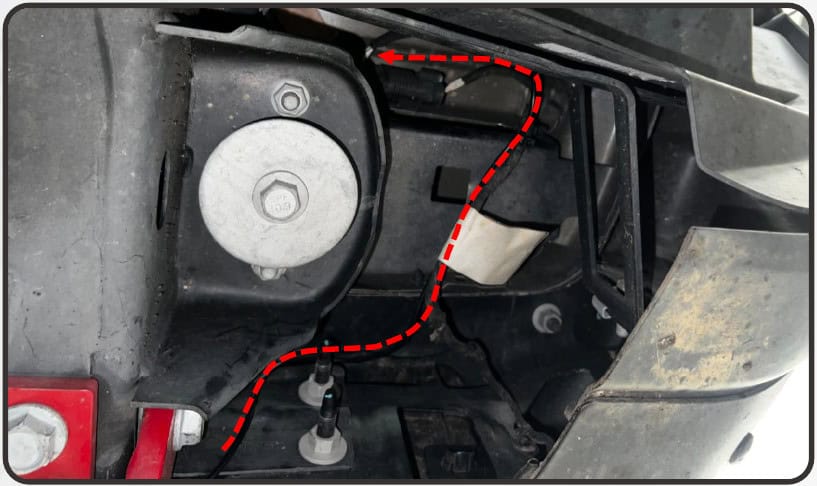
10. Bring the lead to the tail-lamp cavity
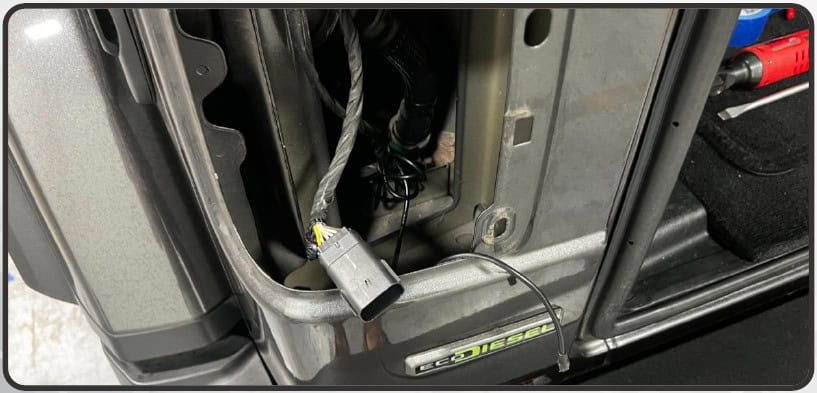
Run the cable behind the bumper alongside the original tail-light harness, securing it with cable ties. Bring it up into the tail-light opening and secure the excess clear of moving or hot parts.
Connect, refit and check
11. Connect the correct harness branch
On factory-halogen vehicles, attach the included magnet-mount resistor to a metal surface inside the cavity. Plug the vehicle connector into the new lamp and close its red lock. Connect the resistor on the halogen branch and the BoostBar lead only if that accessory is installed.
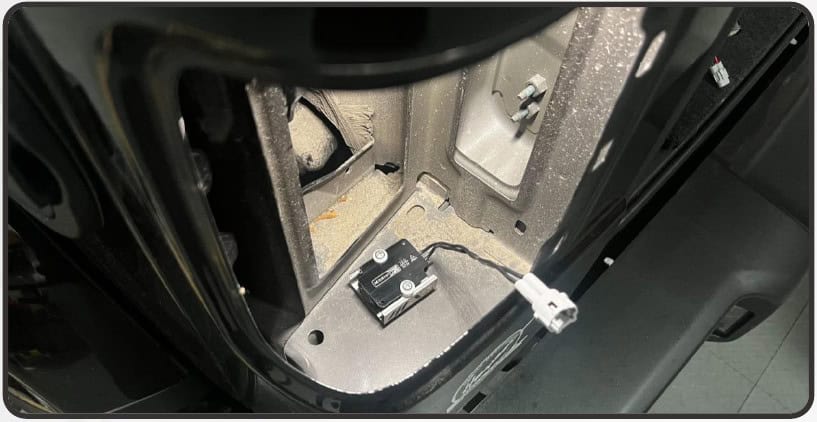
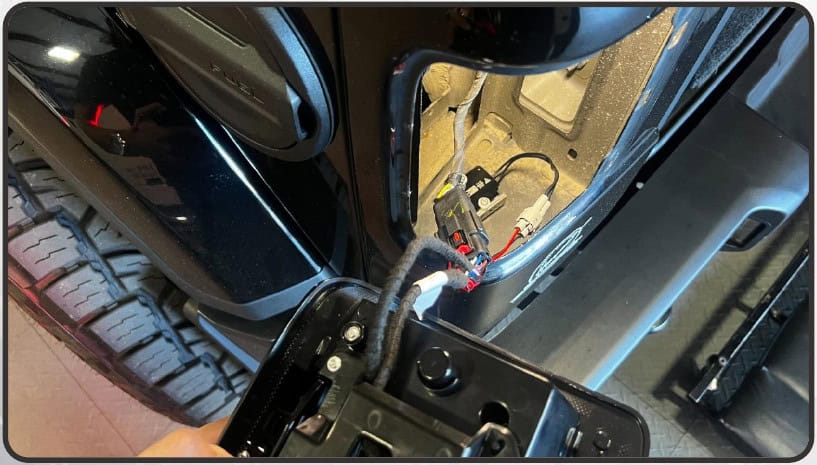
12. Refit both lamps and test
Guide each lamp into its pocket without trapping wiring. Reinstall the plastic retaining bolt snugly by hand and replace the inner cover. Repeat on the other side, then check parking lights, brakes, both turn signals, reverse and any transferred blind-spot equipment before driving.
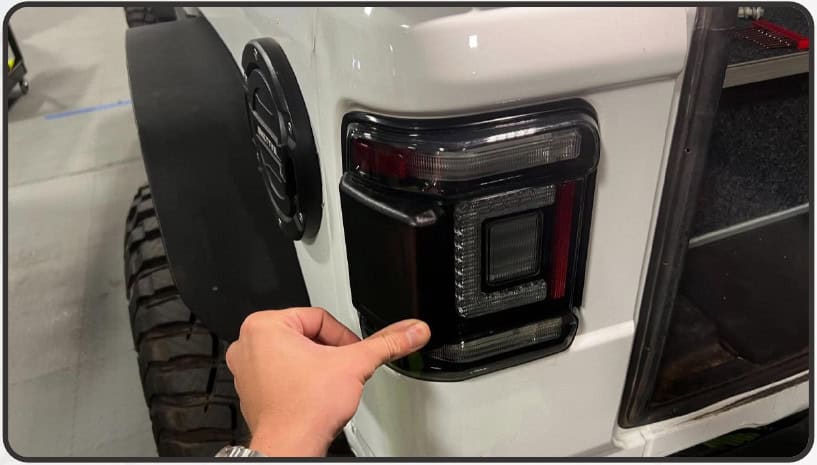
Watch the manufacturer video
Manufacturer video linked from the exact product or installation page. Follow the written equipment branch for your vehicle.
Instructions and matching products
Open the original Morimoto PDF (17 pages)
Original technical photographs and diagrams: Morimoto. BTS explanatory text prepared from the linked instructions and current product information, checked October 24, 2026. No revision number is printed on the retained manual unless shown in the original file.