

BTS ILLUSTRATED GUIDE · MORIMOTO LF271
Morimoto Sealed7 2.0 LF271 Wiring Guide
Identify the main headlight connection and the separate daytime-running and amber-light inputs on the Sealed7 2.0 lamp.
This is the wiring guide for the LF271 individual lamp. It is not a vehicle-specific grille-removal procedure or confirmation that a generic 7-inch lamp fits every Wrangler. Check the product’s application, mounting parts and required adapters before starting.
1. Check the lamp and adapters
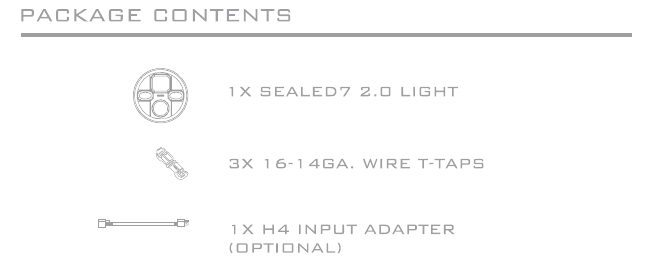
The original instructions show one Sealed7 lamp and three wire taps. The H770 H4 adapter is optional. Confirm the quantity ordered and the vehicle-specific anti-flicker or adapter requirements separately.
2. Connect the main input
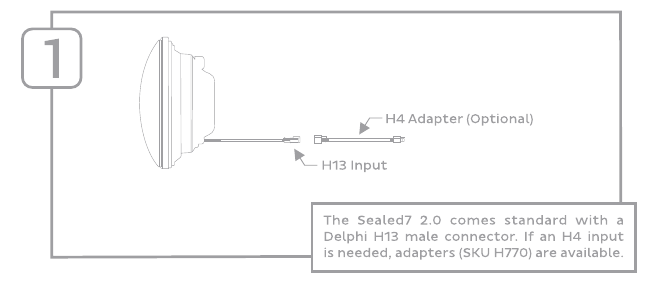
The lamp has an H13 male input. Match it to the correct vehicle connection or the specified optional H4 adapter. Follow the vehicle’s service procedure for removing, securing and aiming the headlight; those mechanical steps are not provided in this two-page wiring manual.
3. Identify the three optional leads
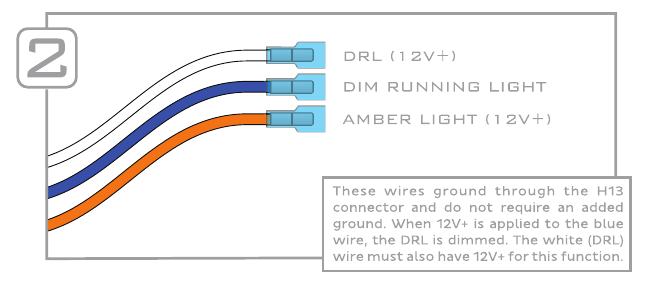
- White: apply the specified 12V input to illuminate the daytime-running light.
- Blue: the 12V dimming input reduces the DRL output only while the White lead also has 12V.
- Orange: the 12V input illuminates the Amber light.
Morimoto states that these functions ground through the main H13 connection. The diagram does not call for a separate ground on each auxiliary lead. Identify the correct vehicle circuits before making connections; the lead colours shown here belong to the lamp, not necessarily to the vehicle harness.
4. Test and finish
Check low beam, high beam and each auxiliary function you chose to connect. Secure and protect the connections and any unused leads, reinstall the vehicle’s retained hardware, then aim the lamps using the applicable vehicle and lamp instructions. If the required adapter or vehicle circuit is unclear, confirm it before powering the installation.
Product and original instructions
View the product and current fitment · Open the complete original manufacturer PDF
The photos and diagrams above come from the manufacturer’s instructions. Keep the original PDF available and follow the instructions supplied with your exact hardware.