

POLARIS RZR XP1000 / XP4 · 2014–2023
RZR XP SS3 headlight installation guide
Install the four-pod Sport or Pro headlight kit, following the original bracket, harness, backlight and fuse steps.
Match the kit before starting
This guide applies to DD7843 Sport and DD7844 Pro headlight kits for 2014–2023 Polaris RZR XP1000 and XP4. Each kit supplies both sides: two outside Driving pods and two inside Combo pods, matched brackets and DD4195 vehicle-specific harnesses. This is not a generic auxiliary-harness installation.
Have a ratchet, 10 mm socket, 13 mm wrench/socket, T40 and T20 Torx tools, 5/32-inch Allen key, zip ties and suitable connector tools ready. Work on a cool, secure vehicle, isolate power according to the vehicle instructions and protect removed panels on padding. Retain the original fasteners.
1–4. Remove the upper panel and front fasteners
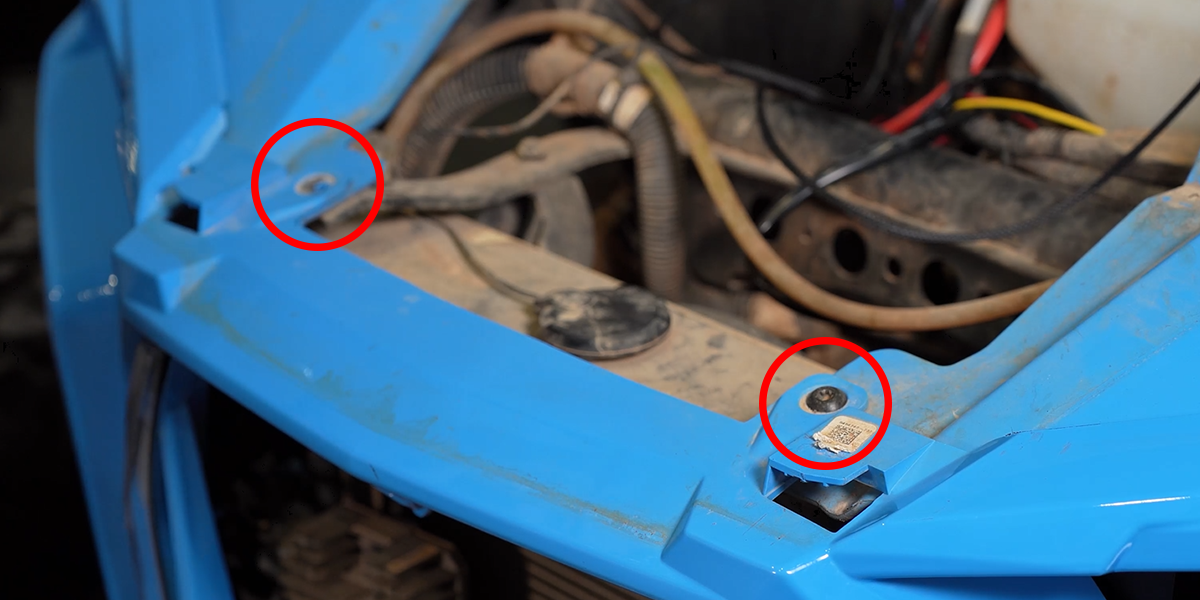
Turn the two upper hood latches and lift the panel forward and off. Remove the two upper T40 bolts, three side fasteners on each side, and two lower front T40 bolts shown in the original figures.
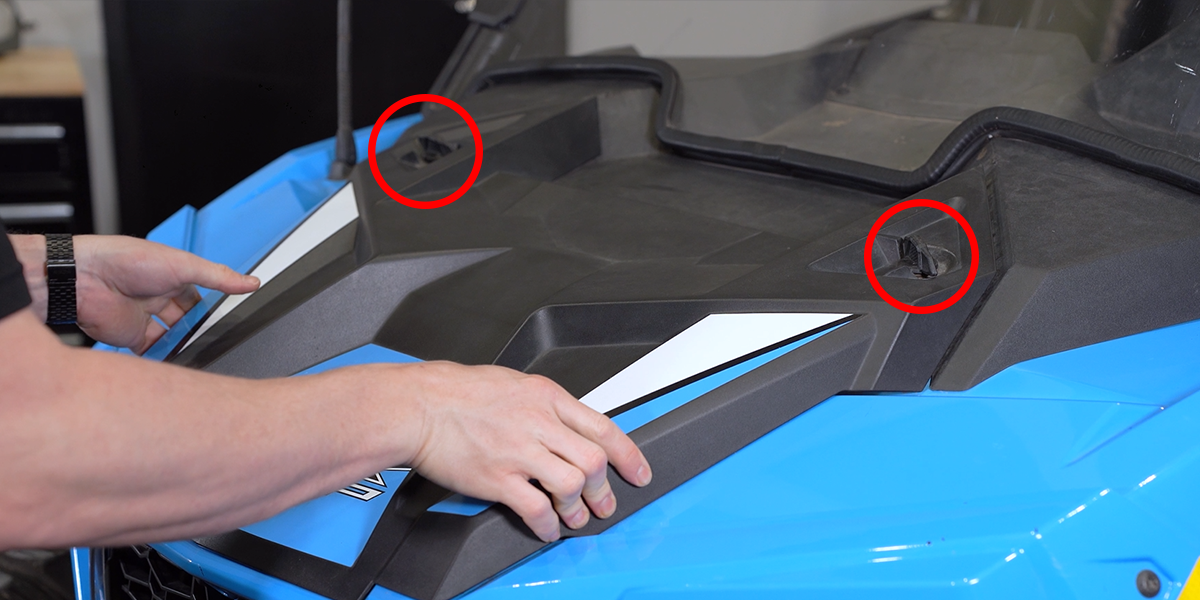
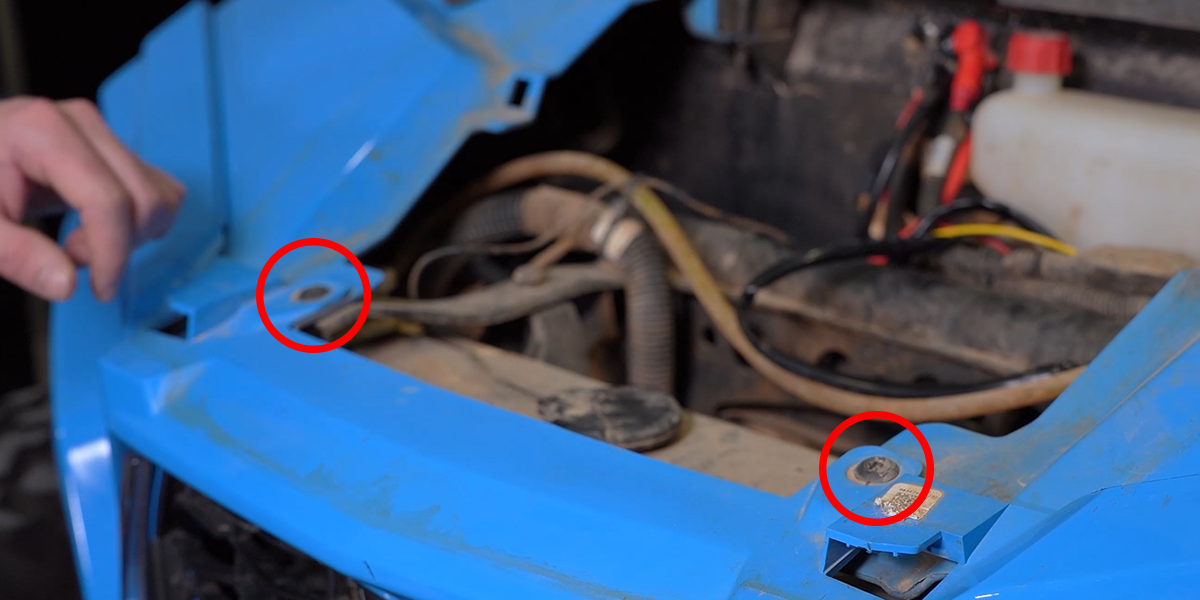
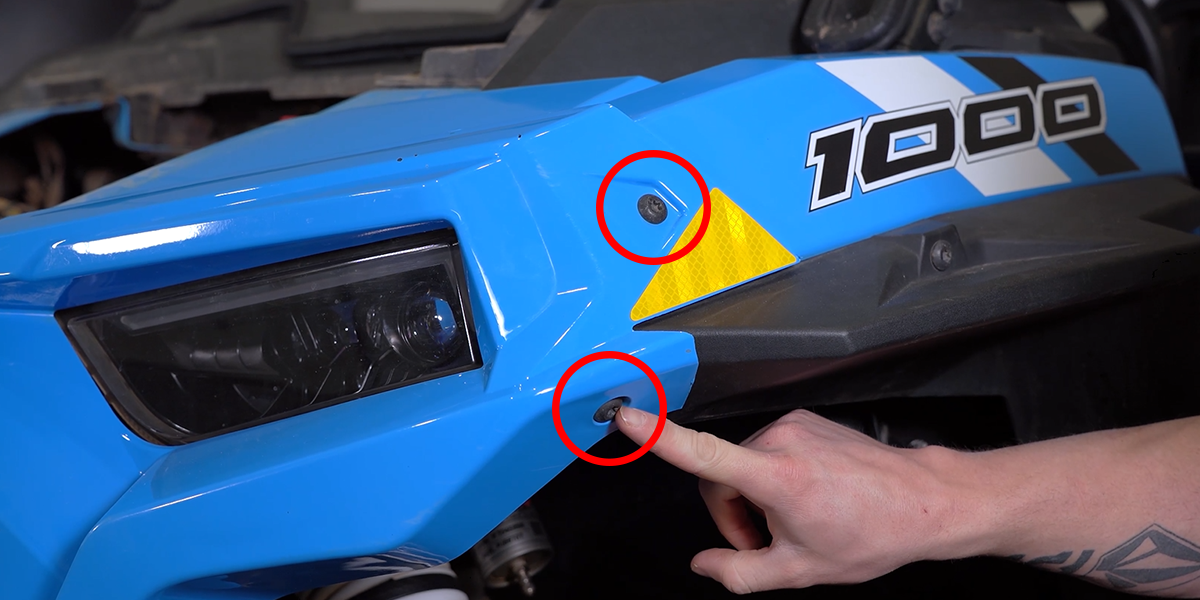
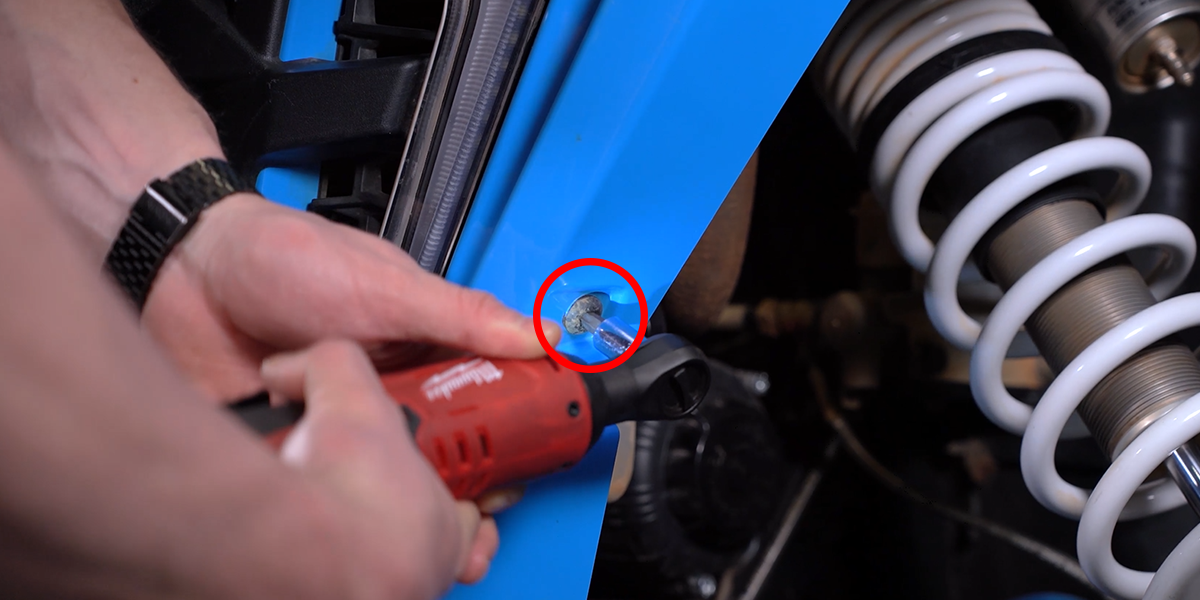
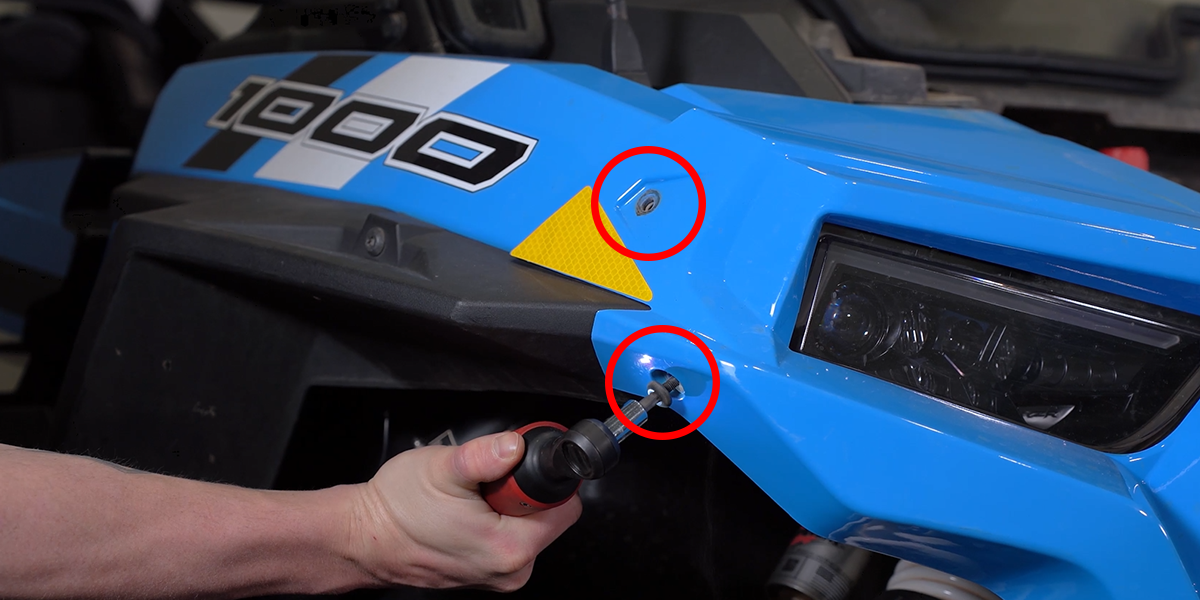
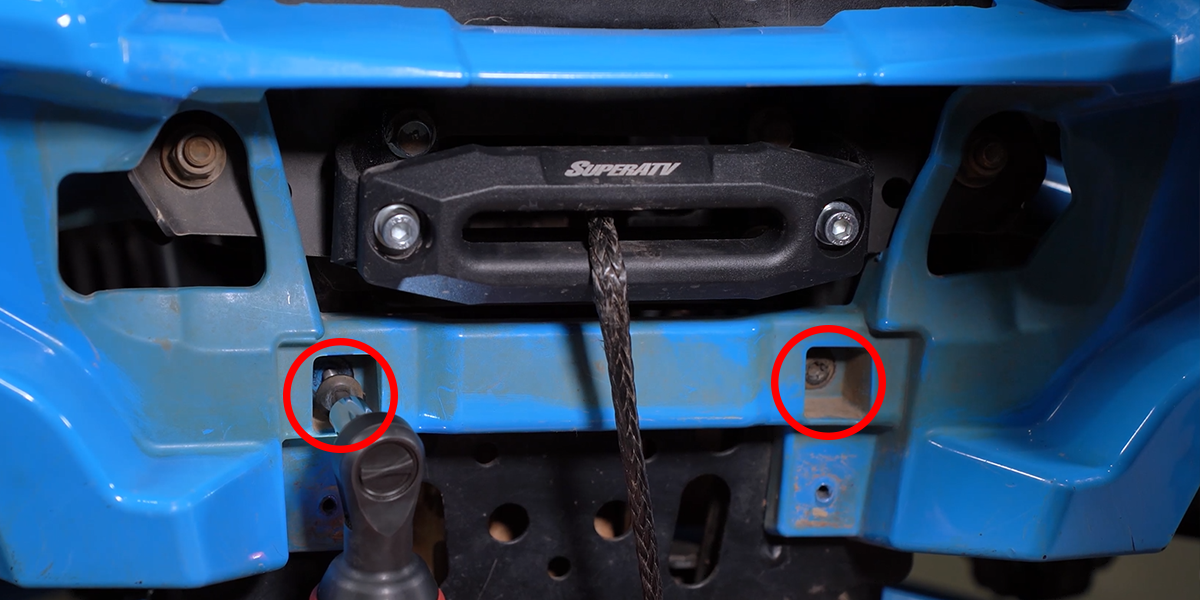
5–8. Disconnect lamps and remove the bumper
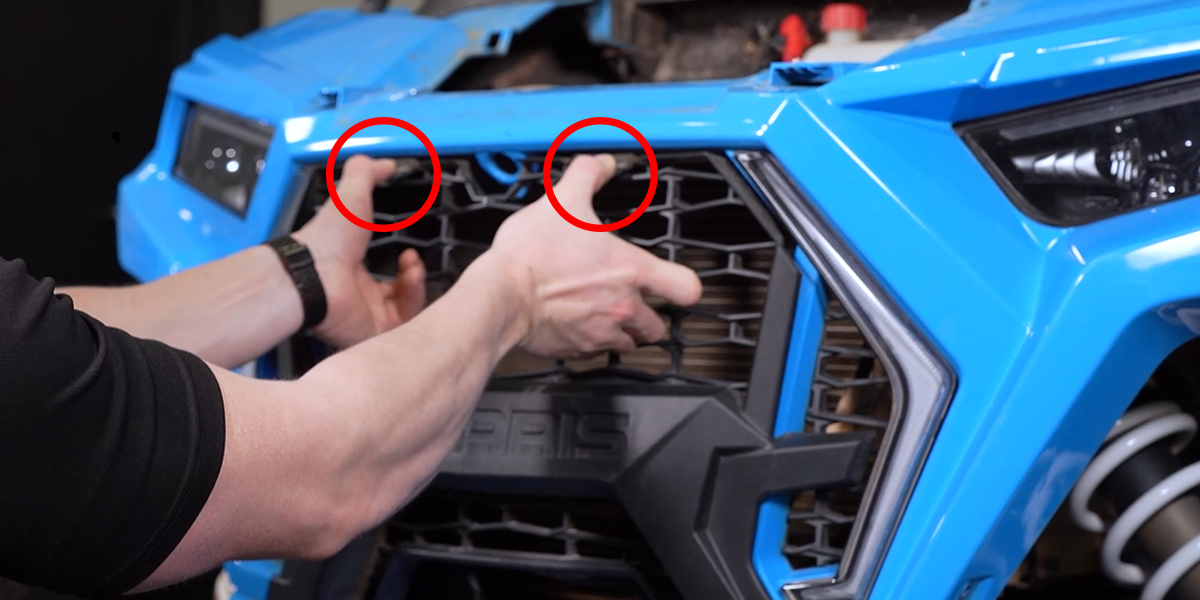
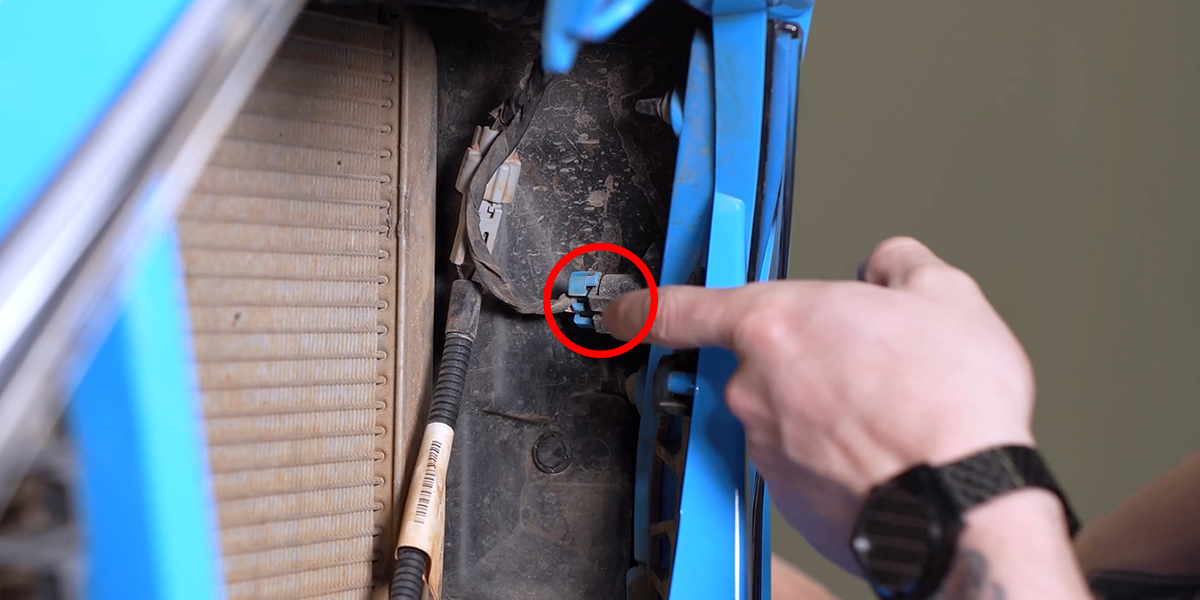
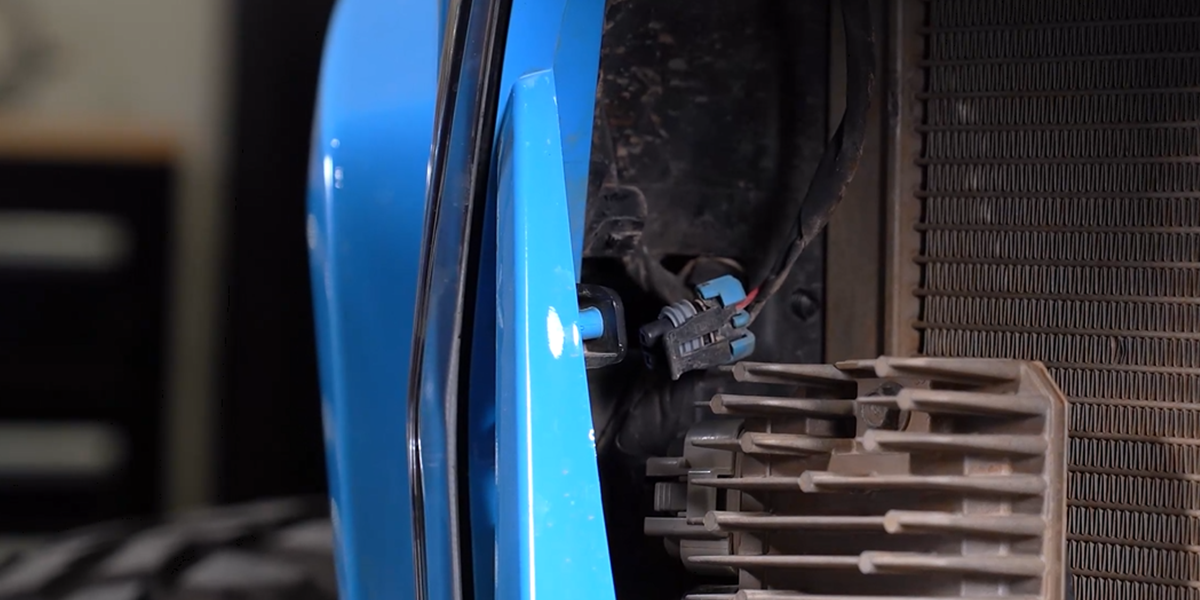
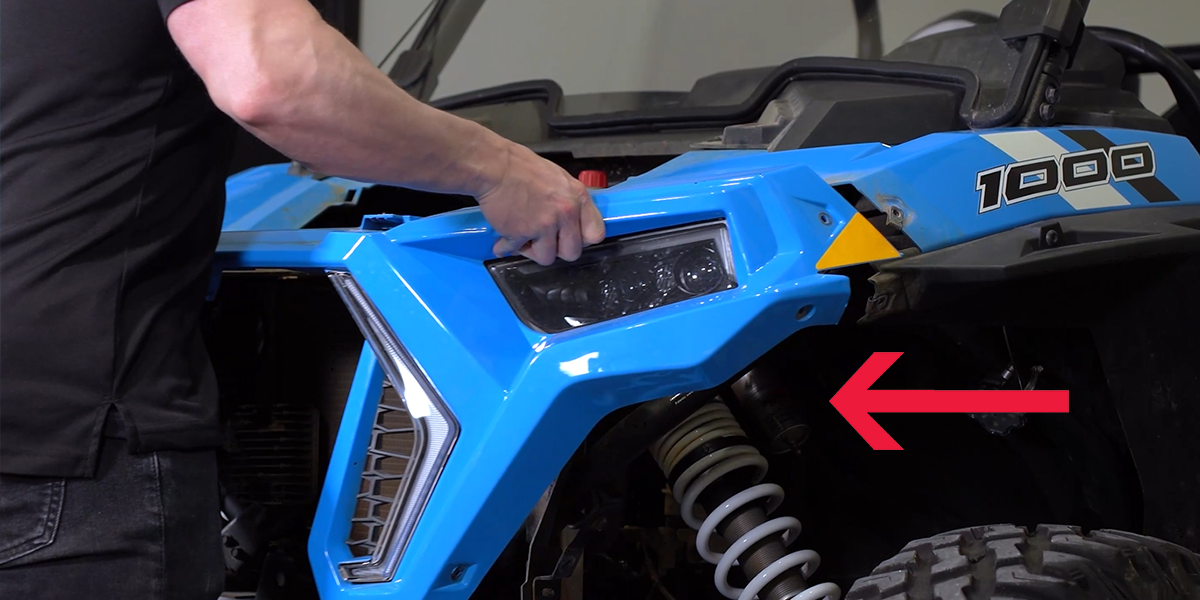
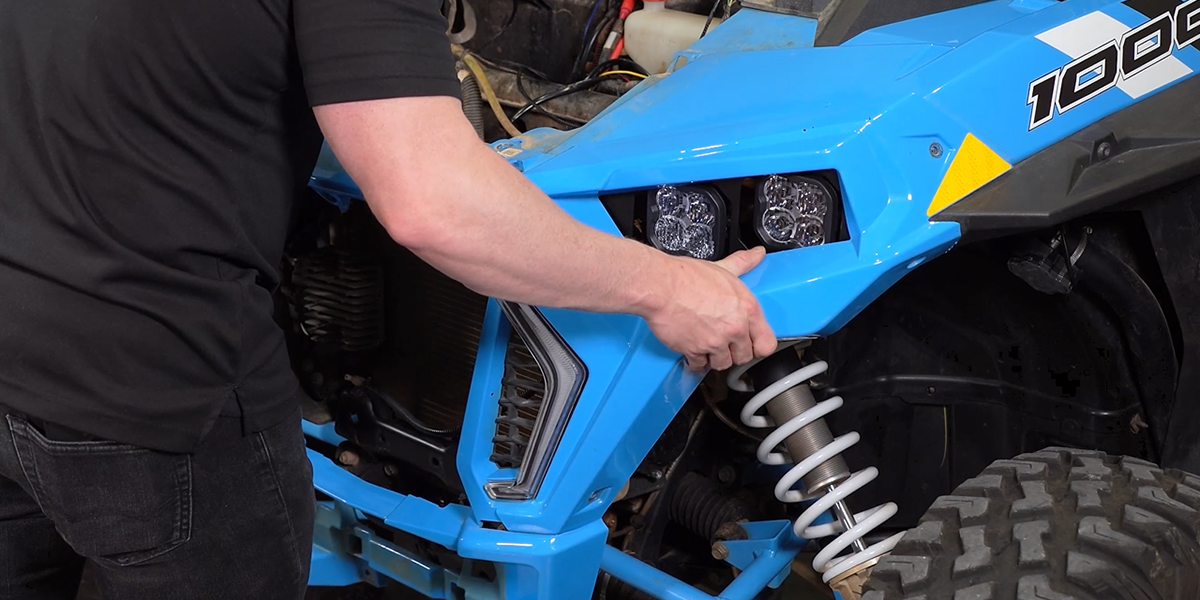
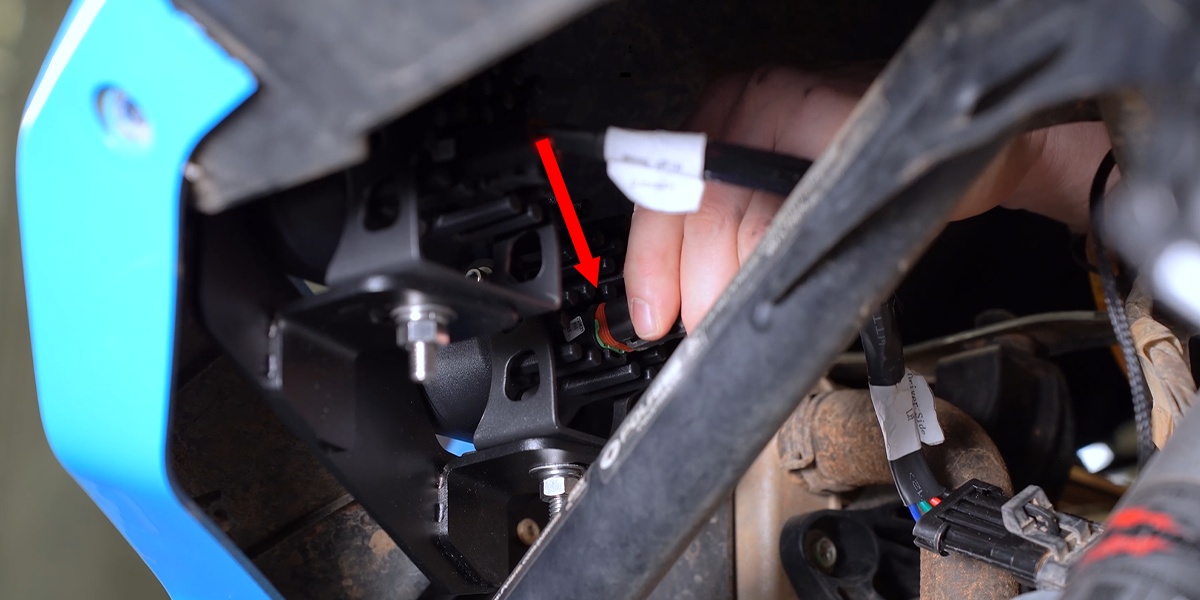
Release both factory headlight connectors. Release the grille tabs and set the grille aside. Disconnect both factory DRL connectors, then lift off the front bumper and support it on a padded stand.
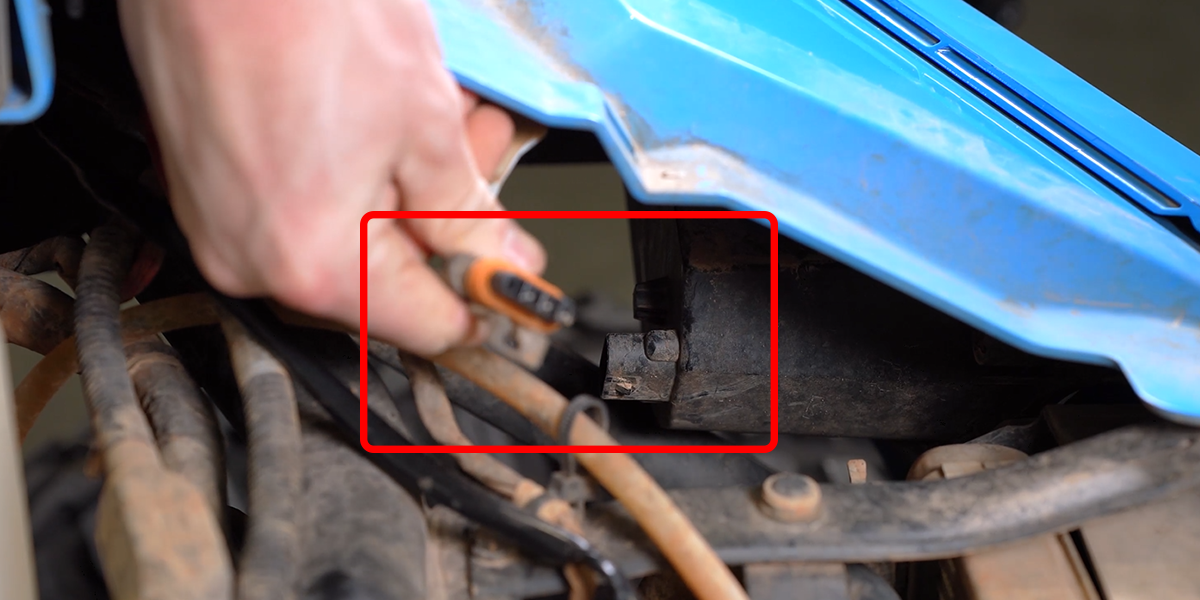
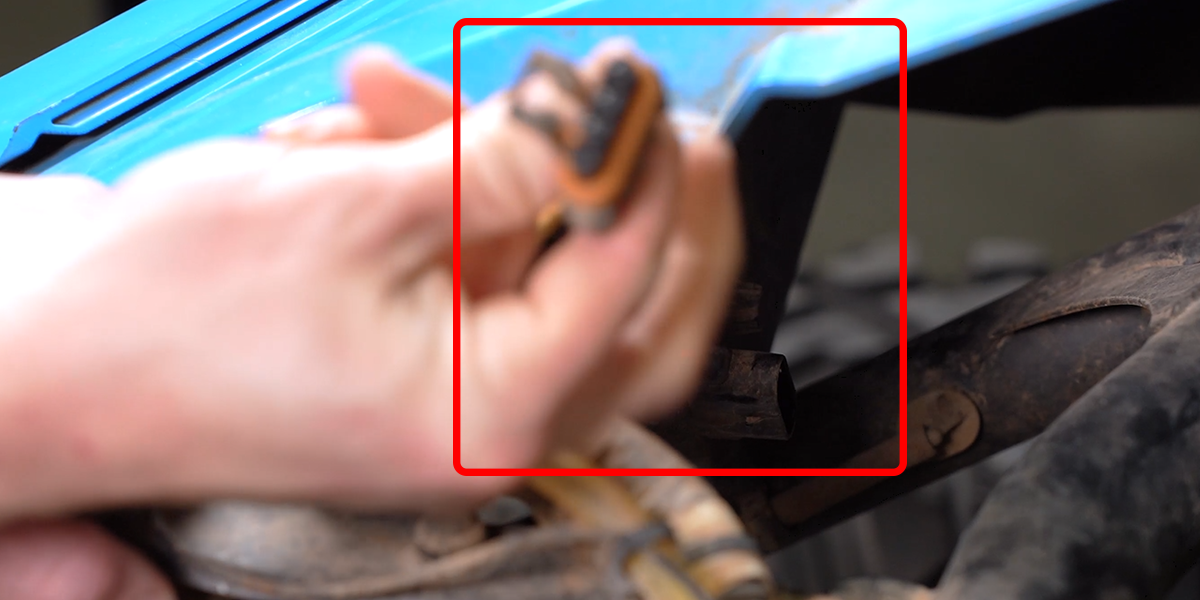
9–11. Replace the headlight housings with brackets
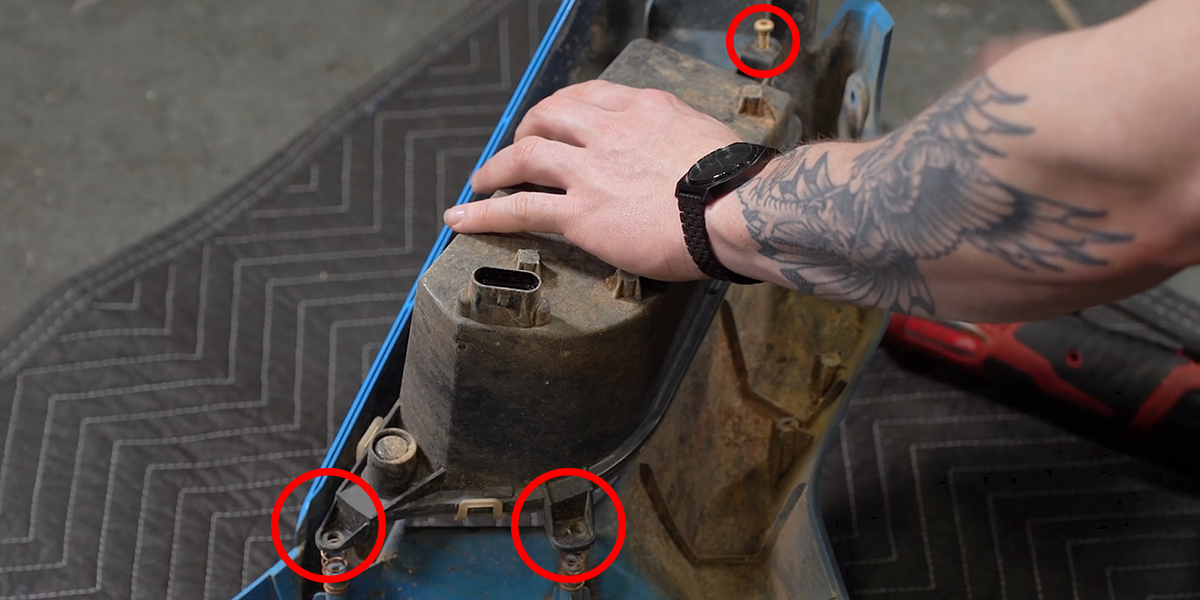
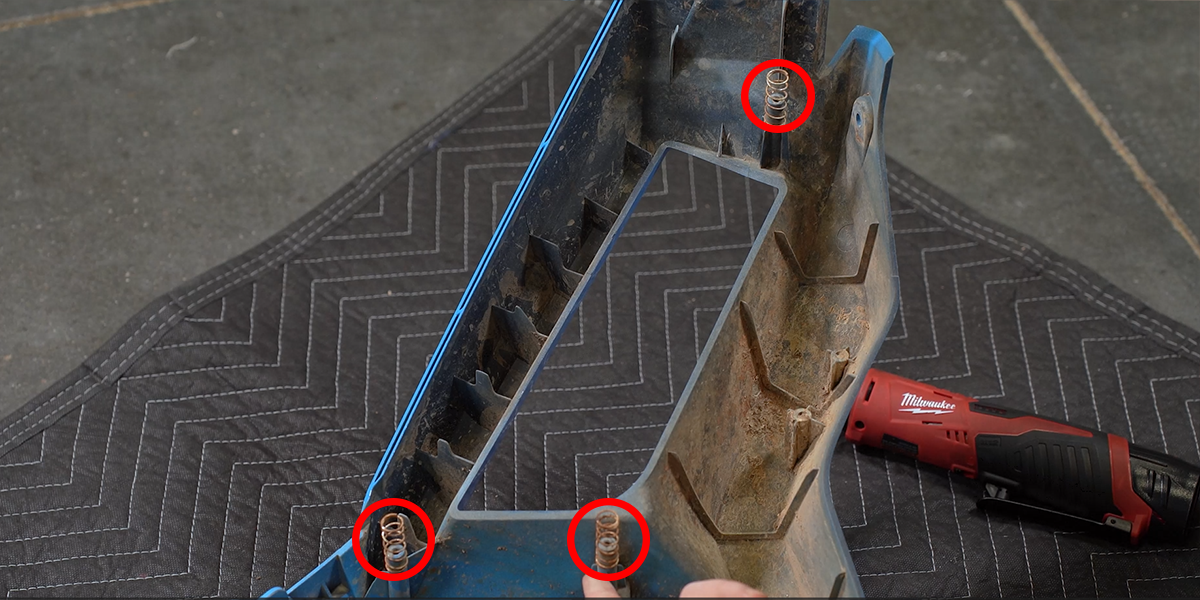
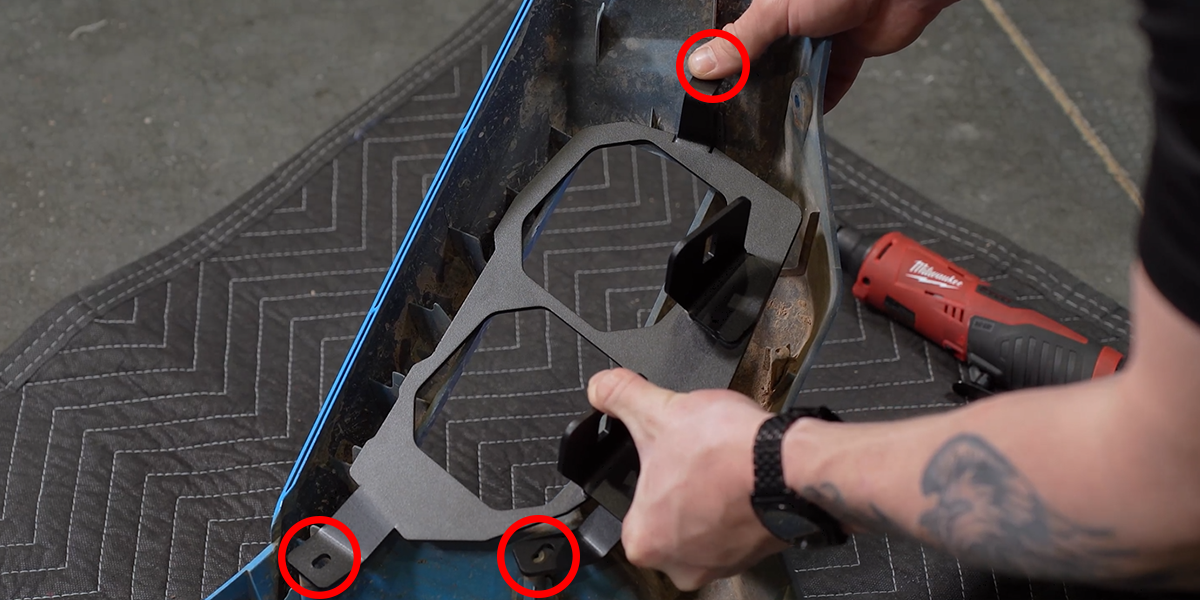
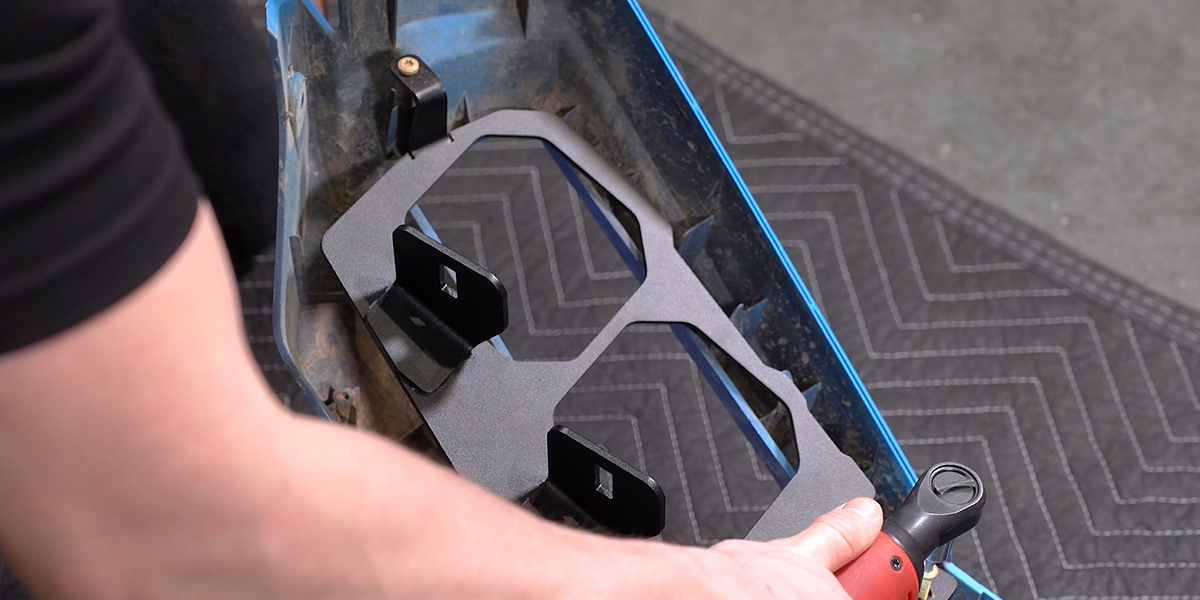
Remove the three T20 fasteners from each headlight housing. Remove the factory springs; they are not reused. Position each supplied bracket and secure it with the three retained T20 fasteners. Repeat for the other side.
12–13. Assemble and position all four pods
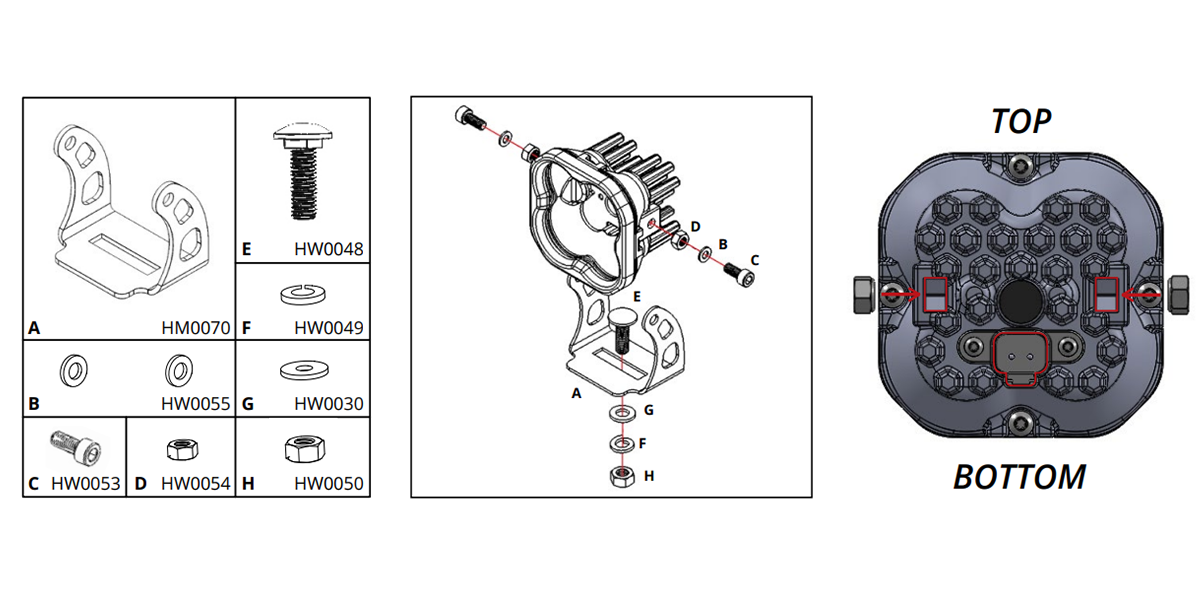
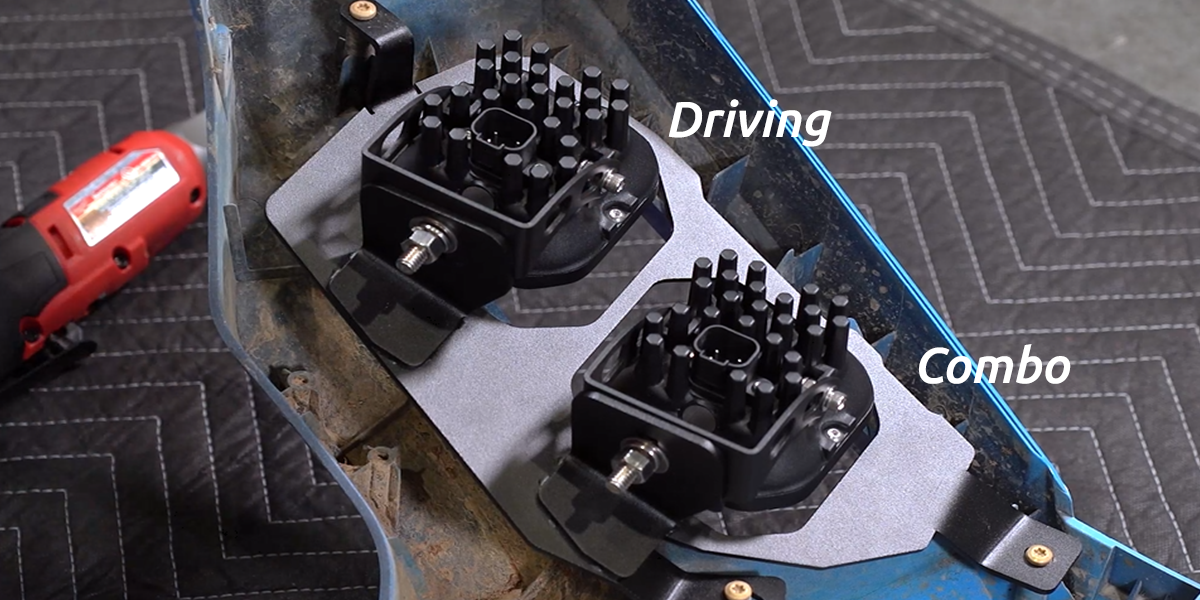
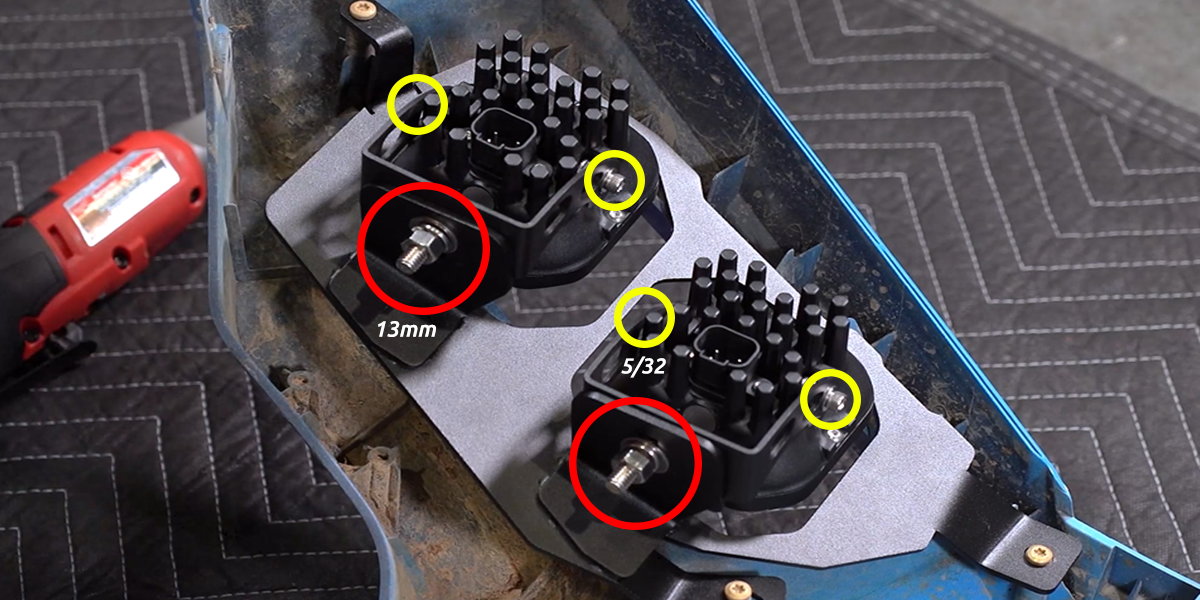
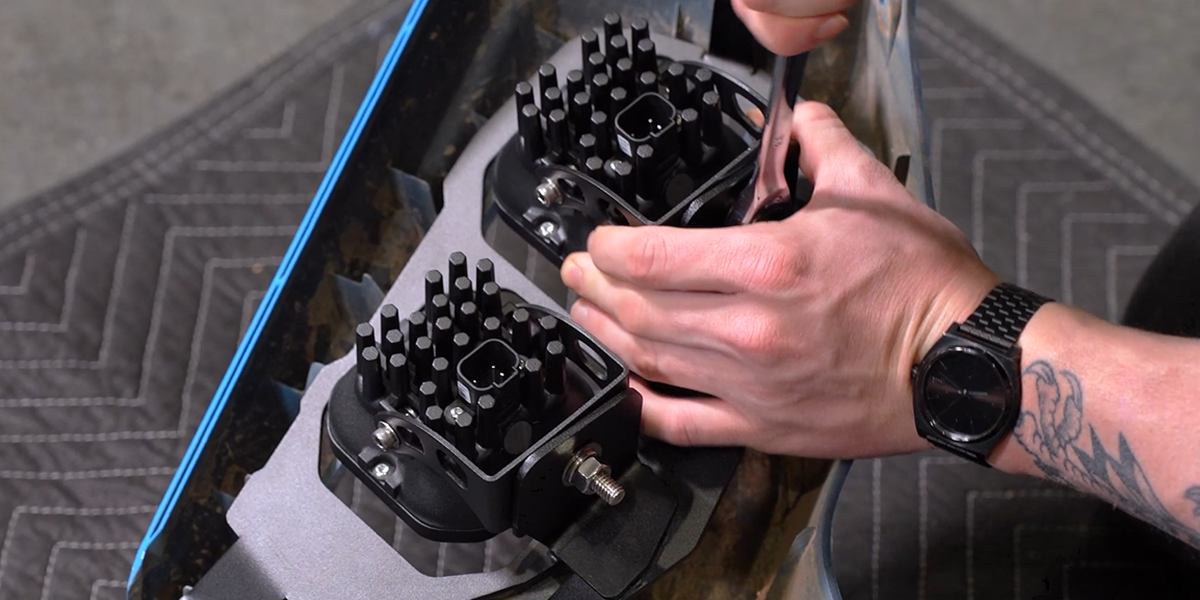
Assemble the SS3 U-brackets with their supplied hardware. Position a Combo pod on the inside and a Driving pod on the outside of each headlight assembly. Pass each carriage bolt through the pod and headlight brackets, then fit the washer, lock washer and nut. Use a 13 mm tool to secure the mounts and the 5/32-inch Allen key for the side adjustment screws. Leave appropriate adjustment for final aiming.
14–15. Route the backlight wiring
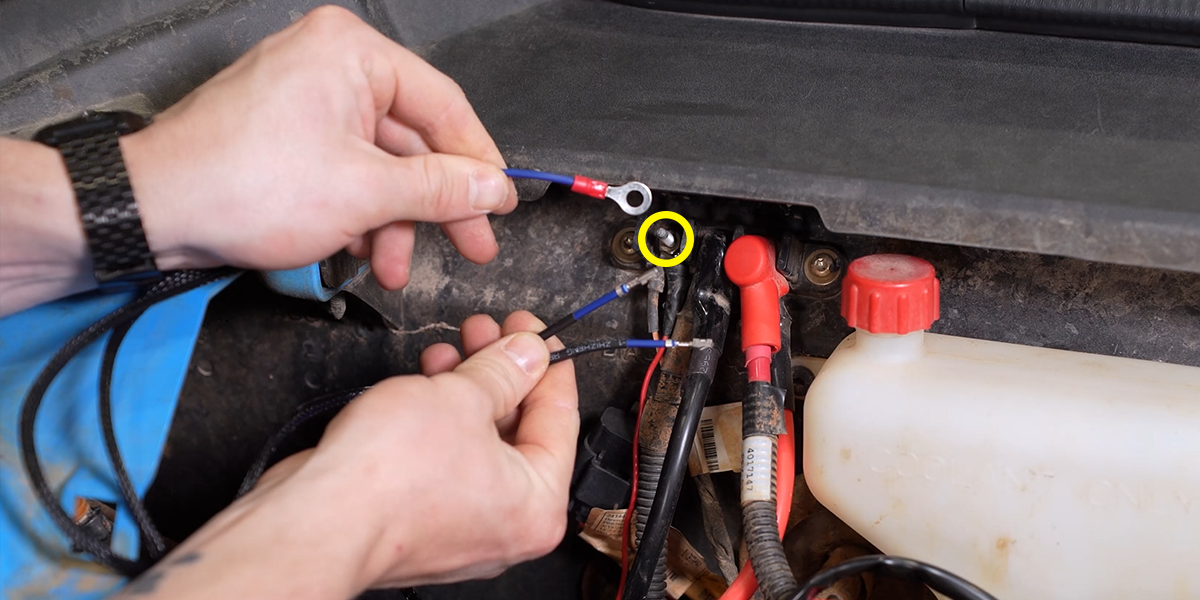
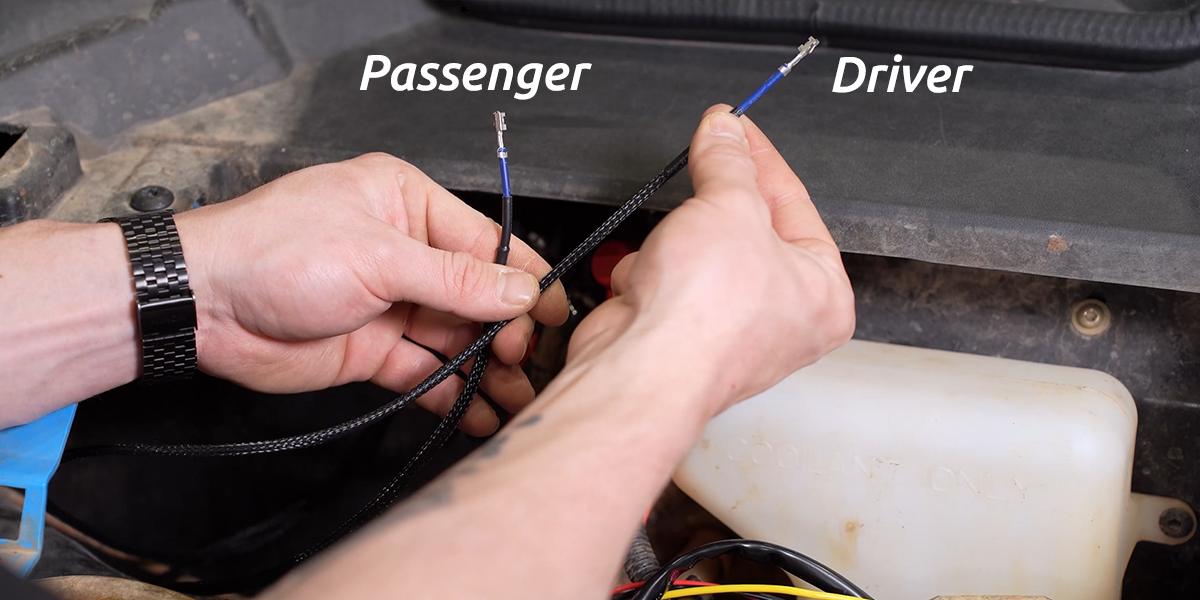
Connect the kit backlight ring terminal to the factory bus-bar connection shown in the original figure using a 10 mm socket. Route the longer lead to the driver-side headlight and the shorter lead to the passenger-side headlight. Follow the harness labels and exact illustrated connection; do not substitute a generic auxiliary harness.
16. Add the backlight terminal to the factory connector
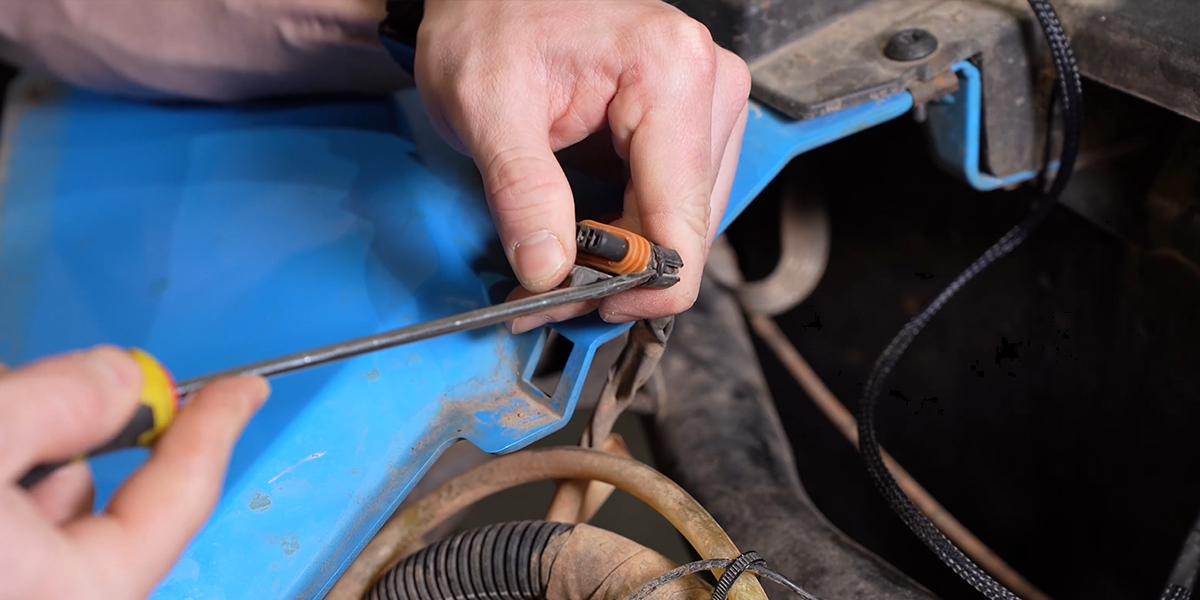
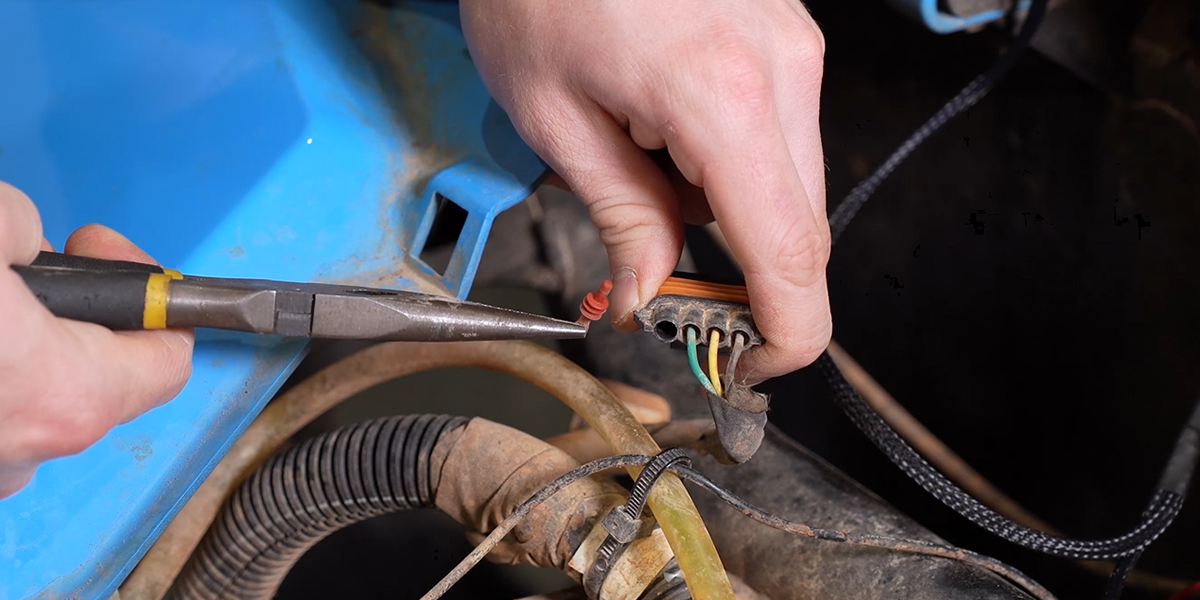
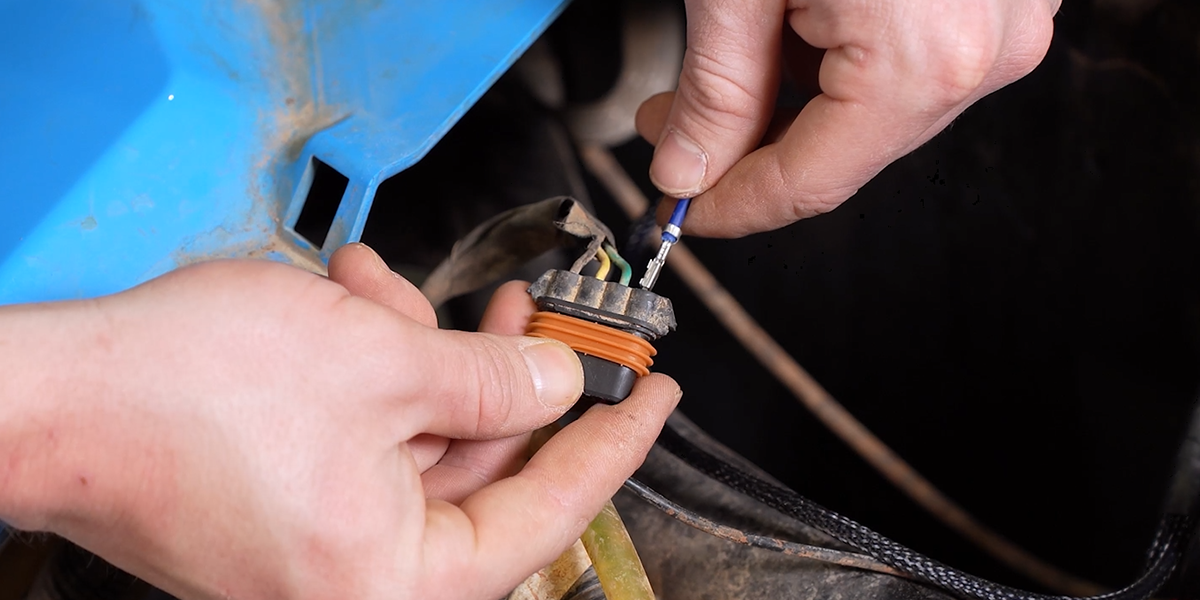
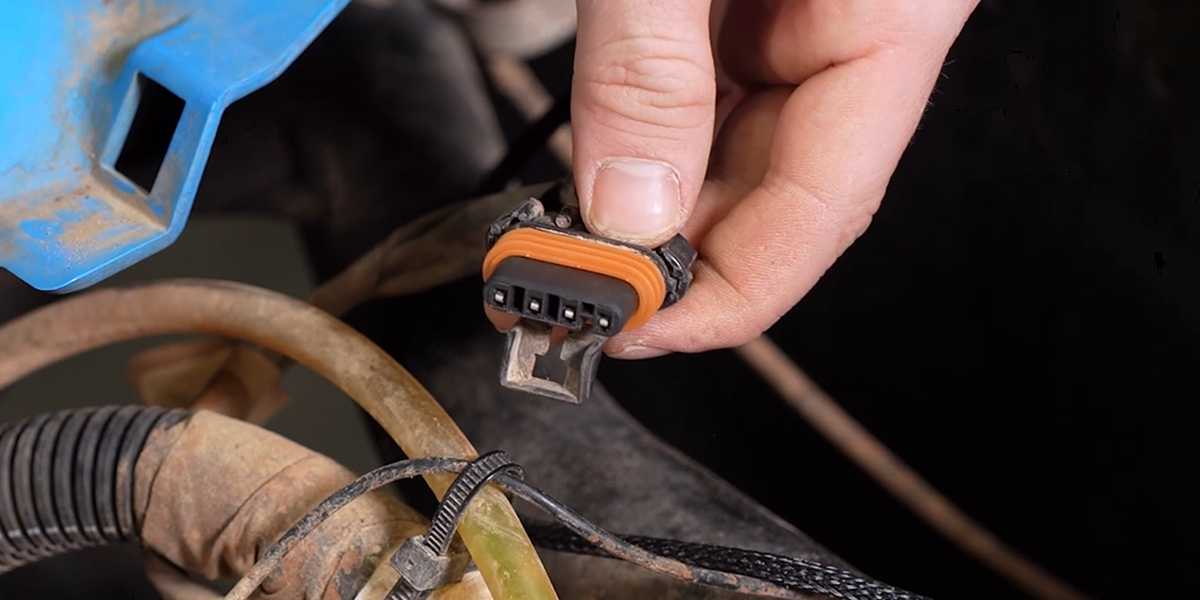
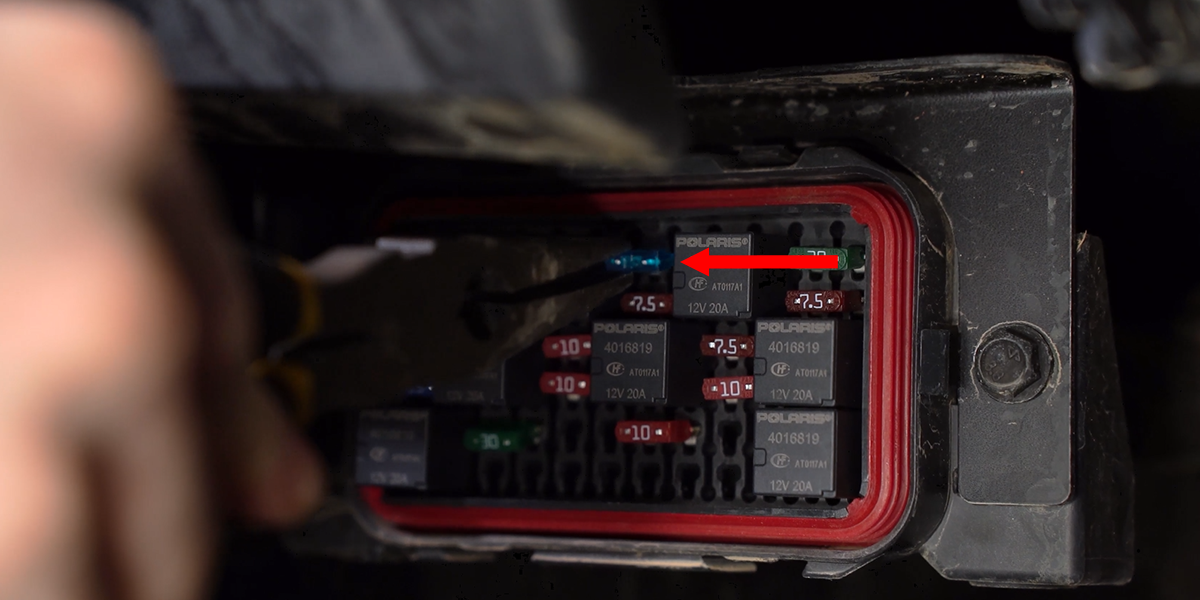
Lift the factory connector retention clip over its lock and retain it. Remove the rubber plug from the specified empty cavity with suitable pliers. Insert the blue backlight terminal with its locking clip facing up until it locks. Reinstall the factory retention clip. Check that the terminal is fully retained before connecting the harness.
17–19. Connect the labelled headlight harnesses
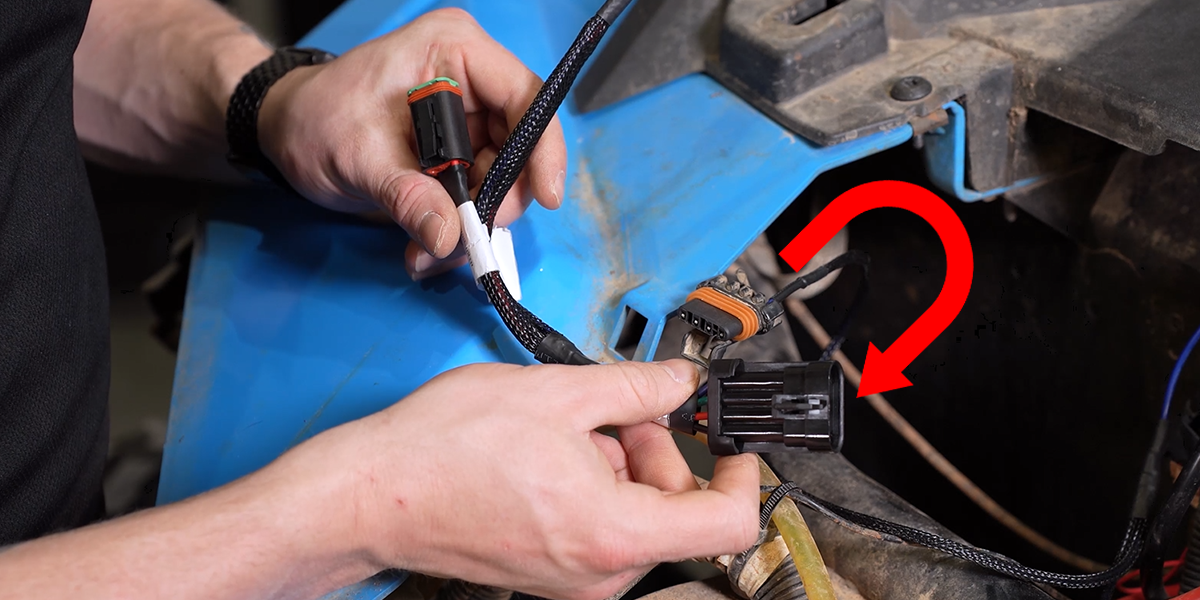
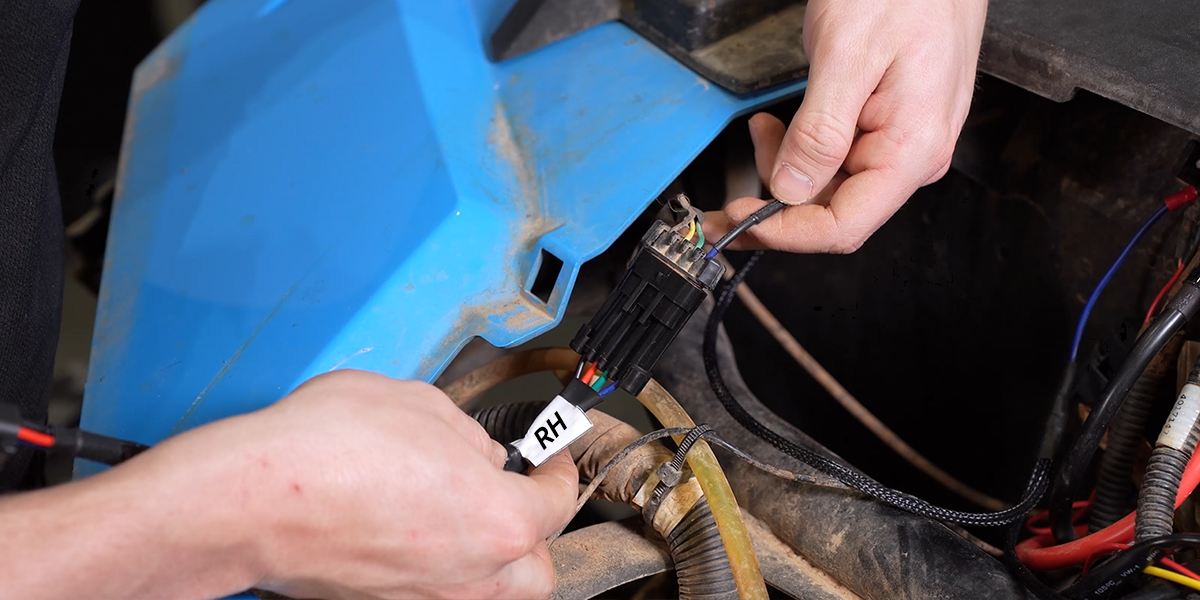
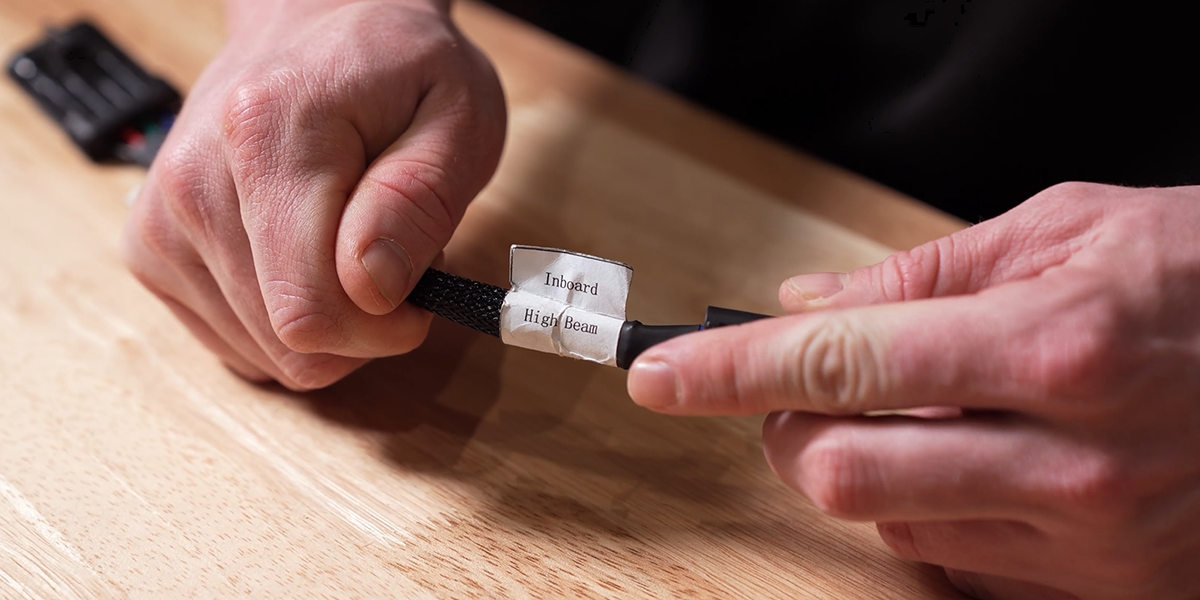
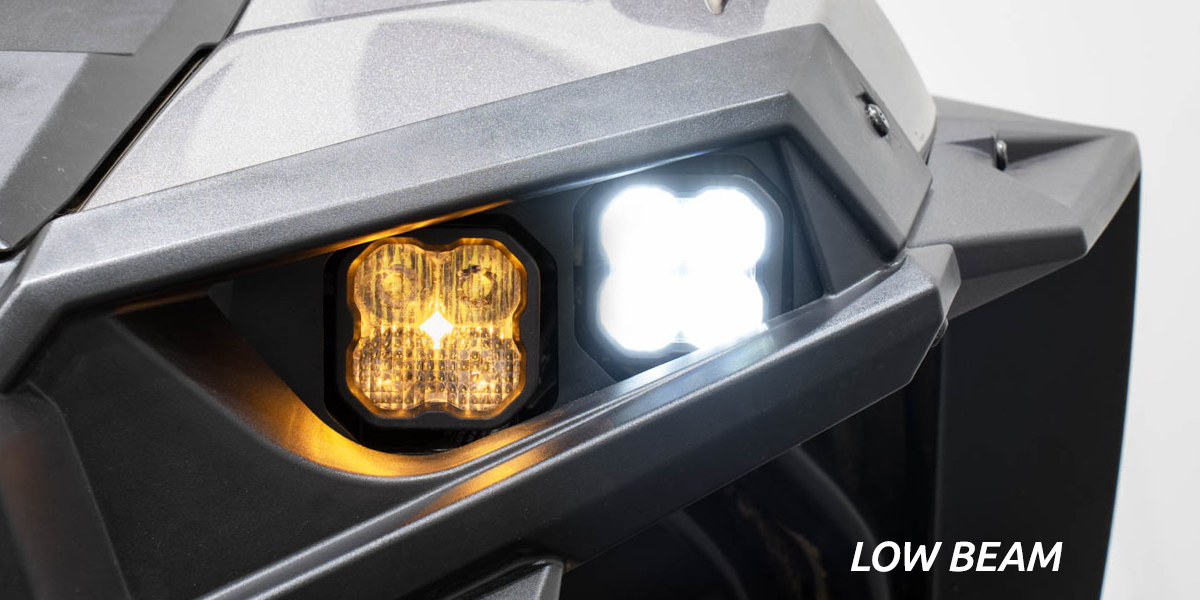
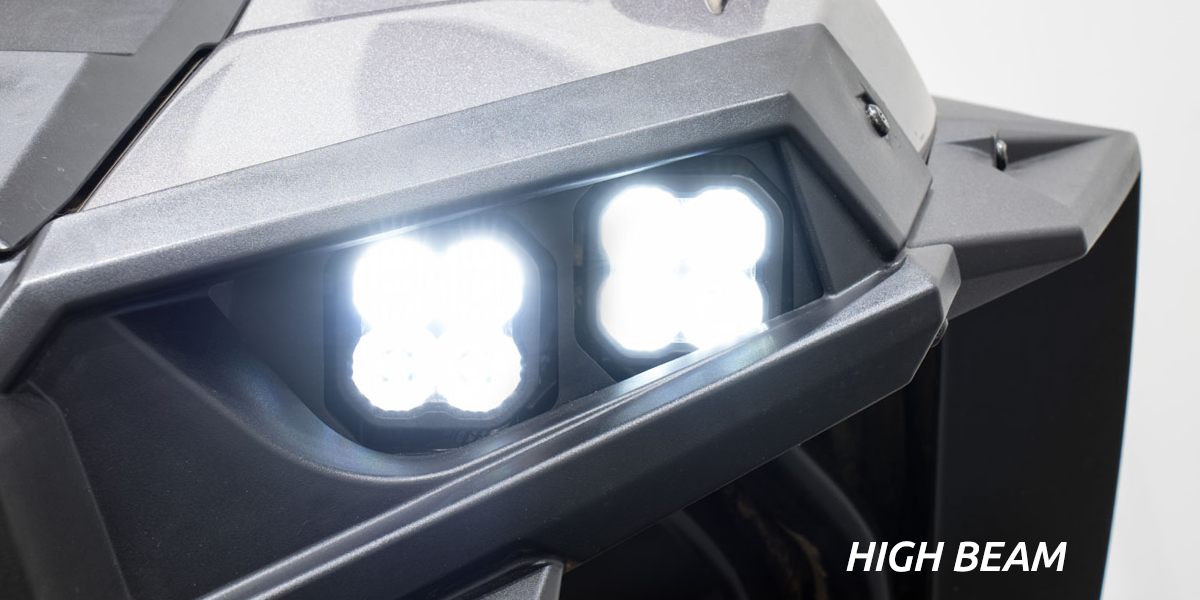
Connect each supplied harness to its matching factory headlight connector, following the driver/passenger labels. Refit the bumper and temporarily secure it with two original T40 bolts. Connect the DT leads to the pods: the outside Driving pod uses the low-beam lead, and the inside Combo pod uses the high-beam lead.
20–21. Follow the kit-specific fuse instruction
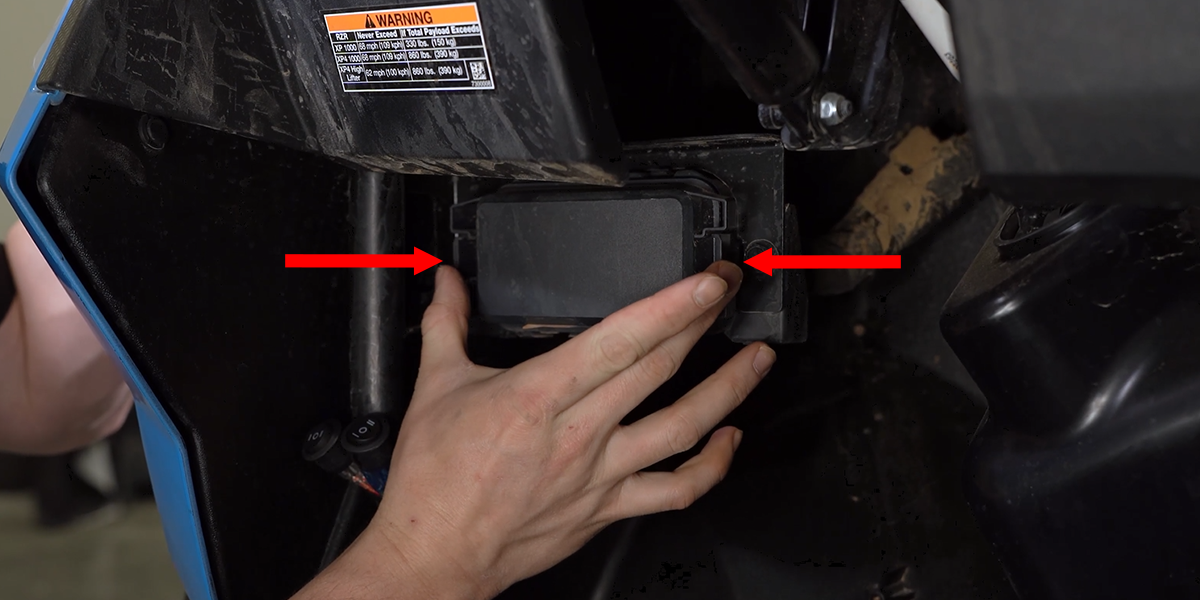
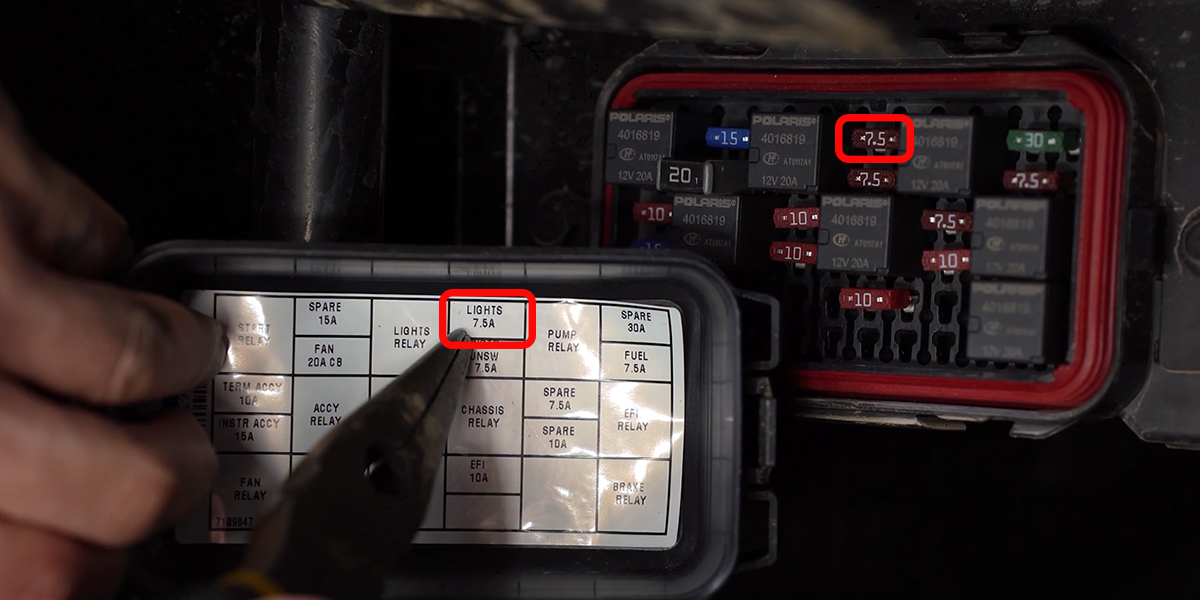
Open the fuse box by releasing the cover clips. Locate the original 7.5A lights fuse identified in the manufacturer’s figure. For this exact DD7843/DD7844 conversion and supplied harness, replace it with the kit-supplied 15A fuse and refit the cover. This instruction does not authorize increasing other fuse ratings or modifying unrelated circuits.
22. Test, aim and refit
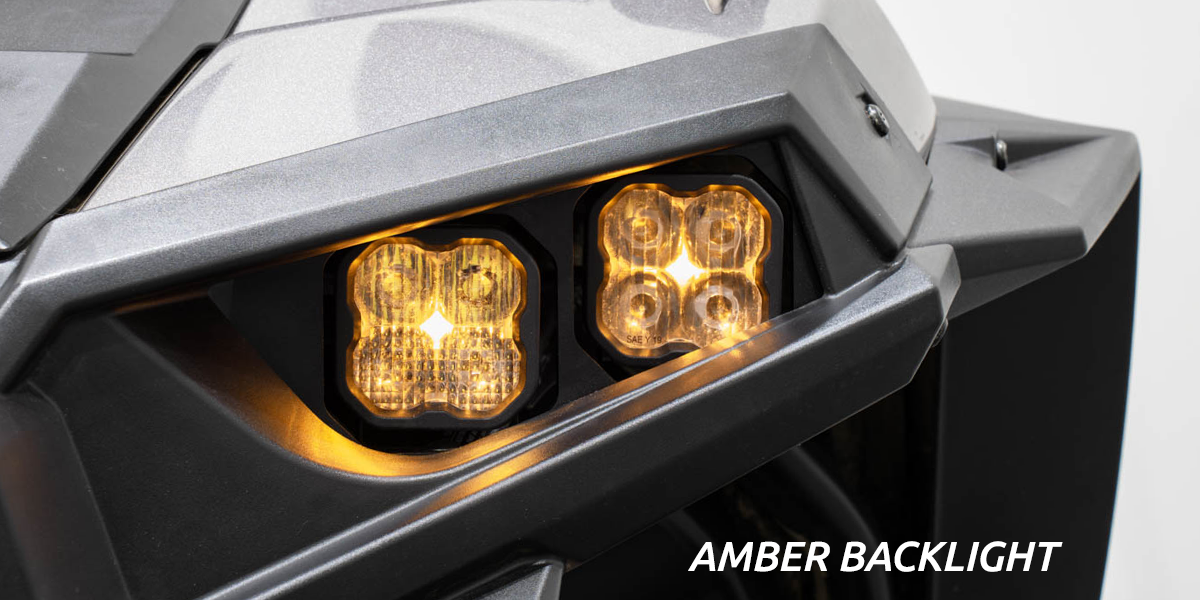
Restore power safely and test the separate Amber backlights, low beams and high beams. The outside Driving pods provide low beam; the inside Combo pods join them for high-beam operation. Aim the lights, secure loose wiring away from heat and moving parts, and reinstall the remaining original panels and fasteners in reverse order.
Use the lights only where permitted. A lamp optic’s SAE designation does not establish road legality for the complete UTV conversion.
Original installation video and references
Original headlight installation article · Original SS3 assembly PDF
The generic PDF supports mechanical pod assembly. Follow the dedicated DD4195 headlight harness and the vehicle instructions above for electrical connections; its older generic output tables are not whole-kit ratings.
Return to the headlight kit · 2019–2023 grille installation · 2019–2023 A-pillar installation · Polaris lighting kits