

BTS INSTALLATION GUIDE
2014–2024 Toyota 4Runner SS5 stealth grille installation guide
2014–2024 Toyota 4Runner, excluding Limited and Nightshade. Two- and four-pod layouts retain Toyota Safety Sense compatibility when installed as instructed.
Before you begin
Plastic trim tool, 5/16-inch ratchet, 10 mm and 14 mm sockets, 4 mm Allen key and an assistant for bumper removal.
Confirm that the kit, vehicle equipment and supplied instructions match before dismantling. Work with the vehicle safely parked and support any removed bodywork. Stop if connectors or mounting points differ from the shown application.
Watch the manufacturer installation
How to Install: SS5 Stealth Grille Kit for 2014-2023 Toyota 4Runner | Diode Dynamics. Video loads only when selected.
1. Remove the core-support panel
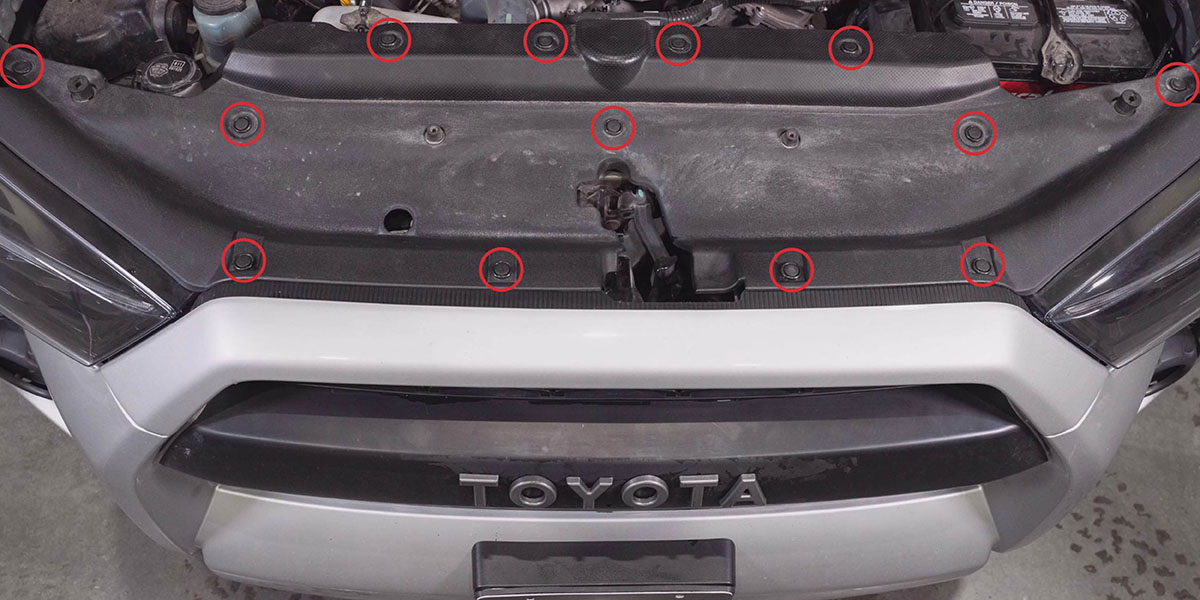
With the hood open, press down the centres of the thirteen trim rivets and remove them with a trim tool. Reset the centres before reassembly.
2. Release the top of the grille
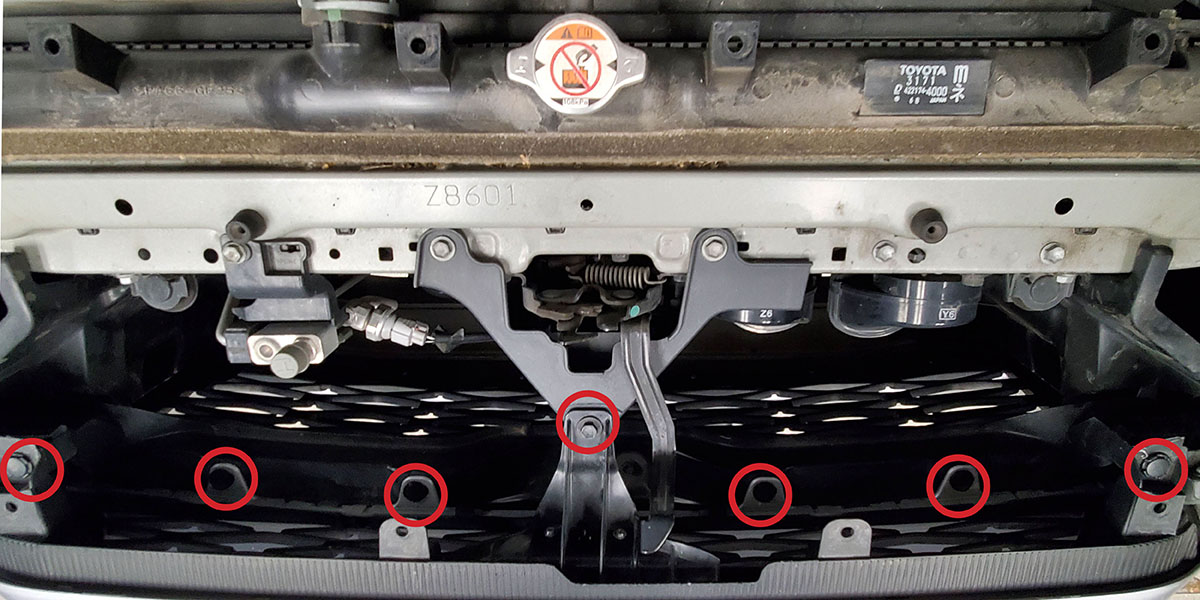
Remove the six grille push rivets and the centre 10 mm bolt.
3. Disconnect the fog lights
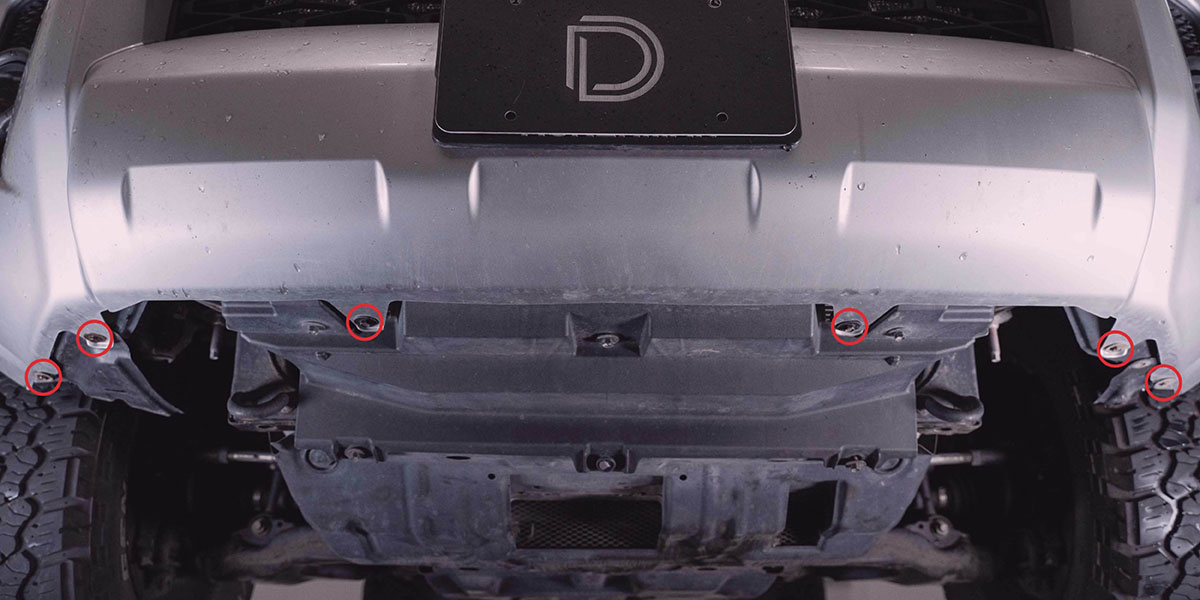
Remove the six underside bumper screws with a 10 mm socket, then disconnect the factory fog-light connectors.
4. Disconnect Toyota Safety Sense when fitted
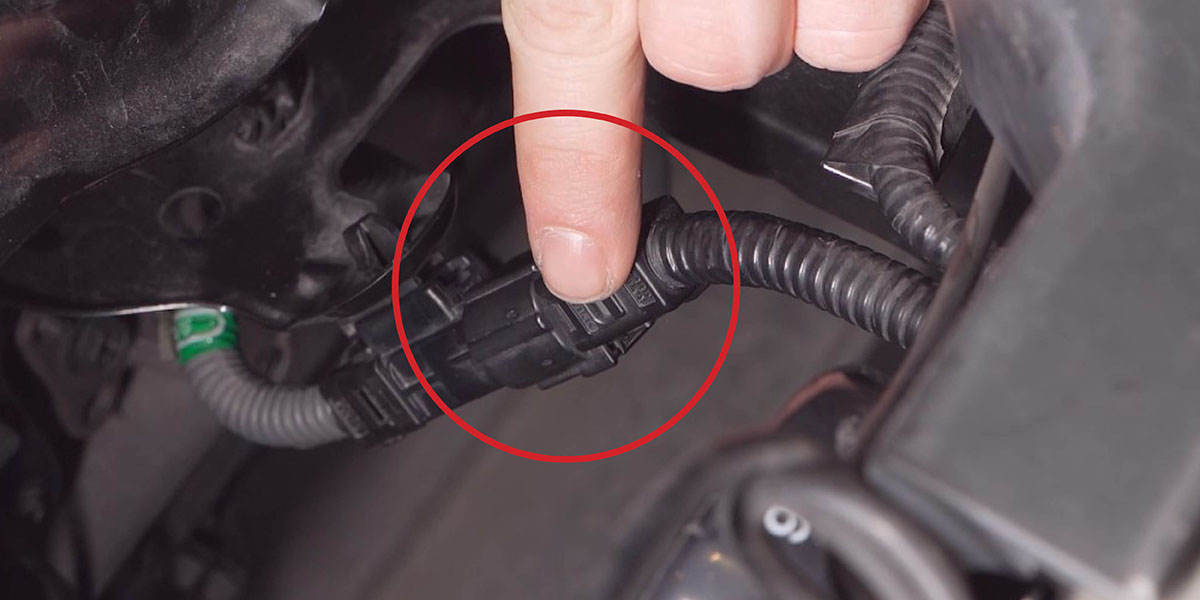
Unplug the connector beneath the hood latch and remove the two 10 mm bolts securing the Toyota Safety Sense module. Preserve the module and its hardware for reinstallation.
5. Release the wheel-well edge
Remove the three 10 mm screws at the bumper edge in the passenger wheel well.
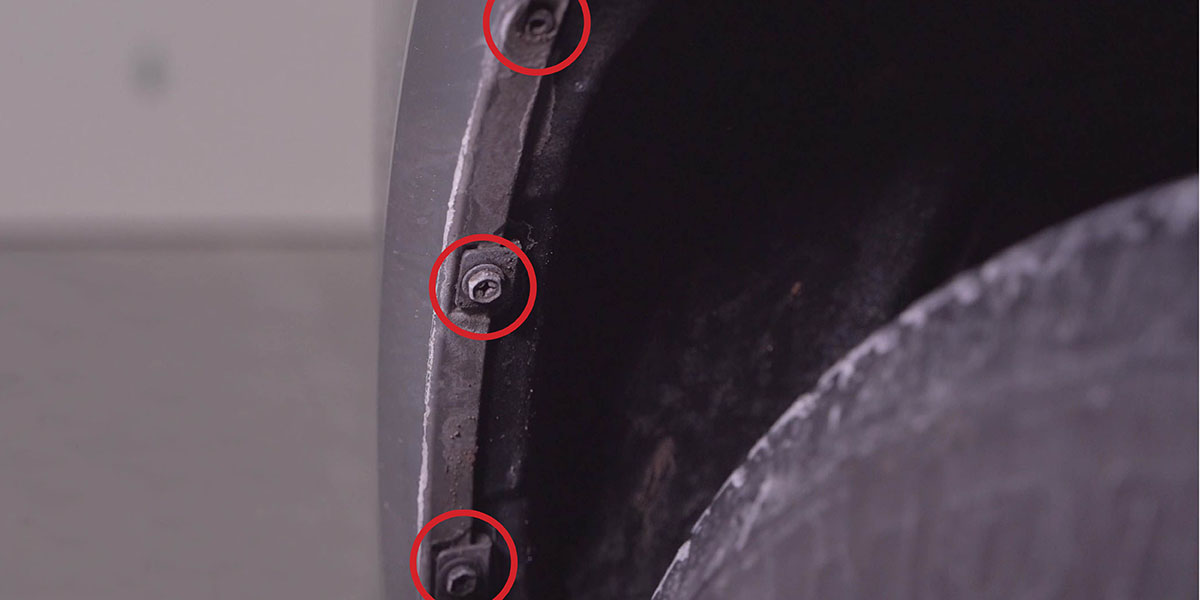
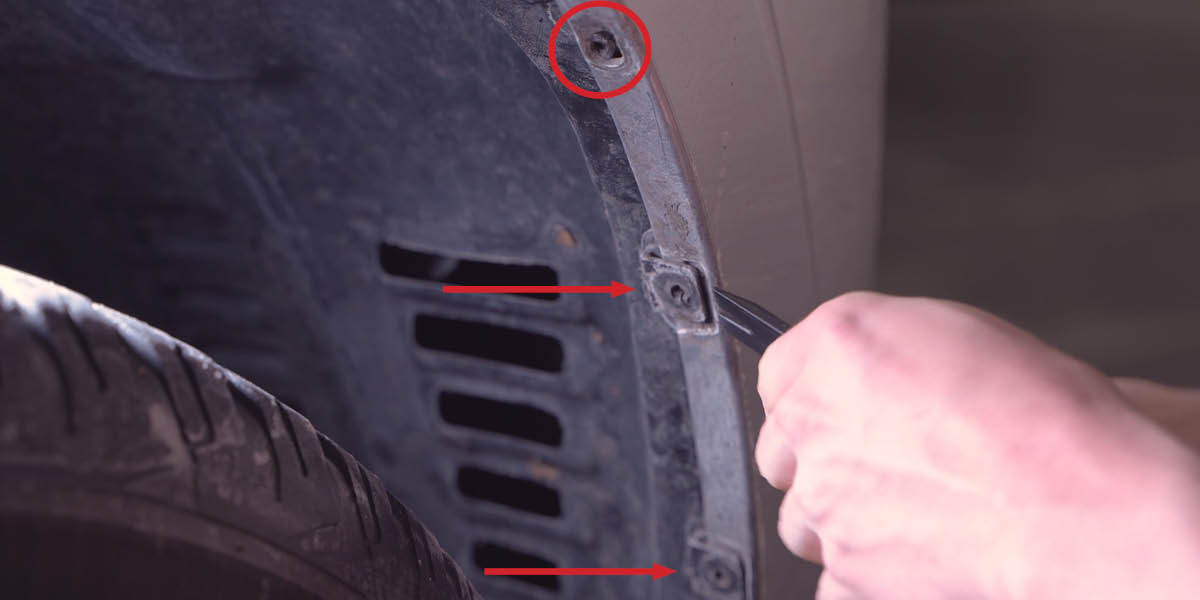
6. Release both bumper corners
Release the upper snap with a trim tool and slide the lower screw clips off the bumper. Pull the corner away carefully, then repeat on the opposite side.
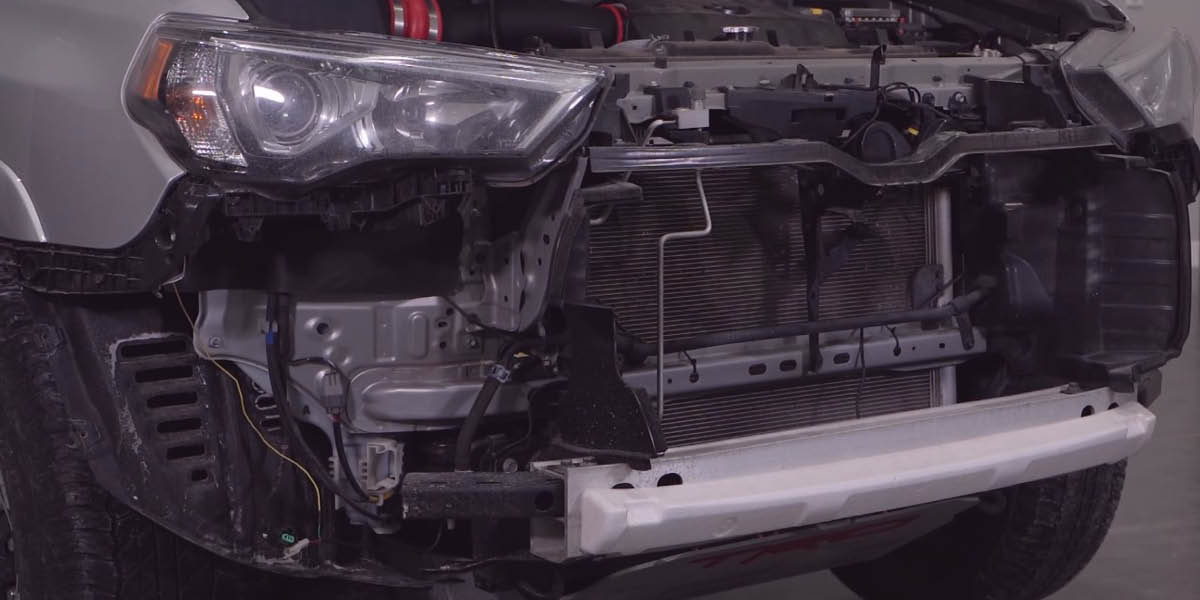
7. Remove the bumper with assistance
Use a second person to support the bumper while pulling it forward from the snaps around the headlights. Set it aside without stressing wiring.
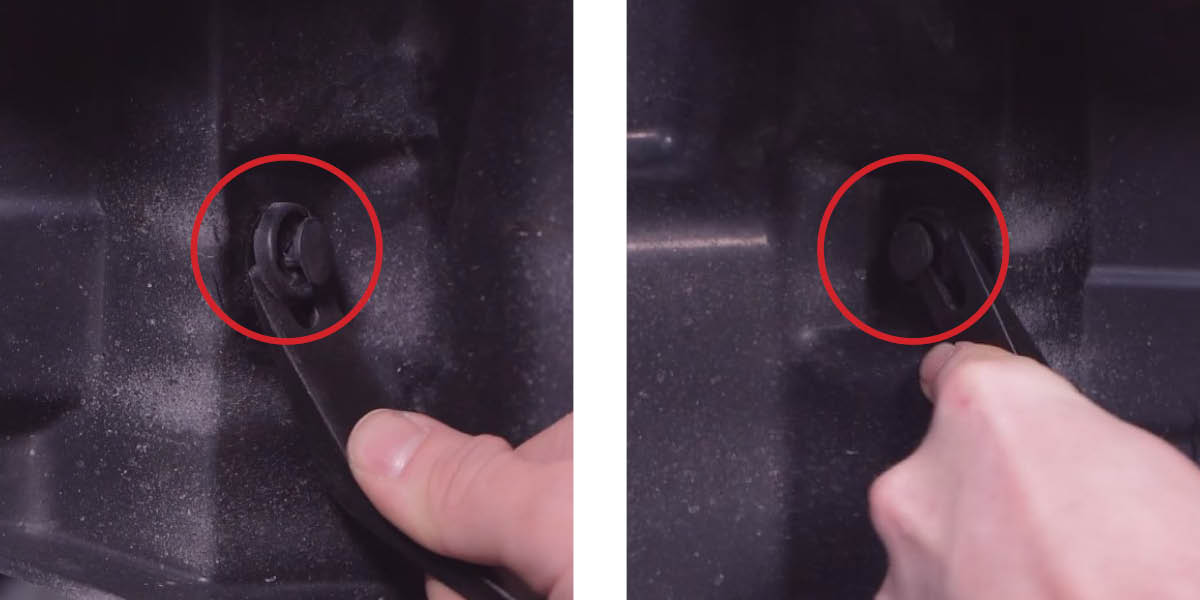
8. Remove the air-dam rivets
Remove the plastic push rivet from each air dam. Leave the air dams installed.
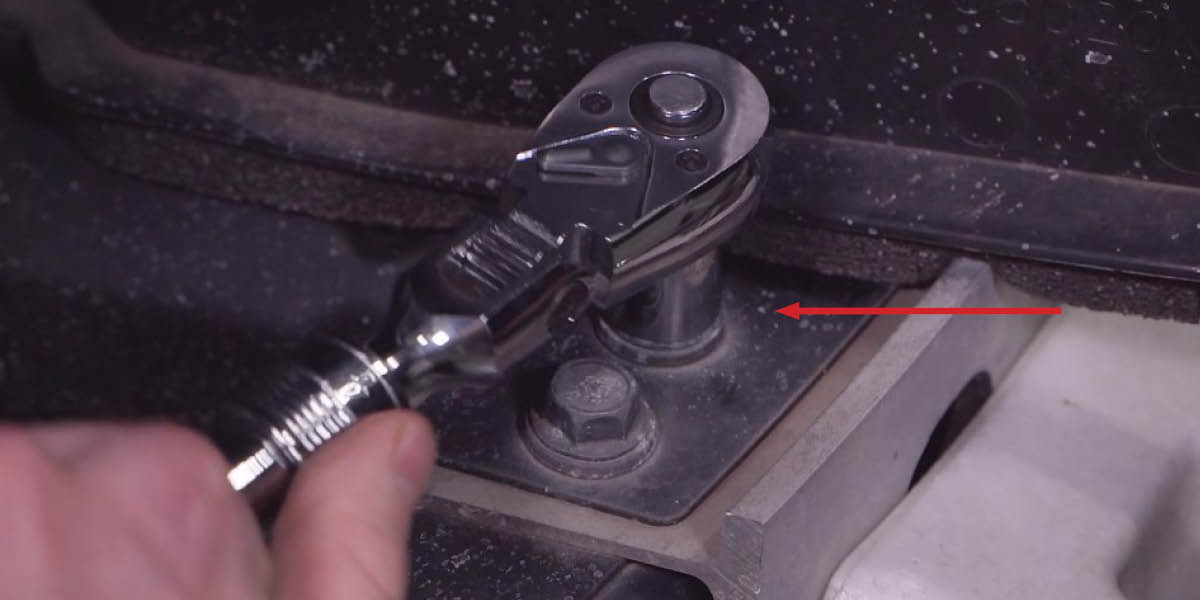
9. Loosen the crash-bar bolt
Use a 14 mm socket to loosen the centre crash-bar bolt identified in the photo.
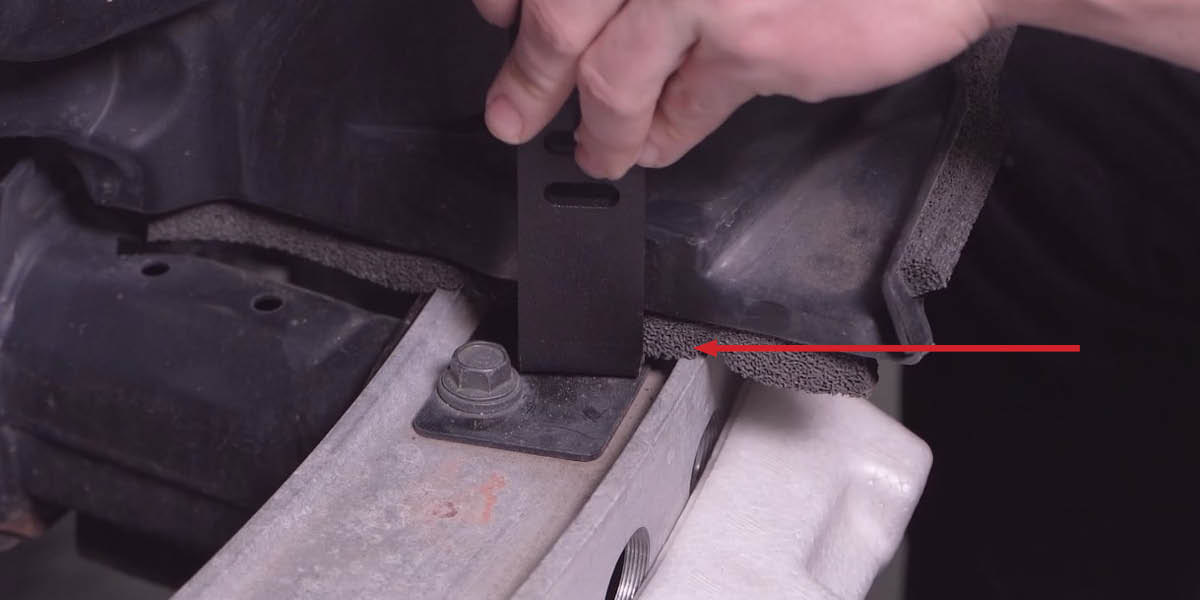
10. Position each vehicle bracket
Slide its open slot under the loosened bolt. The open-slot portion faces outward and the upper tab faces inward.
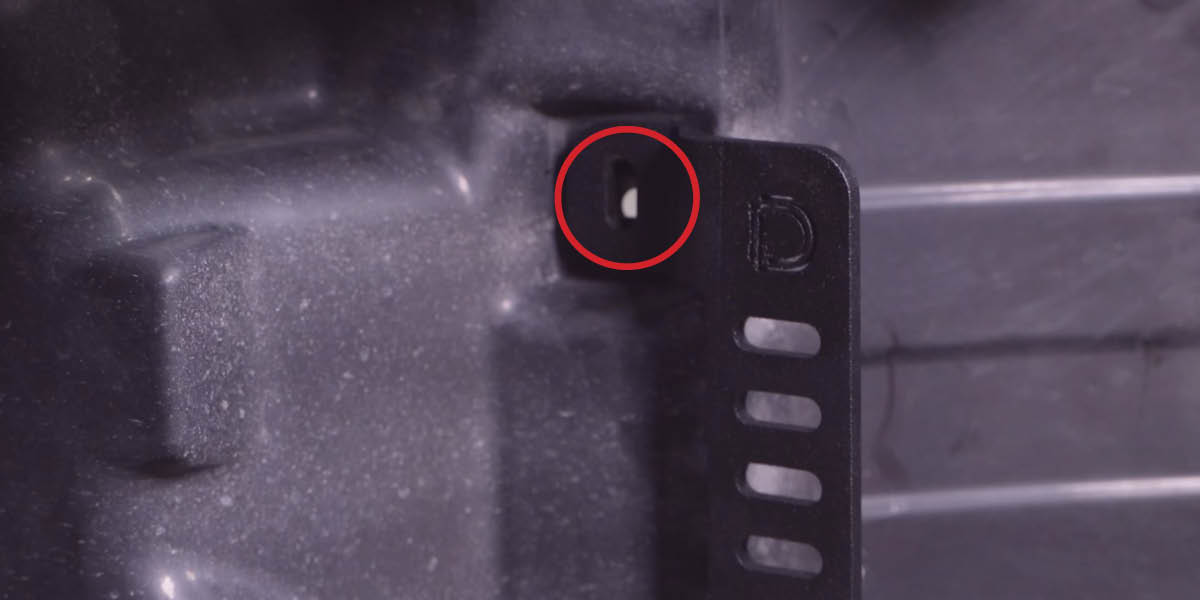
11. Fit the air-dam hardware
Loosely secure the brackets to the air dams with the supplied M6 screw, washer and nut.
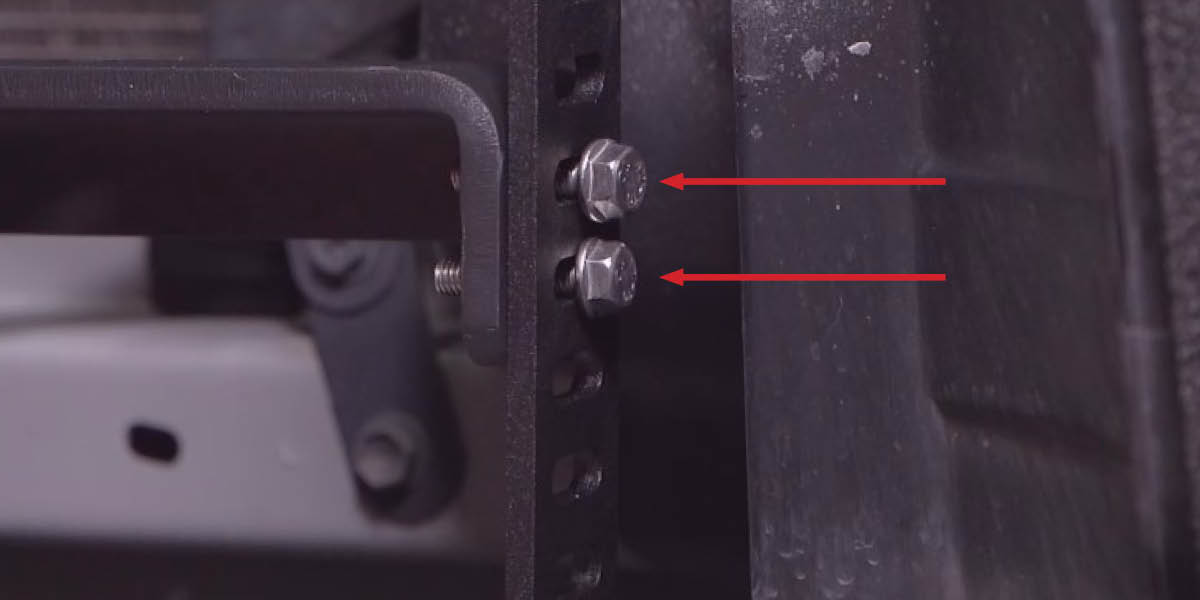
12. Secure the crossbar
Centre the crossbar on the application brackets using the fourth and fifth slotted holes from the bottom. Tighten the bracket and crossbar hardware. The manufacturer specifies 22 ft-lb for the 14 mm bolt loosened in step9; this is not a general torque for every fastener.
13. Choose the pod mounting positions
Four pods use position A. Two pods use position A or B. Position C is only for an optional separately purchased centre pod on a vehicle without Toyota Safety Sense.
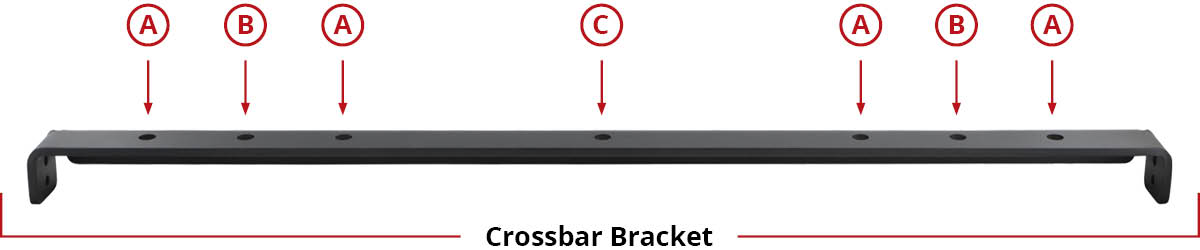
14. Fit the pods loosely
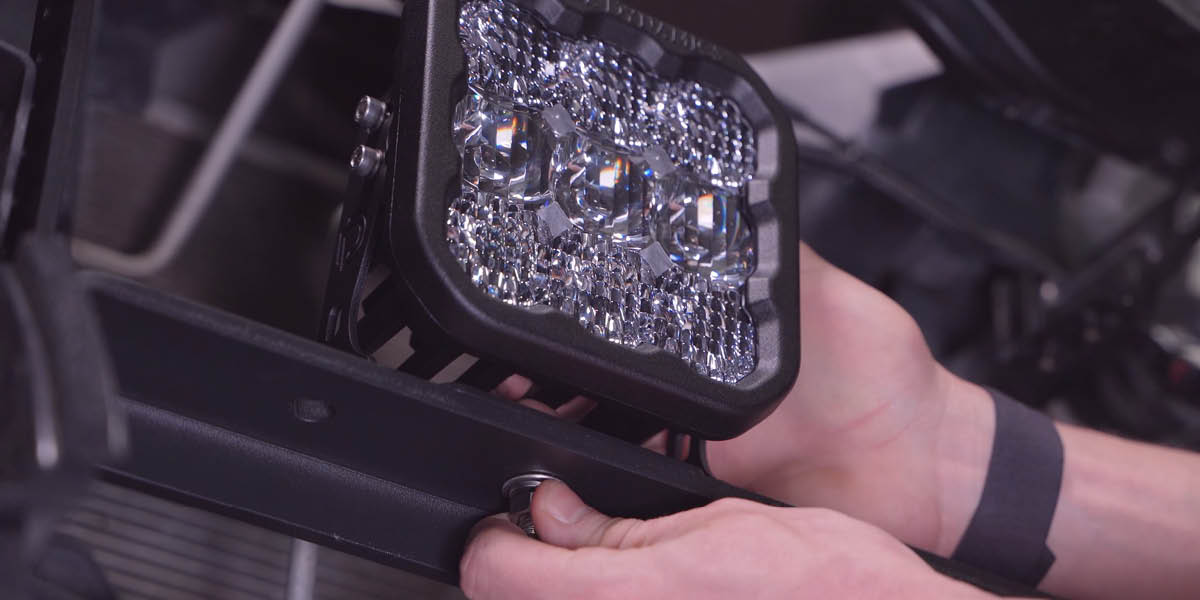
Attach each SS5 pod to its universal bracket with the included hardware. Leave enough movement to check clearance and aim.
Wiring diagram
15. Connect the fused harness
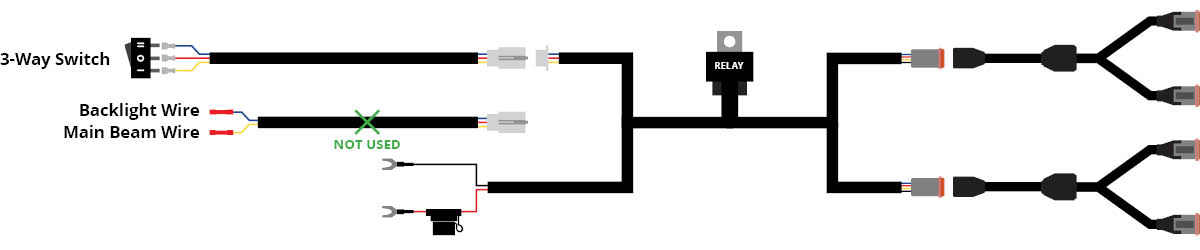
Mount the relay near the under-hood fuse box and route the harness behind the driver-side headlight toward the battery. Connect the harness battery leads to their correct terminals. Route the control switch to its intended mounting point. Four-pod kits use the two supplied splitters between the dual outputs and the pods.
16. Check grille and bumper clearance
Set the bumper loosely in place. Move the pods farther rearward in the slots if any part makes contact.
17. Aim and reinstall
Aim and secure the pods, then reverse steps1–7 to refit the bumper, factory lights and Toyota Safety Sense components where fitted. Test the functions before driving.
White-pod backlight programming
This procedure applies to White SS5 versions with selectable colours. Yellow SS5 versions have amber backlighting.
Start with backlight power off. Cycle it on and off three times within three seconds, about one second per press. Continue at the same pace to step through the colours. Leave power on at the desired colour for five seconds to save, then turn it off.
If connected White pods become unsynchronised, enter programming mode and cycle through all eight colours twice—at least sixteen cycles. Leave the resulting White setting on for five seconds, then programme the desired colour again.
Choose or check your kit
Return to the product and its exact options. Explore Toyota 4Runner lighting
Plan your 4Runner lighting
Planning a 2014–2024 4Runner installation? Match the exact product and vehicle instructions before starting.
Shop 2014–2024 4Runner lighting · Read the 4Runner buying guide