

BTS INSTALLATION GUIDE
Toyota 4Runner SS6 grille-light installation guide
2014–2019 Toyota 4Runner: all trims. 2020–2024: TRD Pro only. Verify the upper-grille opening before choosing this kit.
Before you begin
10 mm socket/wrench and a plastic trim tool or flat screwdriver.
Confirm that the kit, vehicle equipment and supplied instructions match before dismantling. Work with the vehicle safely parked and support any removed bodywork. Stop if connectors or mounting points differ from the shown application.
Watch the manufacturer installation
How to Install 2014-2023 5th Gen Toyota 4Runner Dual 6" SAE/DOT Lightbar Kit | Diode Dynamics. Video loads only when selected.
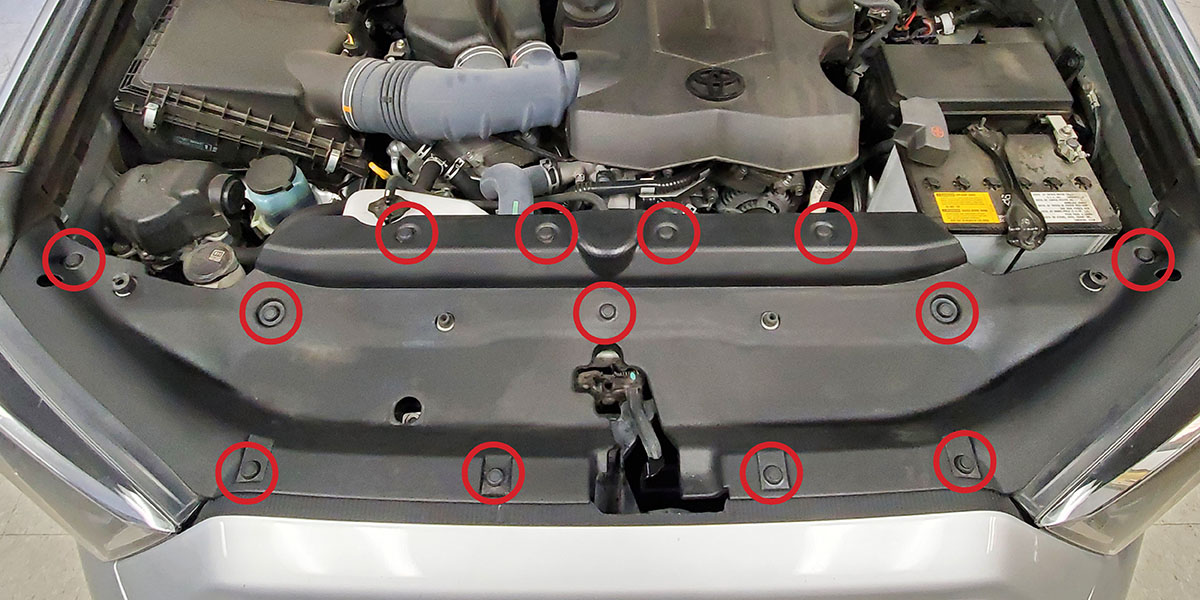
1. Remove the core-support trim
Release the thirteen push rivets by pressing their centres down, then lift out the trim panel. Reset each rivet before reuse.
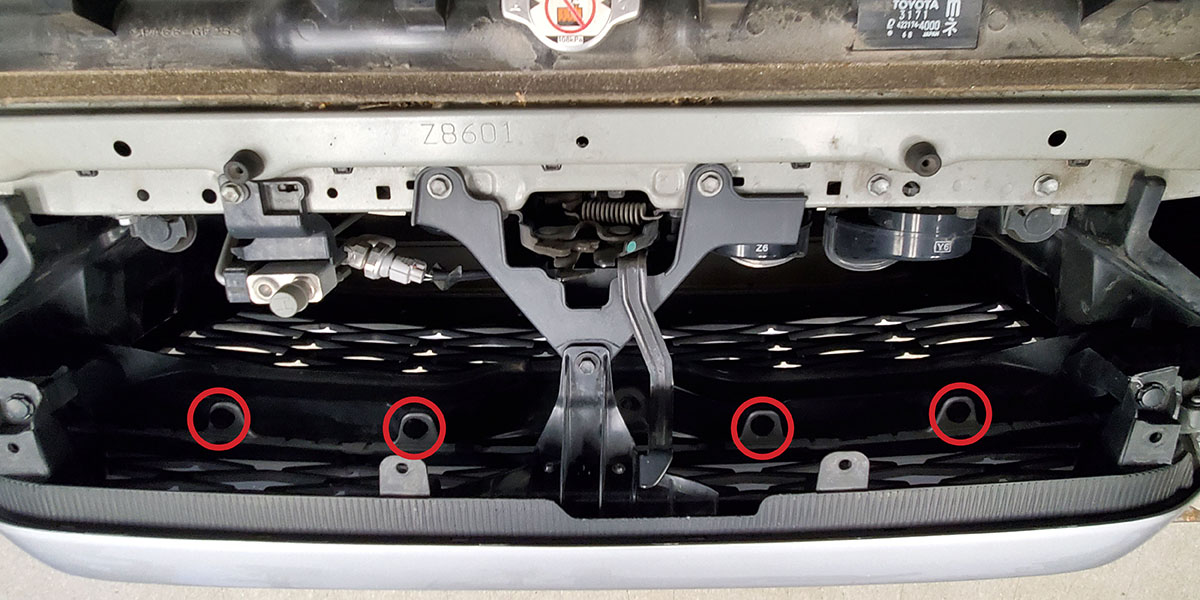
2. Remove the four mounting-hole rivets
Use a plastic trim tool or flat screwdriver to remove the four additional rivets shown in the original photo.
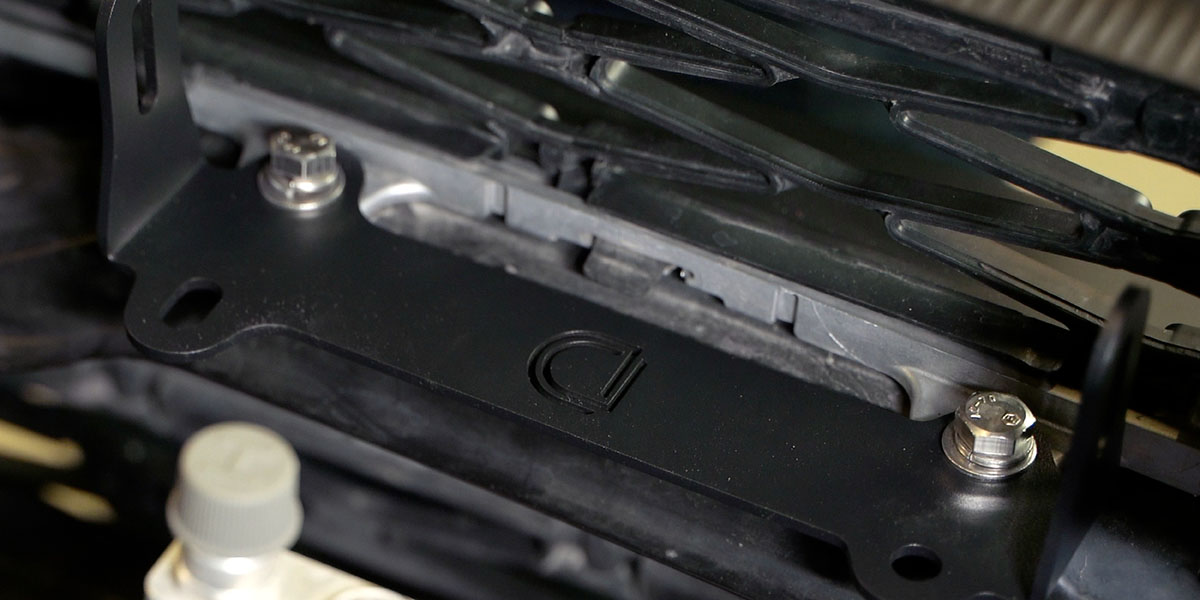
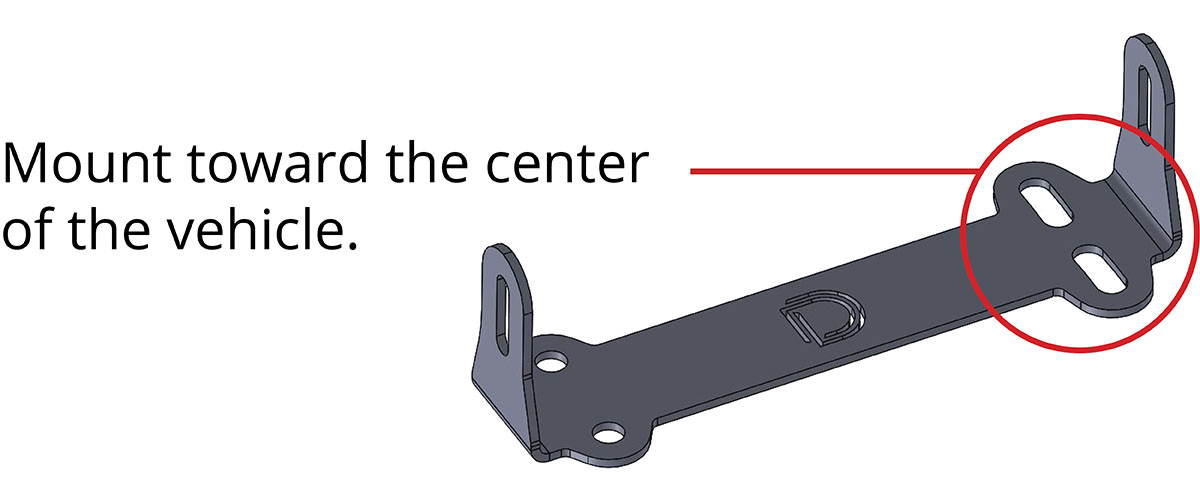
3. Attach the application brackets
Use the supplied M8 hardware to install the brackets at the newly exposed holes. The two source photos show the position and bracket orientation.
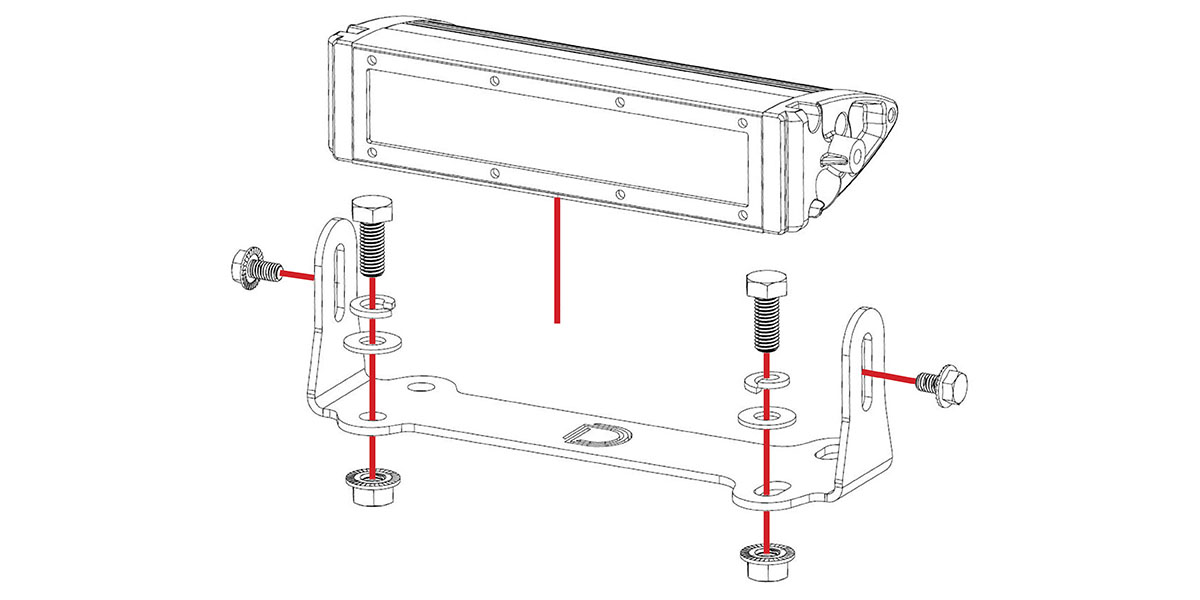
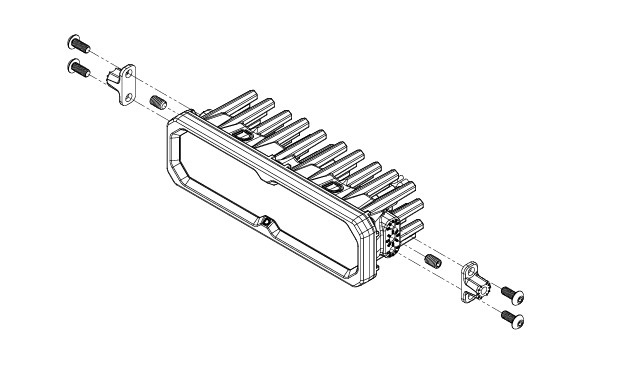
4. Mount the SS6 lights
Install the six-inch lights with the supplied M6 hardware and a 10 mm wrench. The manufacturer shows both an older SS6 Classic mount and the current SS6 with its adapter. Use the arrangement supplied for your lights, not a pictured older component by assumption.
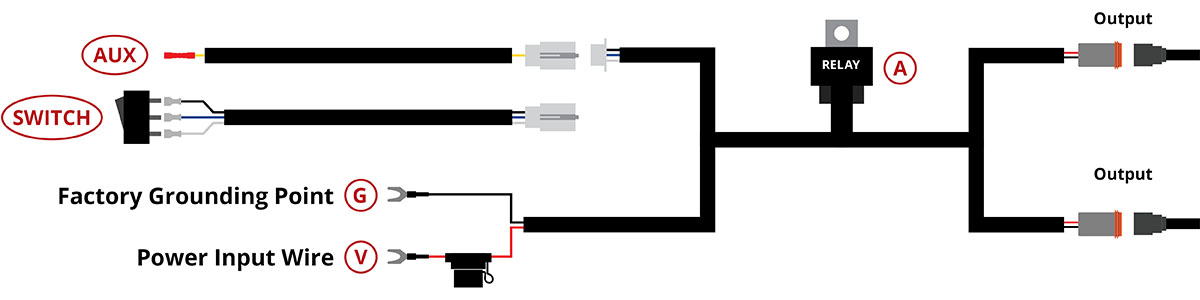
Wiring diagram
5. Mount the relay
Choose a secure relay location near the battery or main power terminal.
6. Connect fused power
Connect red to battery positive or the main positive terminal and black to battery negative or a factory ground. Retain the harness fuse protection.
7. Connect the control switch
If using a compatible auxiliary switch, disconnect the toggle lead at the white connector, fit the supplied pigtail and connect its yellow wire to the switch lead. The switch controls the relay; lamp power is supplied at the battery. Otherwise use the included toggle arrangement.
8. Route the outputs
Keep the wiring away from heat and moving parts. Connect each output to its lightbar.
9. Test and aim the selected optic
Check both lights and aim them for their selected Driving or Fog/Wide function. Follow the applicable installation and road-use requirements; the guide supplies no universal numeric aiming measurement for this kit.
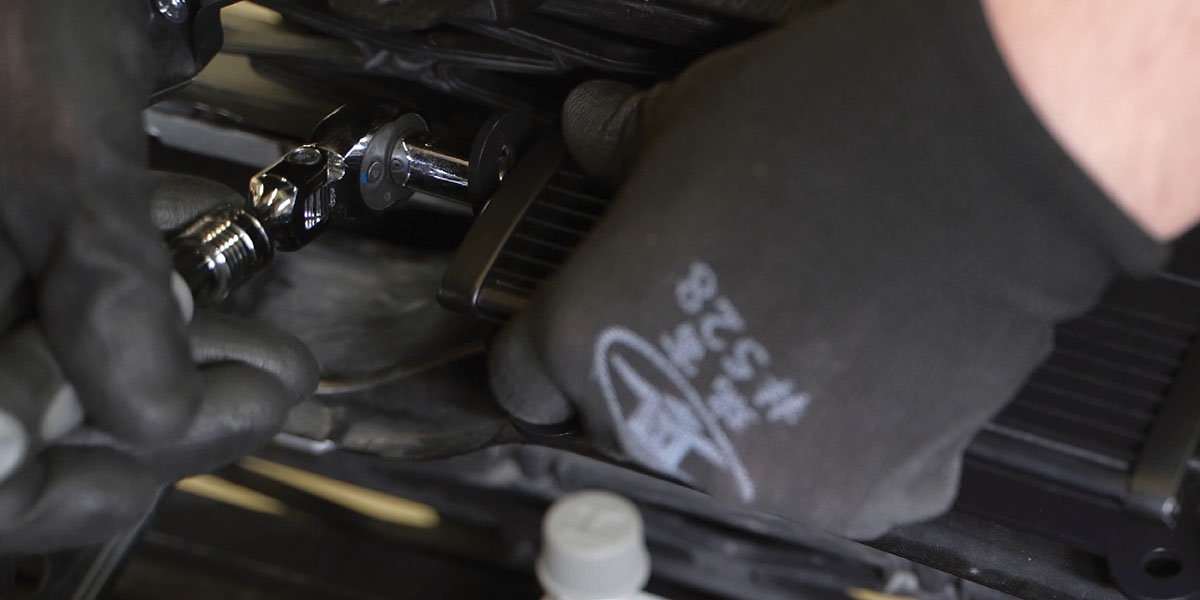
10. Refit the trim
Reinstall the core-support trim with its thirteen original rivets. Press their centres flush to lock them.
Choose or check your kit
Return to the product and its exact options. Explore Toyota 4Runner lighting
Plan your 4Runner lighting
Planning a 2014–2024 4Runner installation? Match the exact product and vehicle instructions before starting.
Shop 2014–2024 4Runner lighting · Read the 4Runner buying guide