

2022–2025 TOYOTA RAV4 · FACTORY-FOG REPLACEMENT
Install SS3 or Elite replacement fog lights on your RAV4
Remove the bumper cover, replace the original bezels and lamps, connect the factory-fog adapters and aim the new lights.
Confirm the vehicle and kit
This guide accompanies SS3 kits DD8827–DD8832 and Elite kits DD8825, DD8826 and DD9007 for a 2022–2025 Toyota RAV4 with factory fog lights. TRD Off-Road and Adventure trims are excluded. A vehicle without fog lights needs the separate add-on kit and complete wiring harness.
Have a 10 mm socket and plastic trim-removal tools ready. Follow vehicle service instructions for safe battery isolation and electrical work. Protect the paint, support the bumper cover and disconnect its wiring before moving it away from the vehicle.
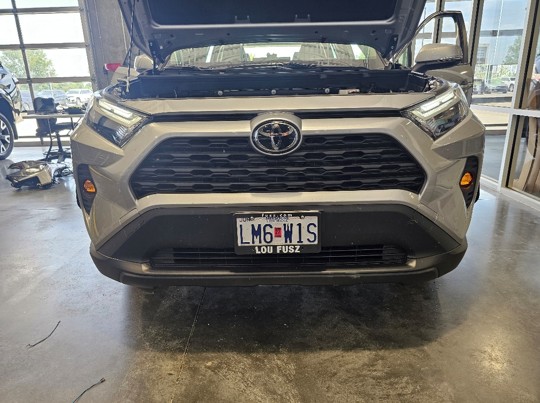
The original photographs show shared bumper access and an Elite mounting example. SS3 uses its supplied Type B lamp brackets; use the hardware supplied for your lamp family. Main-beam adapters connect to existing factory fog wiring. The Amber accent backlight is a separate optional connection.
STEP 1 OF 12
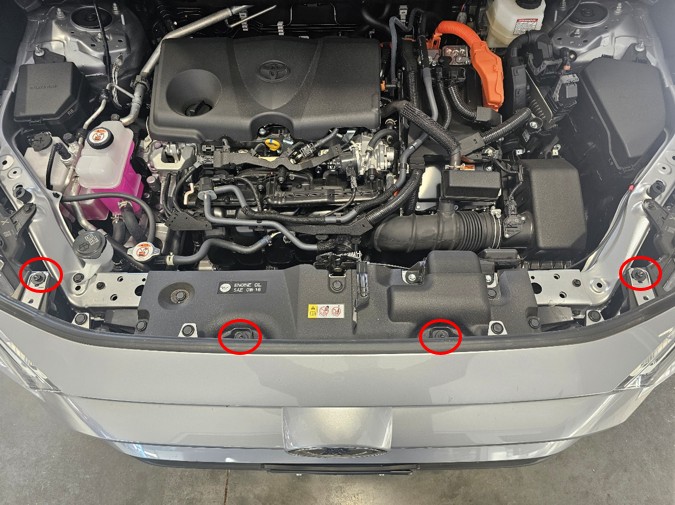
Remove upper bumper fasteners
Open the hood and remove the fasteners along the upper edge of the bumper cover with a 10 mm socket.
STEP 2 OF 12
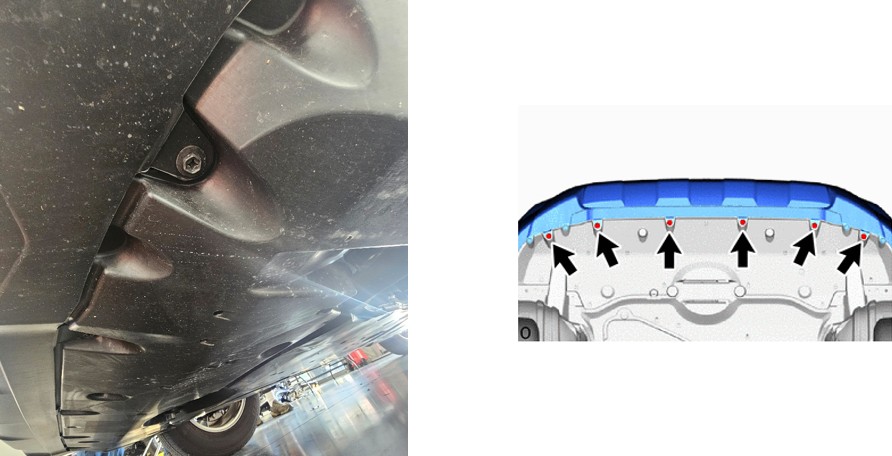
Remove lower bumper fasteners
Remove the lower bumper-cover fasteners from underneath the vehicle. Keep the fasteners organized for reassembly.
STEP 3 OF 12
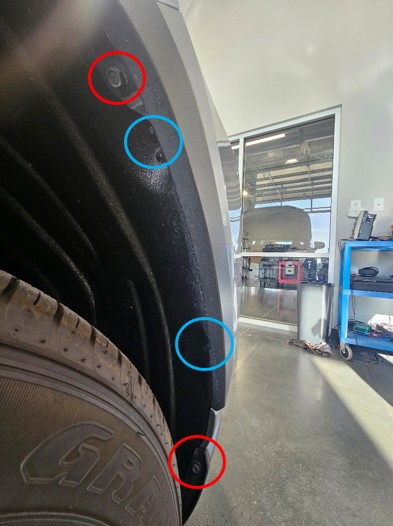
Remove wheel liner fasteners
Remove the front wheel-liner fasteners and clips on both sides to gain access behind the bumper.
STEP 4 OF 12
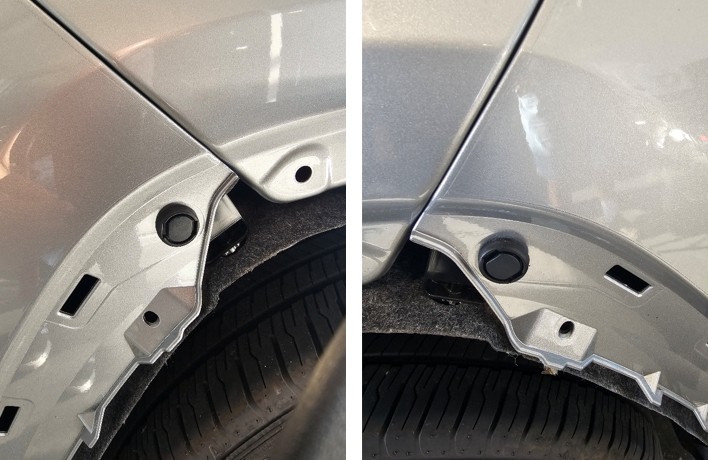
Release bumper from fender flares
Carefully release the bumper cover from the fender flares and remove the retaining clip on each side. Protect the painted edges.
STEP 5 OF 12
Disconnect bumper electrical connectors
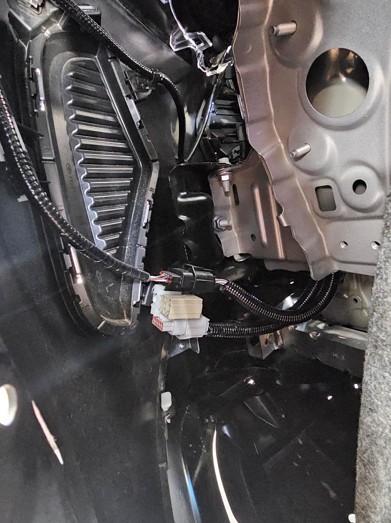
Reach behind the driver-side wheel liner and disconnect the electrical connectors attached to the bumper, including the factory fog-light harness. Do not pull the bumper against connected wiring.
STEP 6 OF 12
Remove front bumper cover
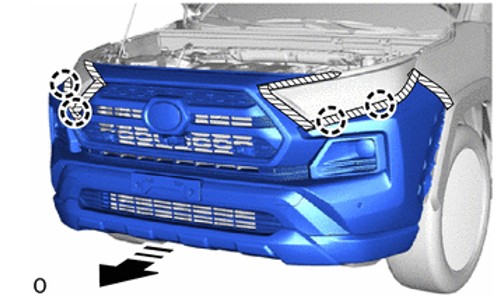
With the fasteners and electrical connections released, pull the cover forward and place it on a protected surface.
STEP 7 OF 12
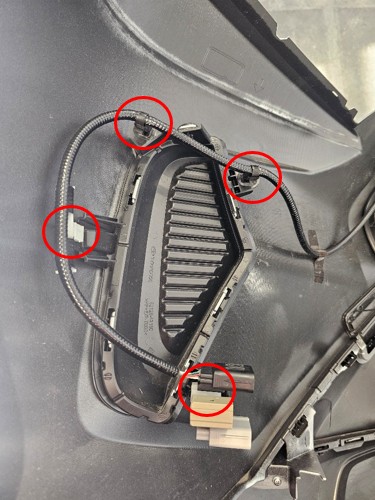
Remove fog bezel harness clips
Release the wiring-harness clips on the backs of the original fog bezels using a suitable trim tool.
STEP 8 OF 12
Remove factory fog light bezels
Release the retaining tabs and remove the original fog bezels from the bumper cover.
STEP 9 OF 12
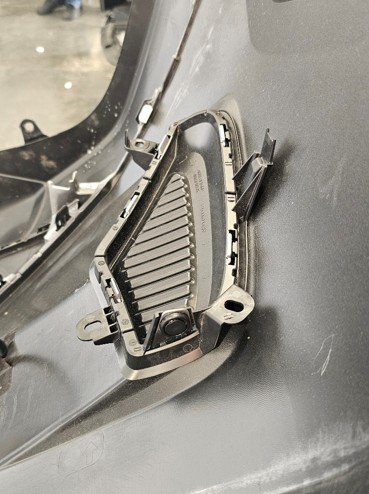
Install replacement fog light bezels
Fit the supplied RAV4 bezels and engage the factory clips. Repeat on the other side.
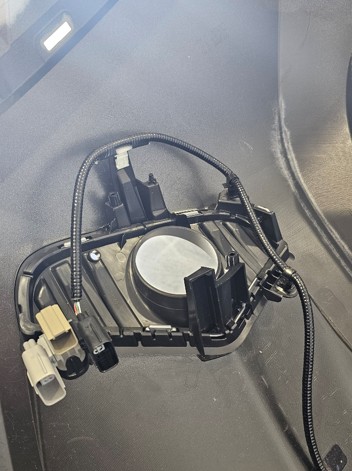
STEP 10 OF 12
Install fog light pods
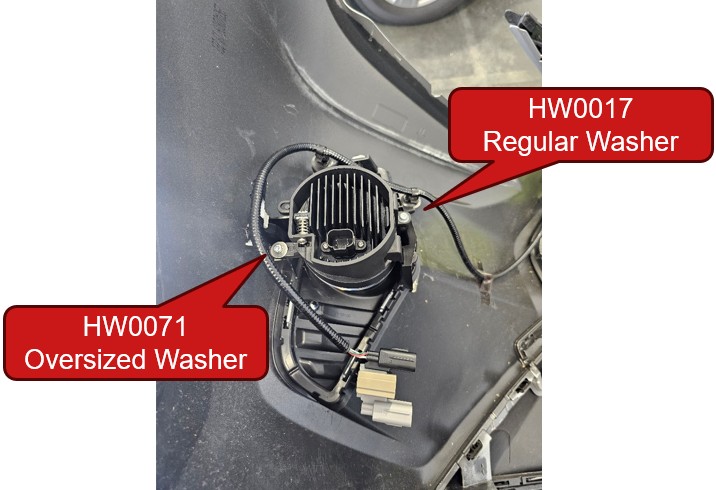
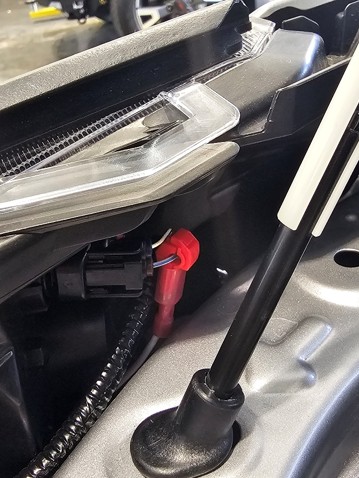
Mount the lamps with their supplied hardware. The Elite example below identifies the regular and oversized washers; the SS3 kit uses its own Type B brackets and hardware. Connect the DD4211 four-pin DT-to-DJ70 adapters to the factory fog connections. If using Amber backlighting, follow the shown sidemarker-power connection and secure the wiring away from moving, sharp and hot parts.
STEP 11 OF 12
Reinstall bumper and test operation
Refit the bumper cover, reconnect all electrical connectors and test the main fog beams and optional Amber backlights separately. Confirm all clips and edges are seated correctly.
STEP 12 OF 12
Aim fog lights and secure all fasteners
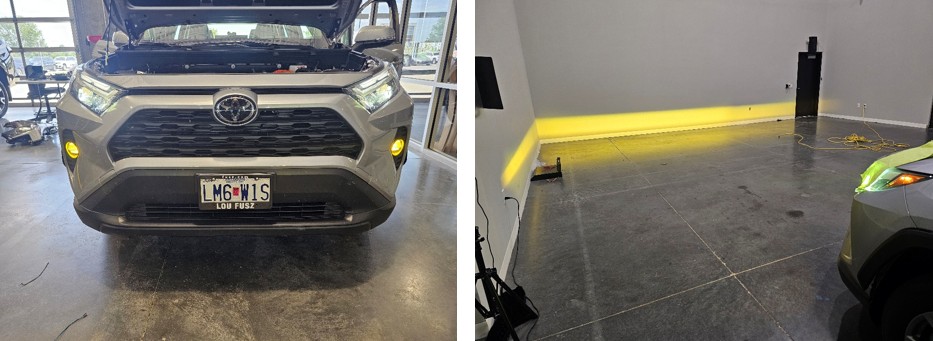
Aim the fog lights using the manufacturer’s instructions and applicable vehicle and local requirements. Refit all remaining fasteners and clips, then check the final beam aim and secure wiring.
Set the Elite Dual Color main beam
Only DD9007 in this replacement-kit selection has SmartSelect White/Yellow control. Fixed White, fixed Yellow and the six SS3 choices do not change main-beam colour. Amber backlighting is separate and is not a third main-beam colour.
With the fog-light circuit powered as directed, turn the fog lights on and off three times, keeping each on or off state between half a second and five seconds. The lamps cycle through the available colours twice. Leave them on for at least five seconds when your preferred colour is displayed to save it. If you make no selection after two cycles, they return to White.
Watch the RAV4 overview and fog-light aiming
The overview includes both add-on and replacement kits. Follow the factory-fog replacement procedure and the application limits above.
This is general fog-light aiming guidance, not a different vehicle’s installation procedure.
Original reference and kit choices
Original manufacturer installation article
Choose SS3 Sport, Pro or Max · Choose Elite White, Yellow or Dual Color · RAV4 without factory fog lights · Toyota lighting kits