

BTS INSTALLATION GUIDE · 2016–2023 TACOMA
Install and set up Morimoto XB Evo & Evo Hybrid headlights
Follow the equipment-specific wiring, front-end removal, aiming and setup for LF2-530 Evo and LF2-530Y Evo Hybrid. The Evo-only mode keys and heater controls are clearly separated below.
Before you start
This procedure is for the 2016–2023 Tacoma LF2-530 and LF2-530Y assemblies. Identify your original headlight type before choosing the supplied adapter. Keep the vehicle and lights switched off while connecting the lamps or changing mode keys.
Have a ratchet with a 10 mm socket, trim tool, Phillips screwdriver, cable ties and a 7/32-inch drill bit or suitable cutting tool ready. Installation includes removing the grille and bumper cover, transferring the lower headlight trim, and making a small fuse-box lid notch for the DRL lead. Inspect the lights and connectors before installation; use a qualified installer if you are not comfortable with this work.
Watch the manufacturer installation
The illustrated procedure below remains available while you work.
1. Remove the grille and bumper cover
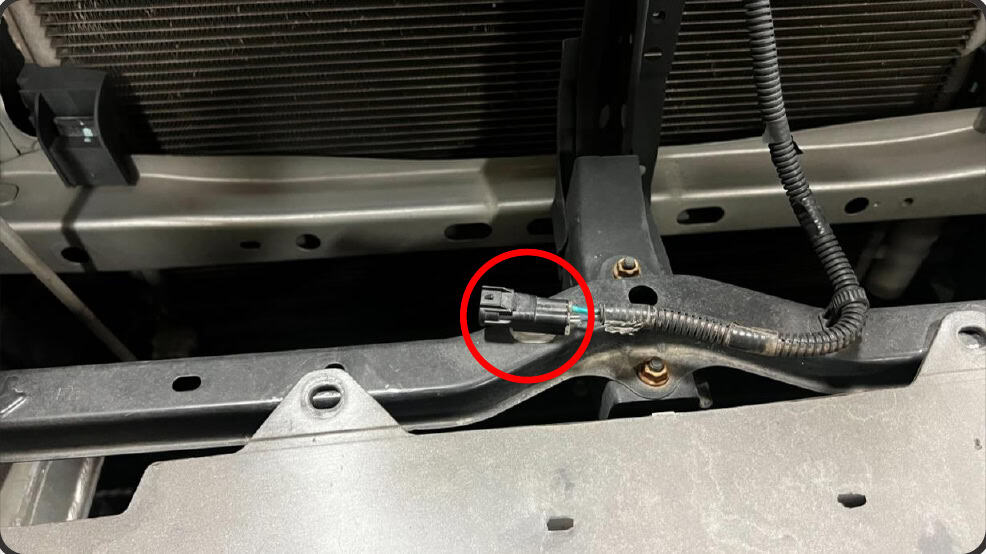
Open the hood. Remove the two 10 mm screws across the upper grille, then release the two outer clips. If the grille carries an automatic-braking sensor, unplug its connector before moving the grille away.
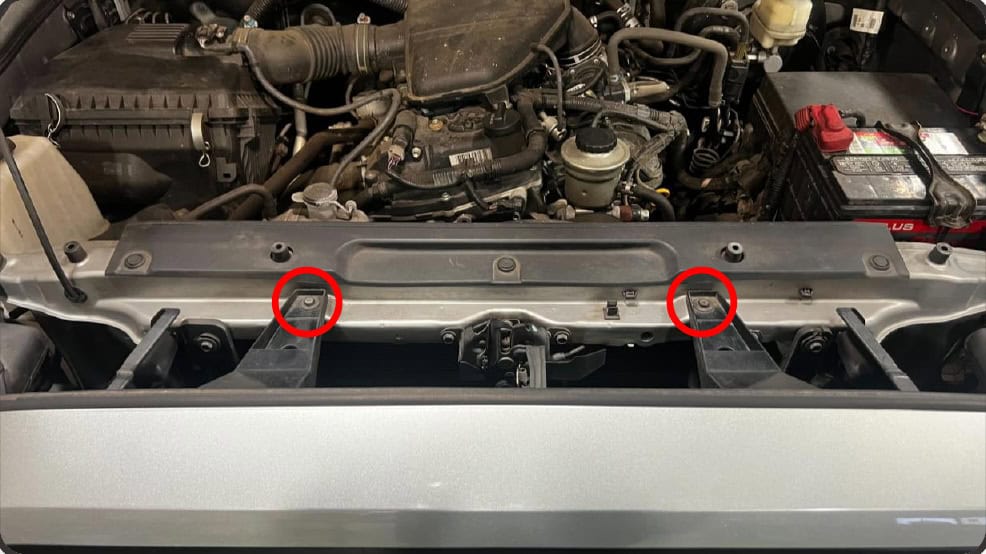
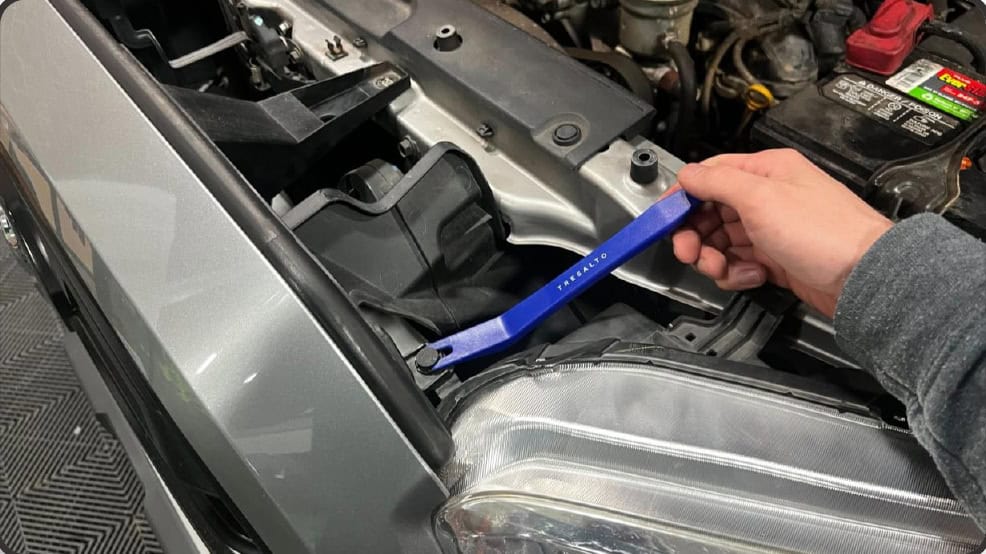
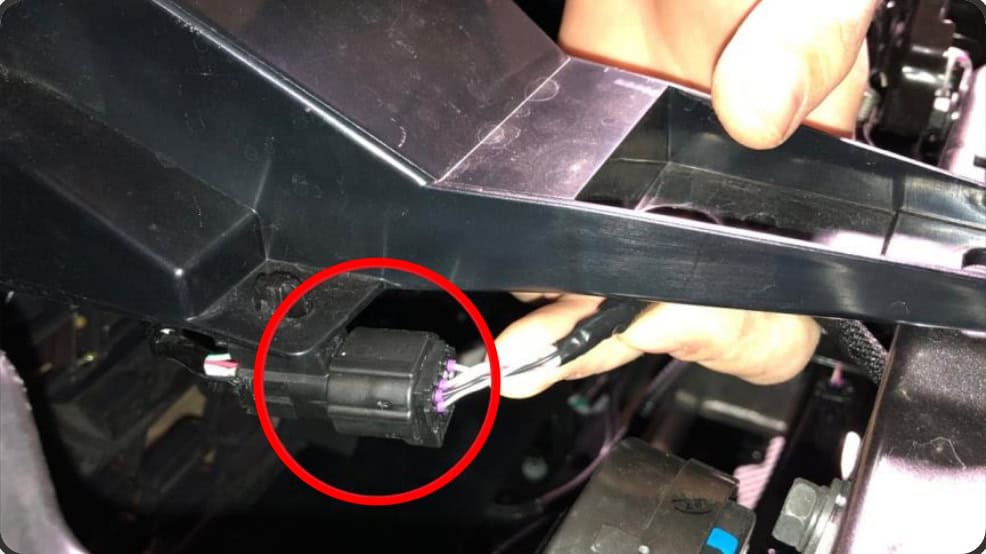
Lift the two upper grille brackets. Pull the grille forward and release the side clips on both sides, then set it aside. Remove the six clips along the top of the bumper cover.
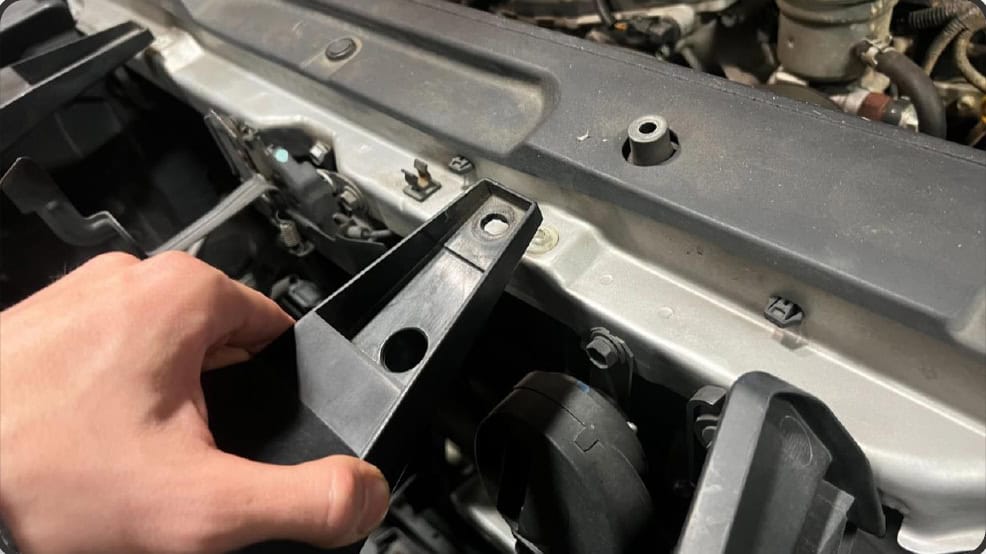
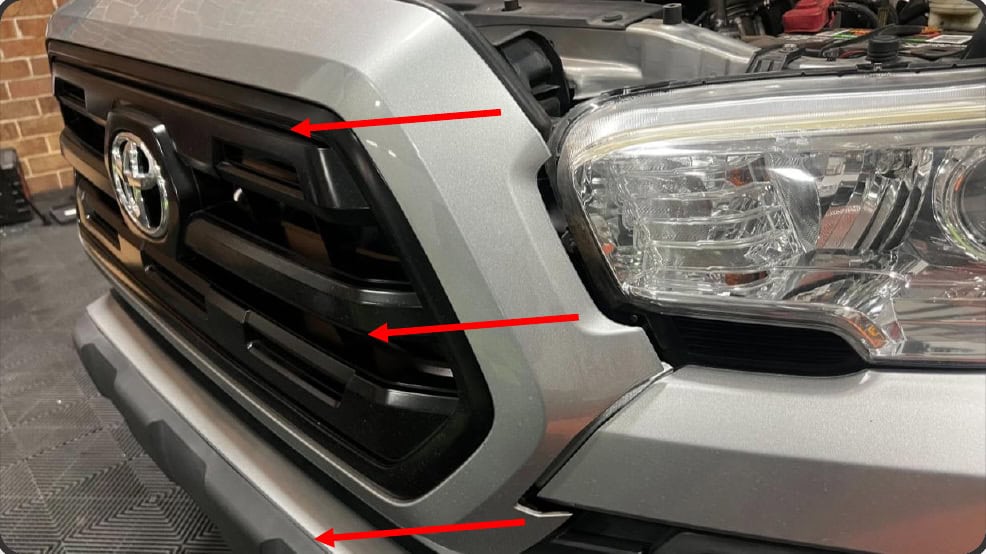
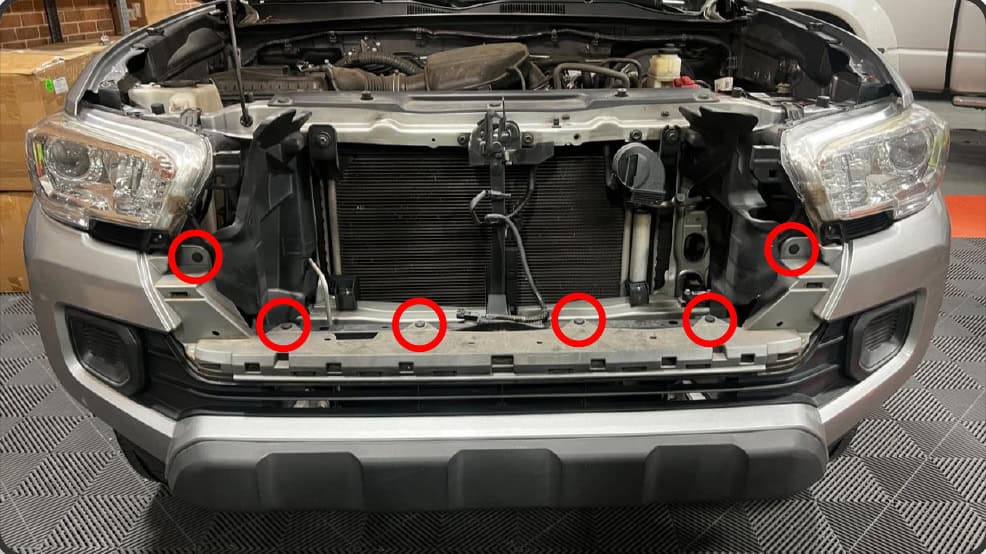
In each wheel well, turn the plastic retainer so its slot is horizontal and remove it, then remove the 10 mm screw. Remove the two bolts at each lower corner and the two bolts beneath the middle of the bumper.
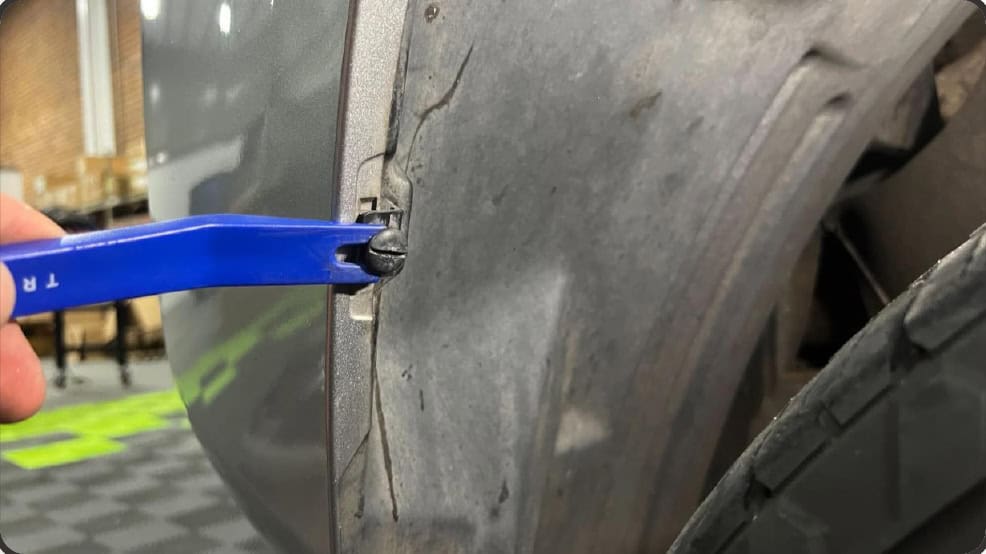
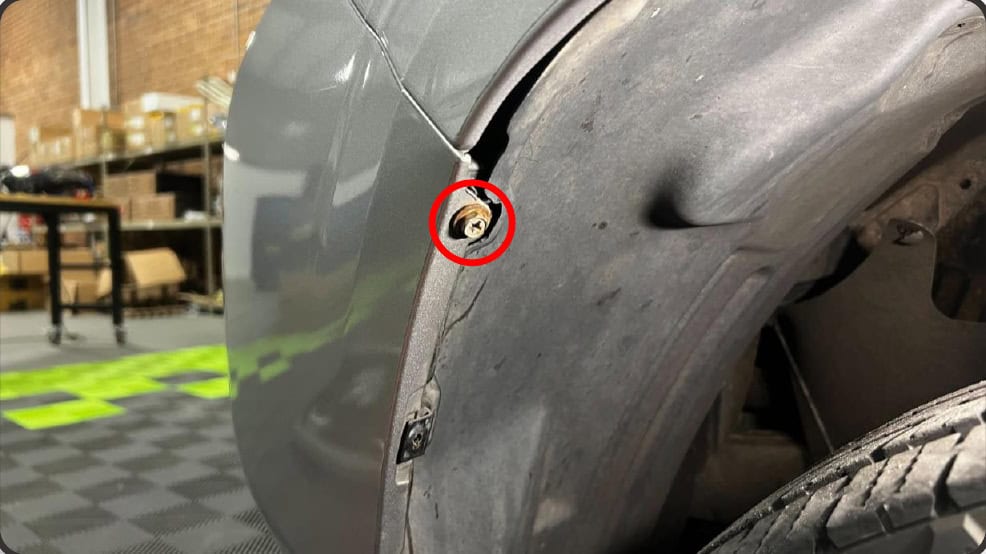
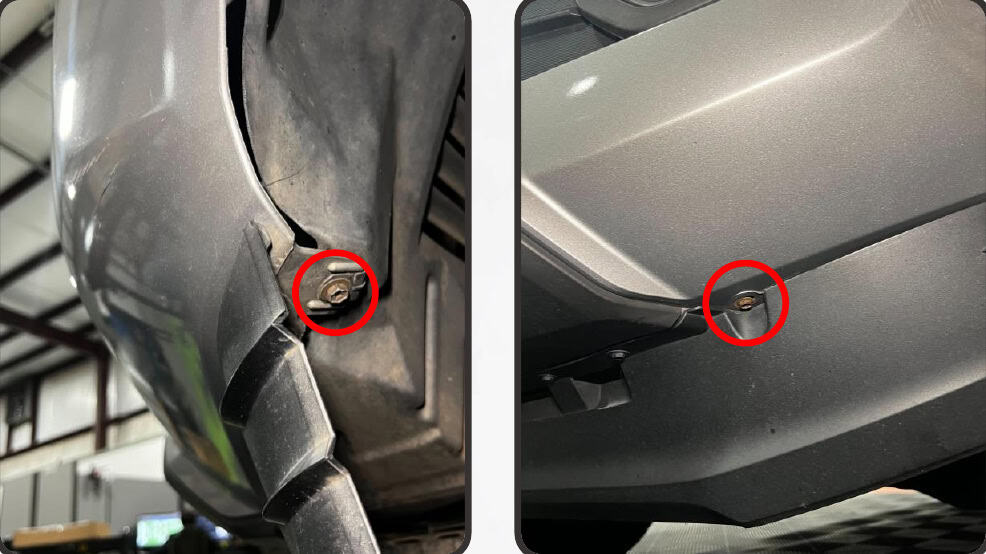
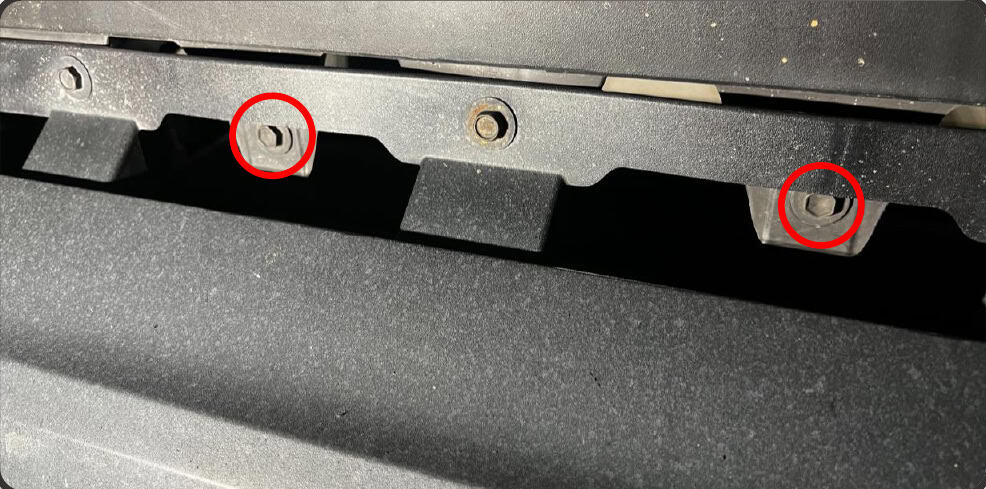
Unplug the factory fog lights if fitted. Release each bumper corner by pulling it back from the tab and then outward from the fender. Support the cover while removing it.
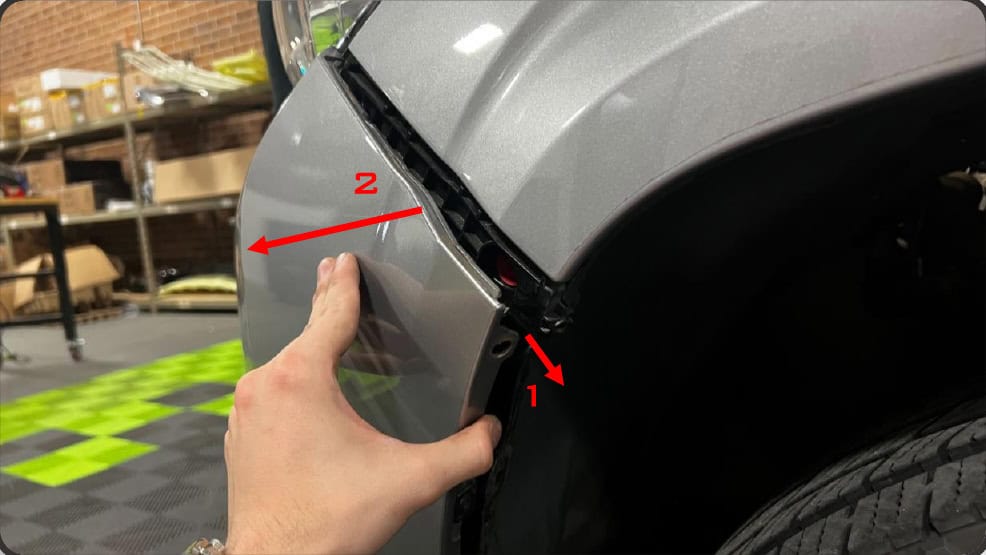
2. Remove the headlights and transfer the trim
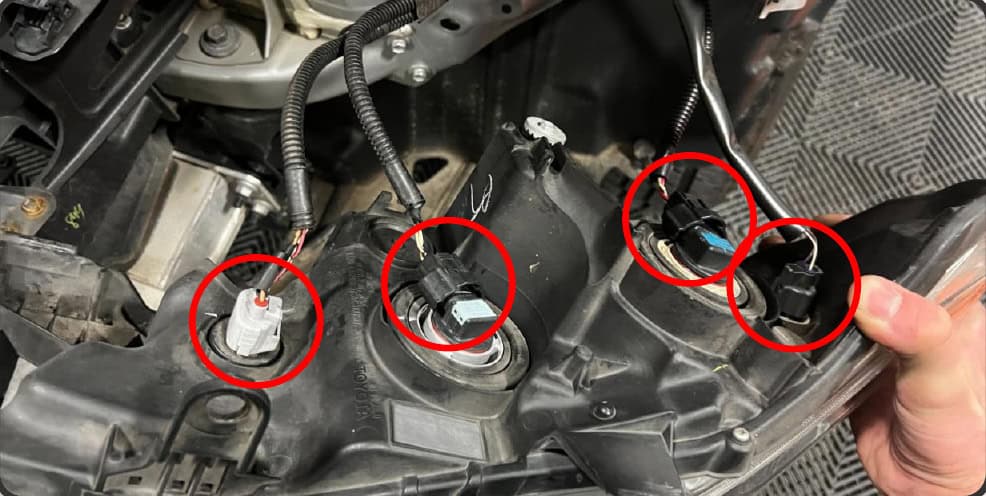
Remove the side bracket bolt and the two upper bolts from the first headlight. Lift the upper tabs, then pull the assembly forward to release its inner clip. Unplug the vehicle connectors. Repeat on the other side.
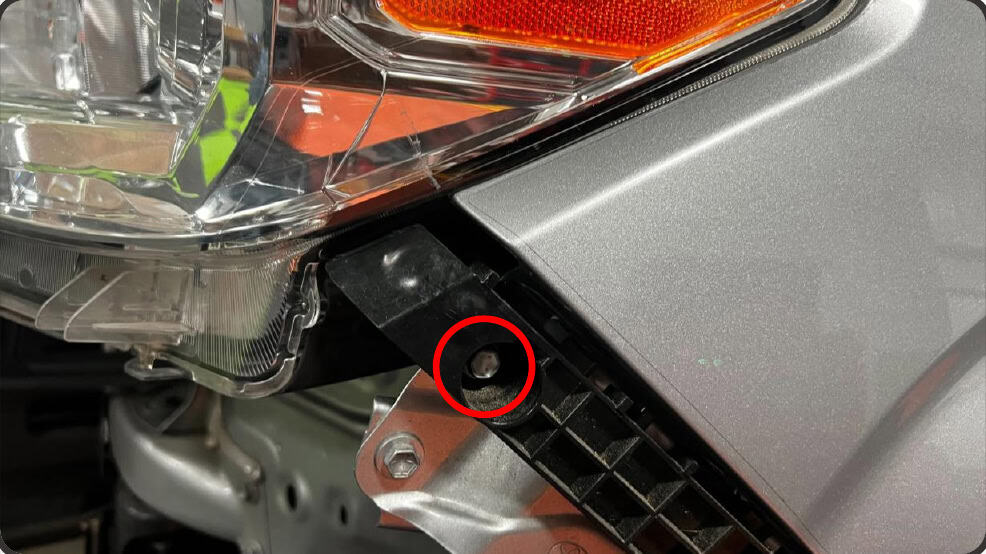
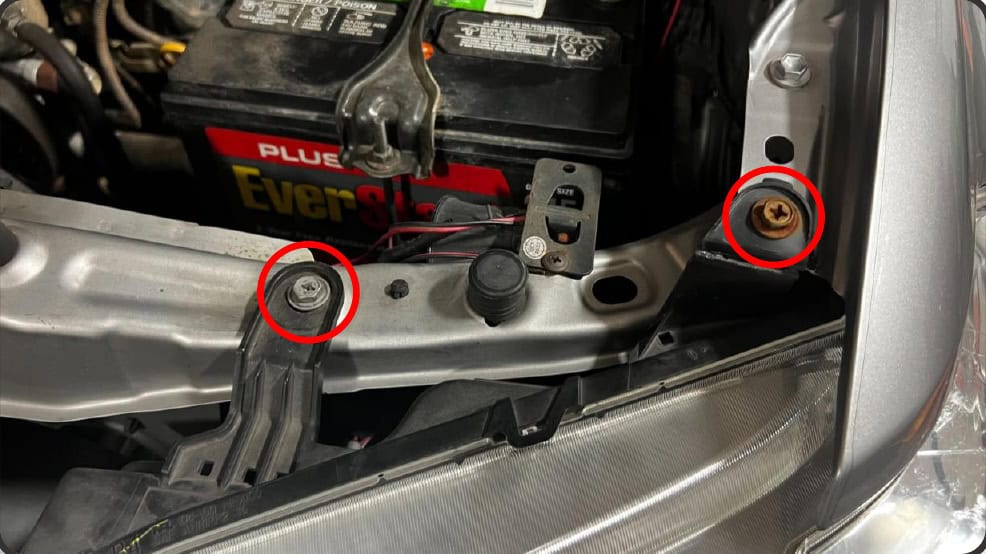
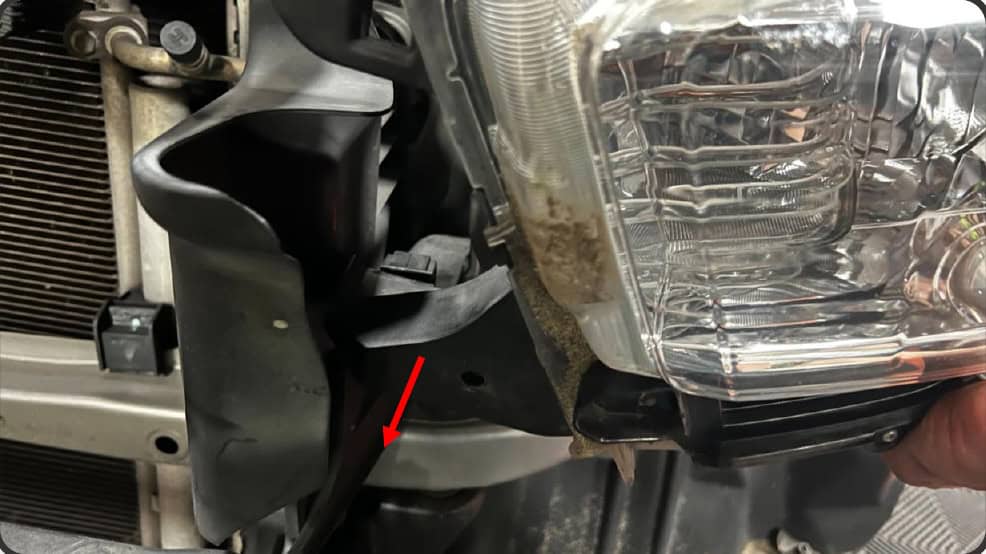
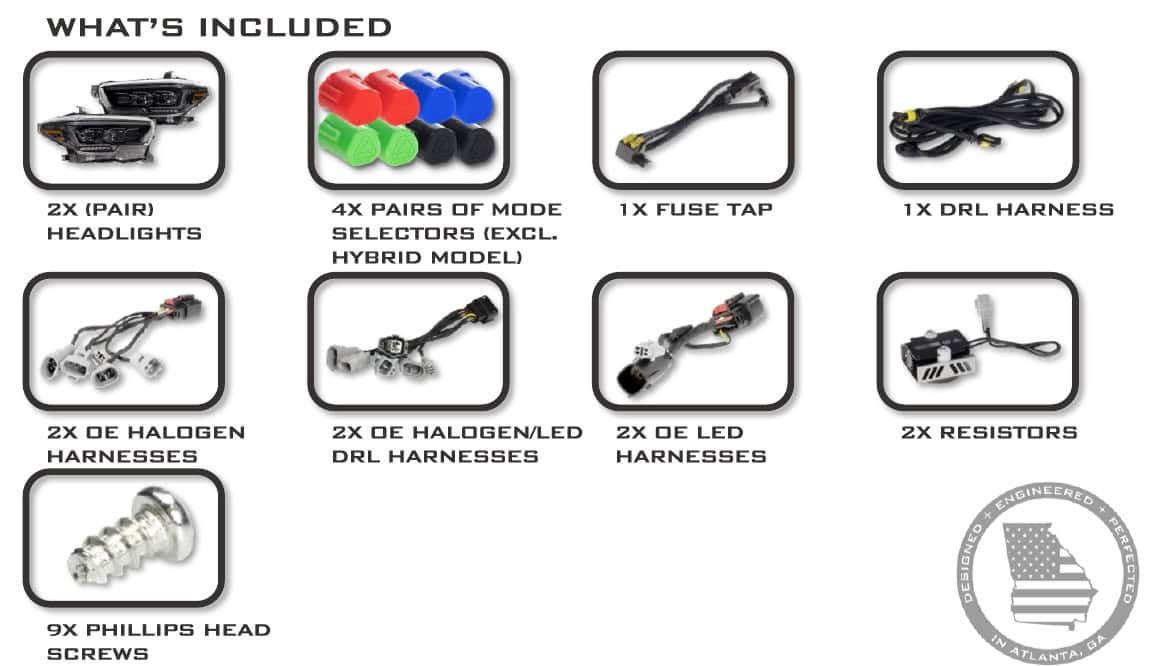
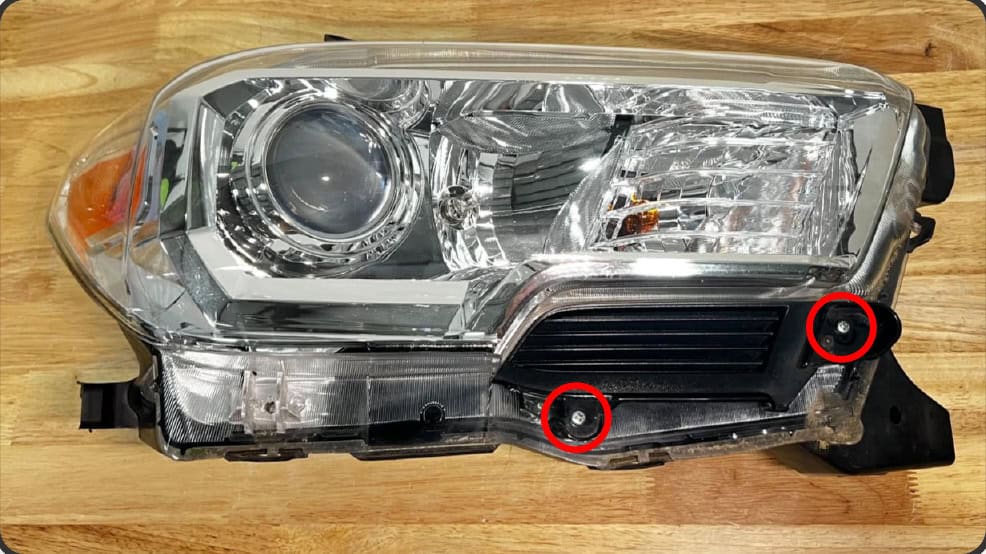
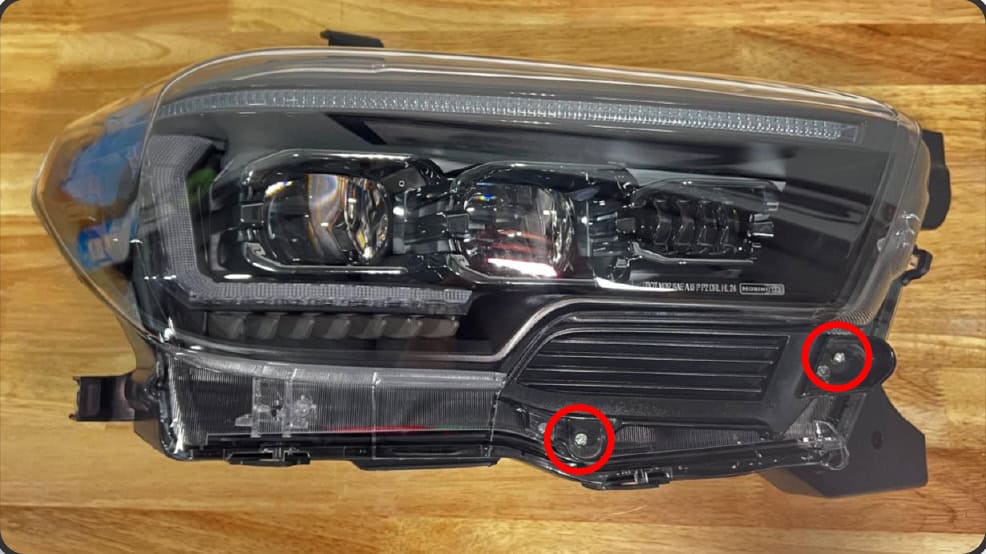
Remove the two Phillips screws retaining the lower trim on each original headlight. Transfer that trim to the corresponding new light using the supplied Phillips screws.
3. Choose the Evo settings before fitting the lights
LF2-530 Evo only: choose a matching pair of keys for the DRL colour and turn-signal style. Fit one key into the three-pin connection on each light. Change keys only with the vehicle and lights off. Evo Hybrid does not use these keys; its white DRL and amber fade-off signal are fixed.
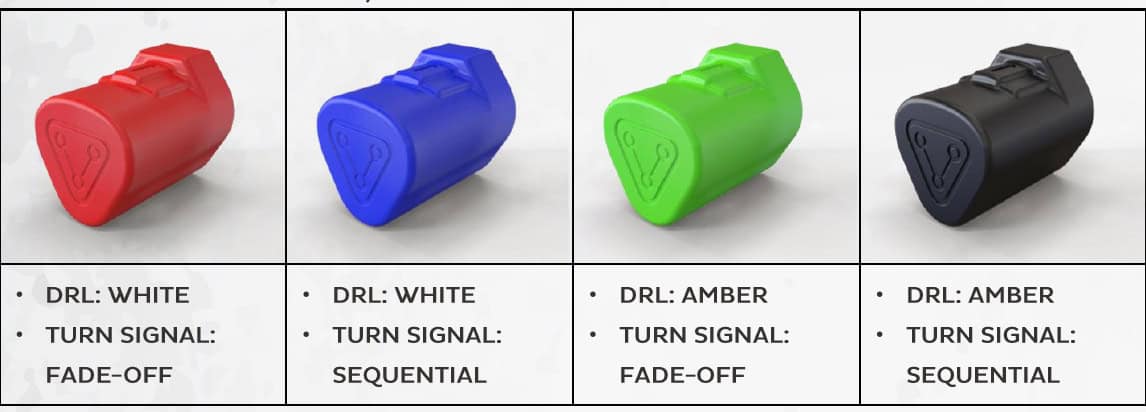
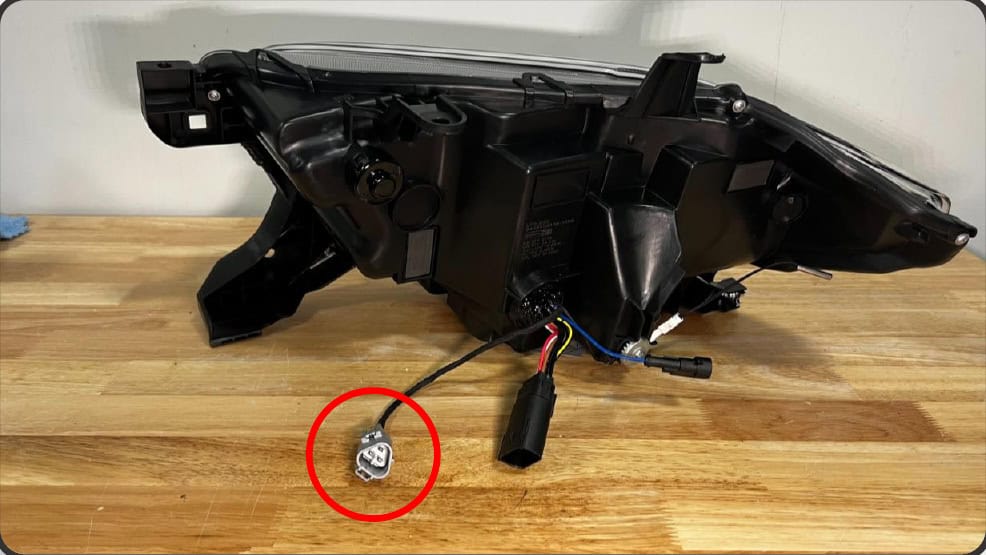
- Red key
- White DRL · fade-off signal
- Blue key
- White DRL · sequential signal
- Green key
- Amber DRL · fade-off signal
- Black key
- Amber DRL · sequential signal
Optional Supercharged drivers
Both models accept the LF2-DRVSC9 driver set. Keep the standard drivers for public-road use; the Supercharged configuration is for off-road use and is not compliant for public roads in the United States or Canada.
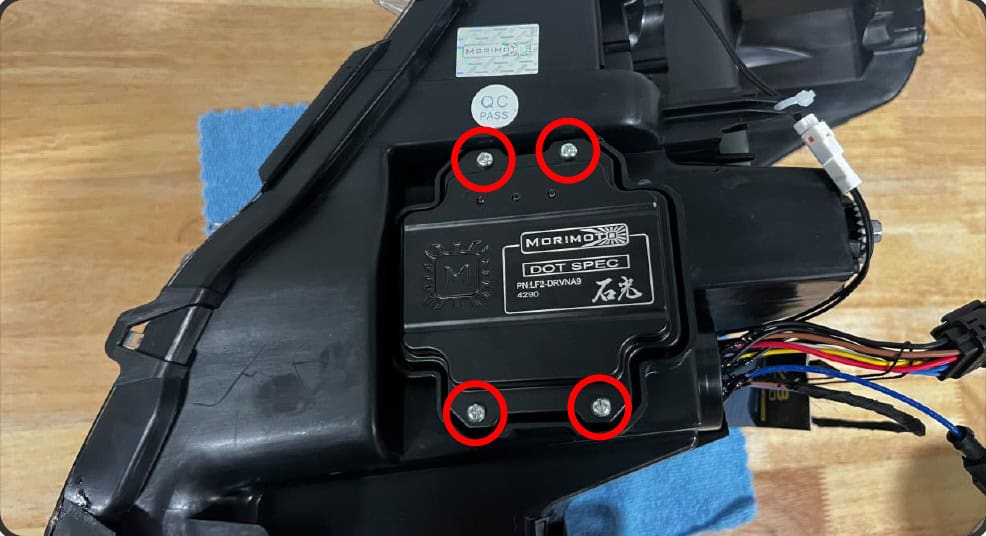
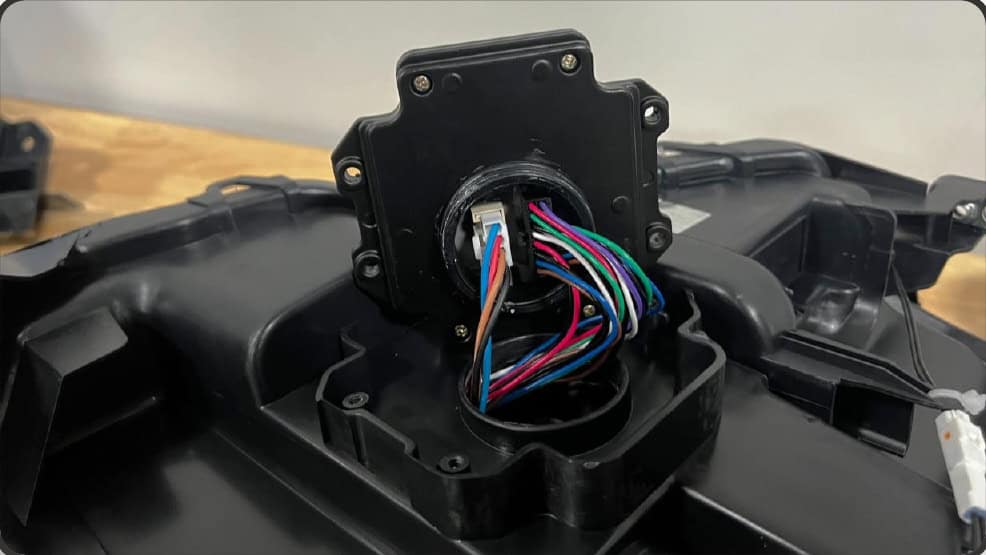
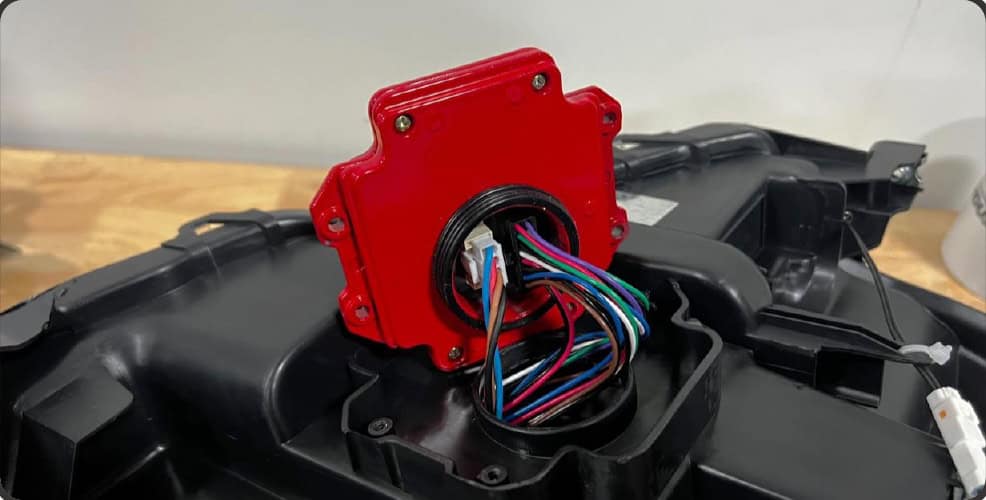
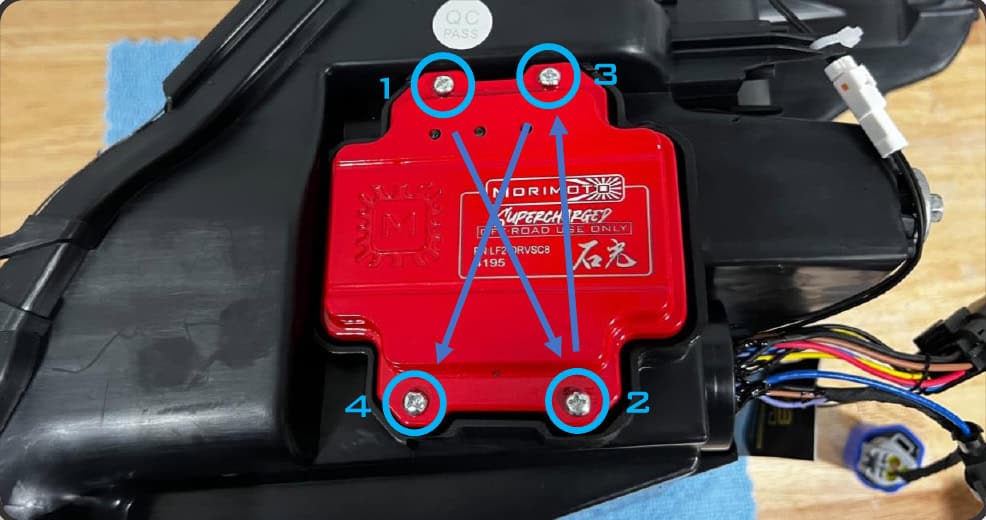
If fitting the optional drivers, remove the four screws from the original driver under each assembly. Lift it out and release the connector clips. Plug in the replacement, check that the connectors latch, and apply a thin layer of the supplied grease around the outer edge of its seal. Seat the seal without pinching or bunching it. Refit the four original screws in a crossing pattern to seat the driver evenly.
4. Match the factory light and connect the adapters
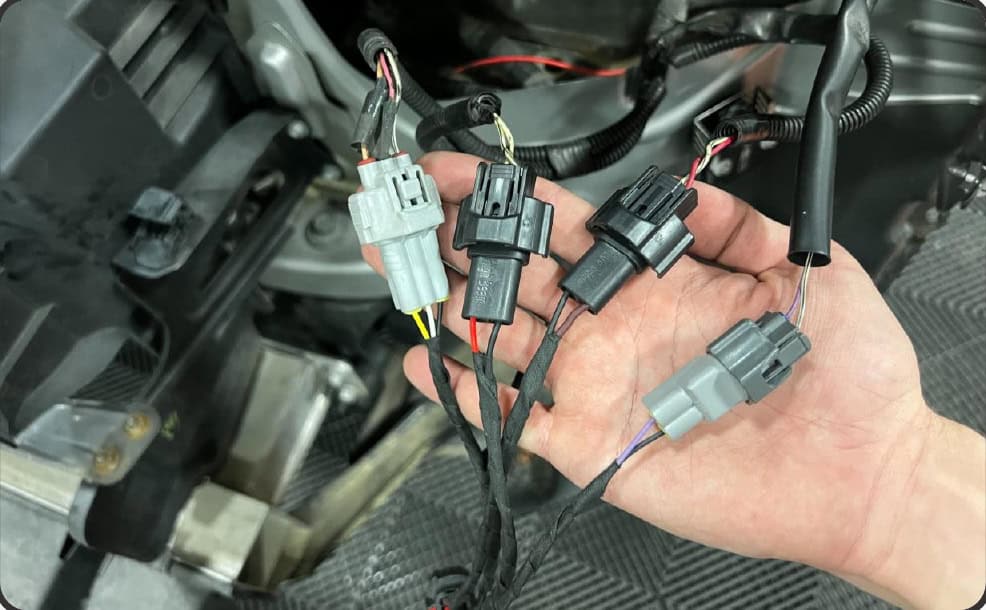
The manual provides three wiring paths. Compare the original lamp and connectors with these manufacturer illustrations, then use the matching supplied adapter. Do not force a connector that does not match.
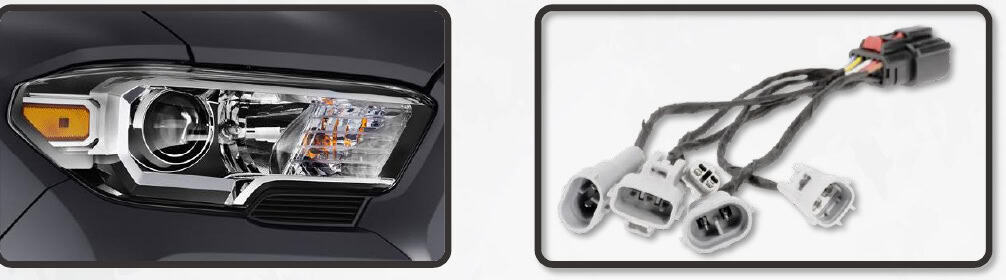
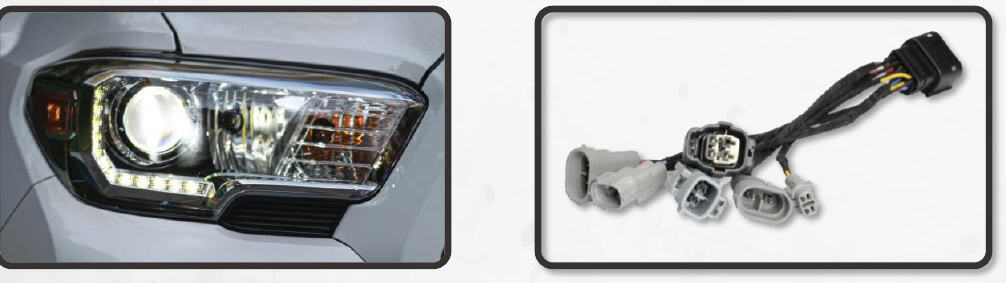
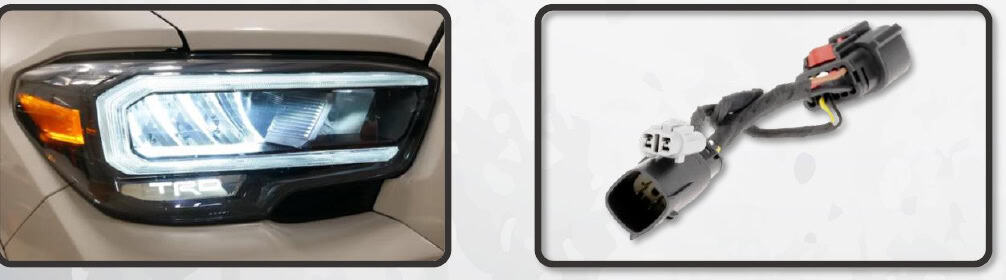
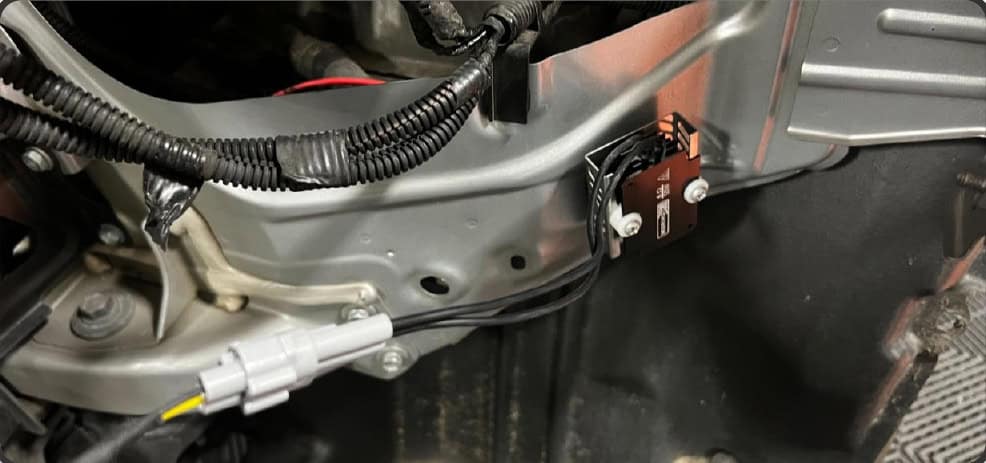
Plug the vehicle connectors into the correct adapter until their clips latch. Mount each resistor magnetically to the metal surface inside its headlight cavity as shown, then connect it to the corresponding adapter lead.
5. Install and route the DRL feed
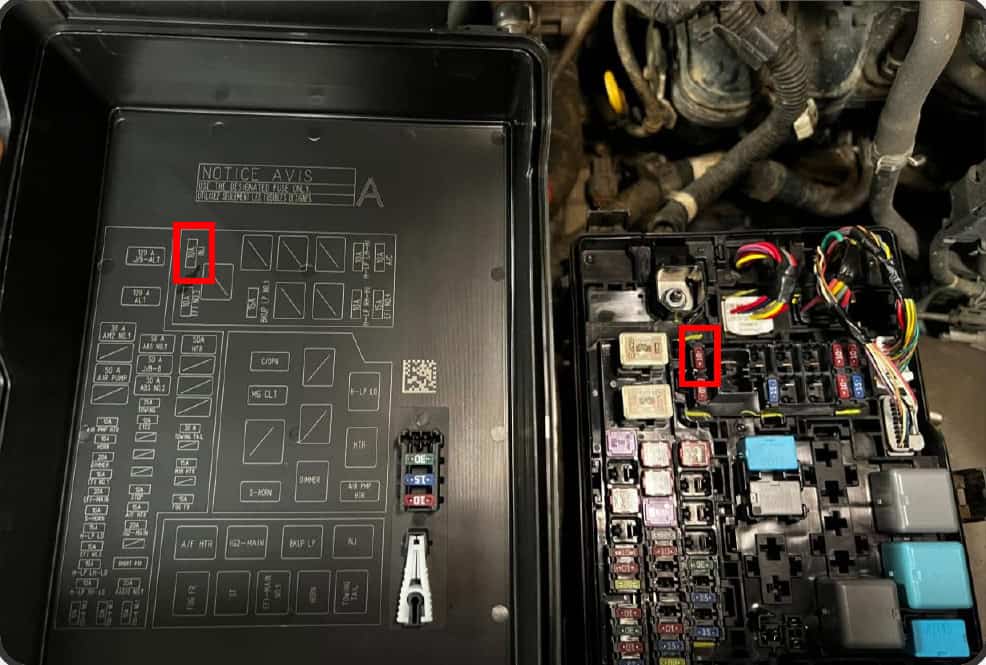
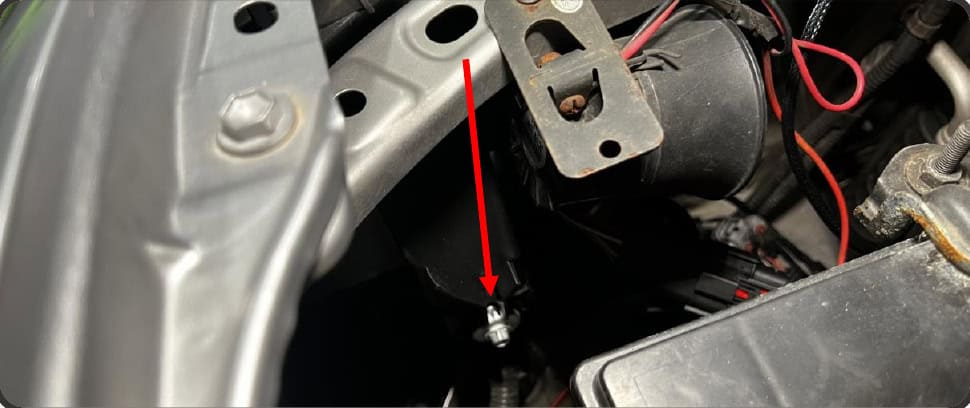
Open the driver-side engine-bay fuse box. Locate the 10A INJ fuse shown in the illustration, remove it and install the supplied fuse tap in that position. Match the pictured location and supplied hardware; this guide does not substitute a different fuse circuit.
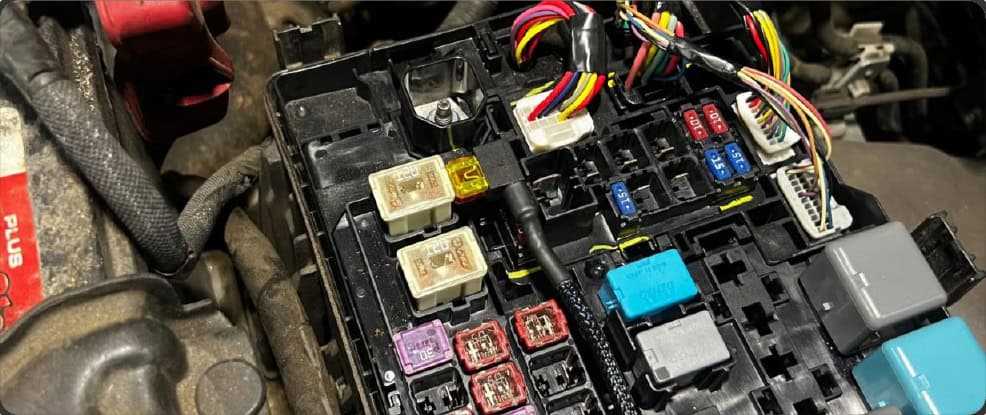
Route the tap lead out of the fuse box. Make a small notch in the lid using a 5.5 mm / 7/32-inch drill bit or suitable cutting tool, only large enough for the wire grommet. Seat the grommet in the notch and refit the lid. Connect the DRL harness to the fuse-tap lead.
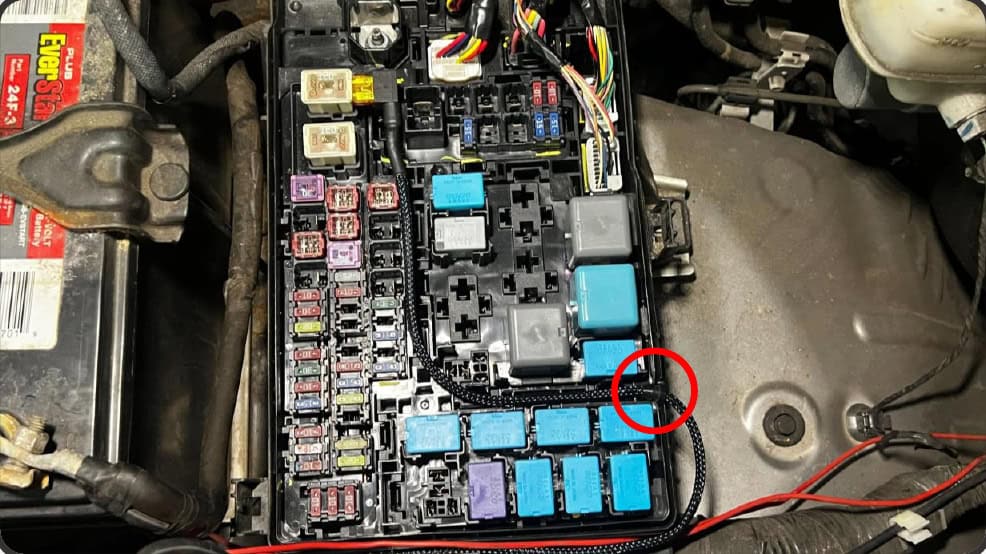
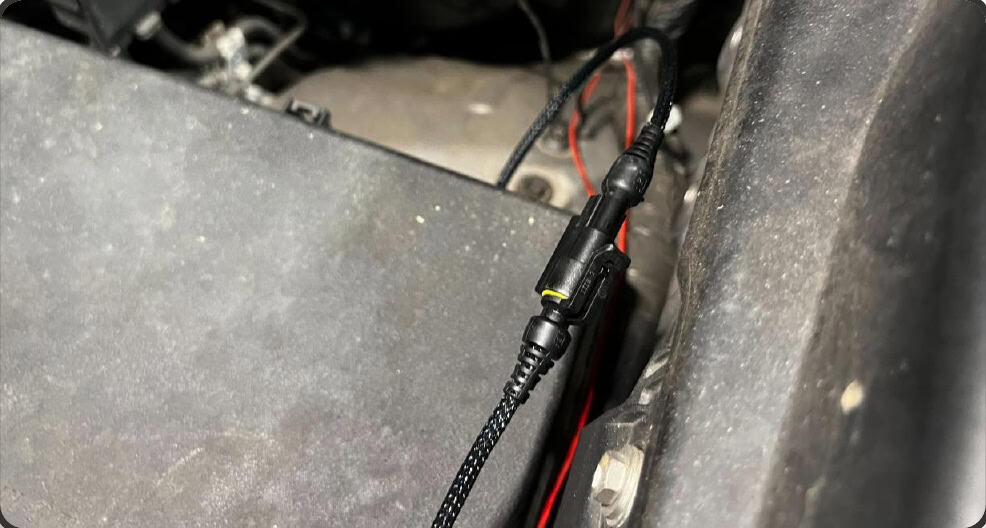
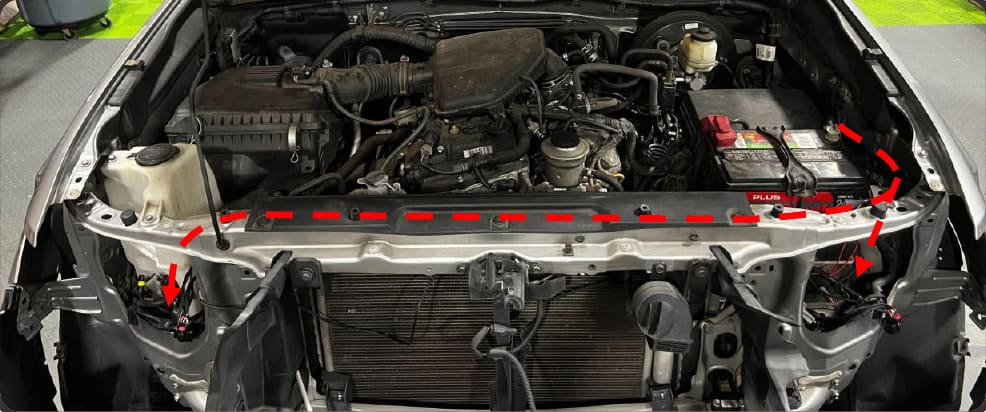
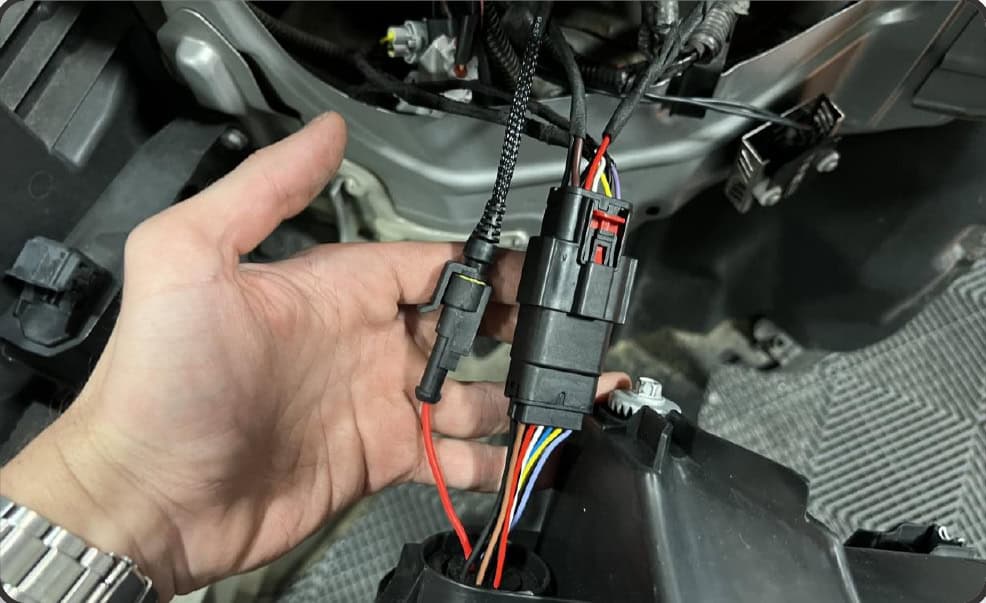
The short branch goes to the driver-side lamp. Run the long branch across the radiator support to the passenger side and secure the harness and loose wiring with cable ties. Connect the DRL feed and equipment adapter to each new headlight.
6. Test the lights and reassemble
Position both assemblies and secure them using the original mounting hardware. Test low beam, high beam, DRL and both turn signals before replacing the bumper and grille.
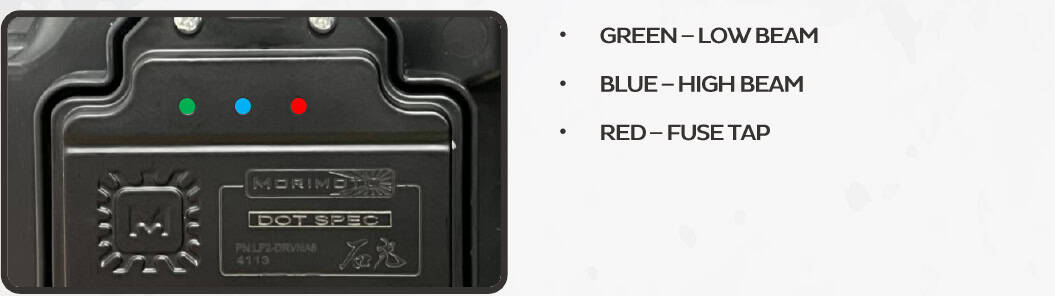
The driver indicator identifies low-beam power in green, high-beam power in blue and fuse-tap power in red. With the supplied DRL feed in use, follow the manual’s instruction to turn off the factory DRL function. Depending on the original equipment, use the stalk’s OFF/DRL OFF position or the vehicle-menu setting.
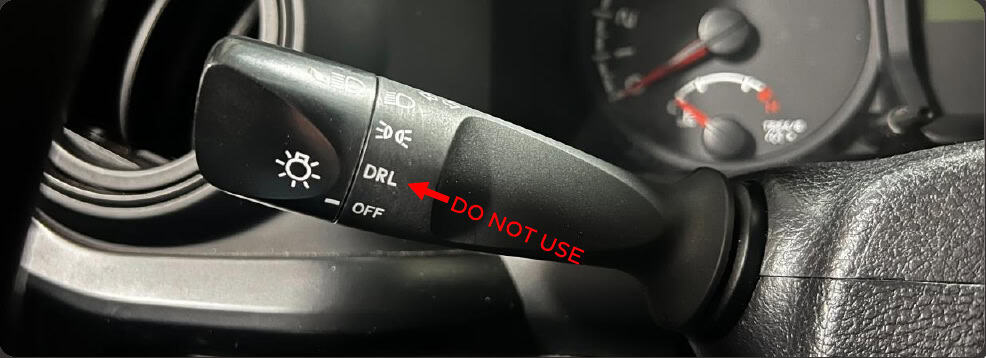
For the pictured menu path: Menu → Setup → Vehicle → Vehicle Customization → Lights Settings → Daytime Running Lights → OFF. Refit the bumper cover and grille in the reverse removal order, reconnecting the fog lights and grille sensor where fitted.
7. Aim before road use
Park on level ground, square to a wall, 25 feet away. Measure from the ground to the optical centre of the outermost projector. Use a long Phillips screwdriver at the rear adjuster.
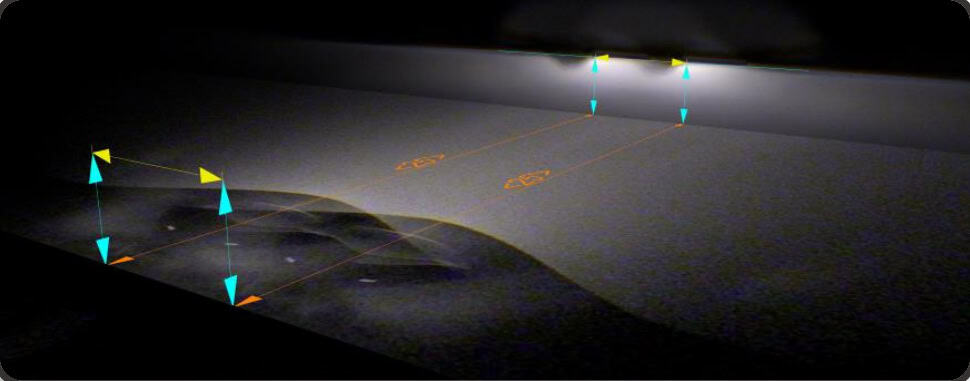
- Projector height up to 40 inches
- Set the cutoff at the same height.
- Above 40 and up to 44 inches
- Set the cutoff 2 inches below projector height.
- Above 44 inches
- Set the cutoff 3 inches below projector height.
Do not turn the adjuster more than three full rotations in either direction. Over-adjustment can damage the mechanism.
Frost-Free operation: Evo only
LF2-530 Evo uses a heater and circulation fans to help reduce snow and ice accumulation while driving. LF2-530Y Evo Hybrid does not have this system. Clear heavy accumulated snow or ice before driving; the heater is not intended to clear a thick overnight covering.
- Start the vehicle and let the welcome sequence finish.
- In cold conditions, flash the high beams four times within four seconds.
- Two response flashes indicate that the system is actively powering the heater and fans. One response flash acknowledges the request while the system is in standby because operating conditions are not met.
- Once requested, heating cycles automatically as required. Repeat four flashes within four seconds to switch it off; one response flash confirms deactivation.
The system returns to its default off state when the ignition is fully switched off. Ambient temperature, lens temperature, heater temperature and available battery voltage affect operation. Morimoto’s main instruction states at or below 5°C / 41°F, while a later condition uses “below”; do not treat a particular response at exactly 5°C as guaranteed.
Choose your headlight and keep the instructions handy
Read the Tacoma heated-headlight fitment guide · Explore Tacoma lighting
Original BTS instructions based on Morimoto’s LF2-530 / LF2-530Y installation manual, retrieved October 24, 2026. Illustrations are manufacturer installation media. The retrieved PDF displays no revision date. Manufacturer PDF.