

BTS installation guide · 2016–2023 Tacoma
Install a Tacoma Stealth lightbar
Fit the brackets, position the lightbar behind the lower grille, connect the harness and set the aim.
Check the kit and prepare
This guide covers the 2016–2023 Tacoma factory bumper using the Diode Dynamics Stealth kit. The vehicle mounting procedure covers Classic and current SS30 kits; their lightbar wiring and features differ. Match the connector and supplied harness to your actual kit.
Have a 10 mm socket and wrench, 12 mm socket, trim tool and a cutting tool if you plan to trim the air deflectors. A second person helps position and aim the bar. Work with the engine off and the vehicle secured; disconnect power while making electrical connections.
1. Release the upper grille
Remove the two upper grille bolts with a 10 mm socket, then release the two push clips.
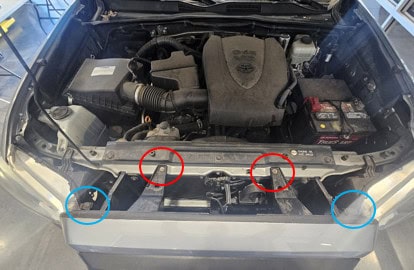
2. Remove the grille
Pull straight forward to release the remaining clips; set the grille aside safely.
3. Release the air deflectors
Remove one push clip from each air deflector behind the grille.
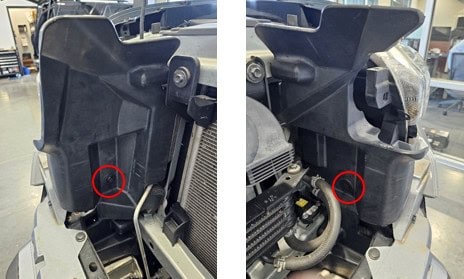
4. Remove the air deflectors
Rotate each deflector inward and pull it out.
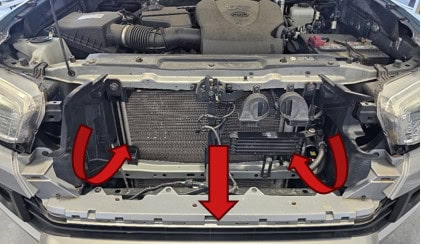
5. Remove the crash-bar nuts
Remove two nuts per side with a 12 mm socket.
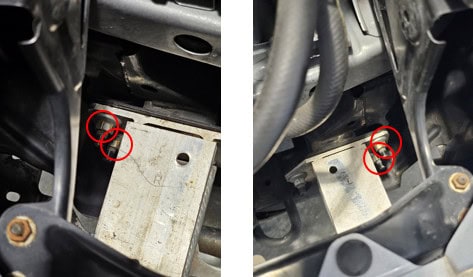
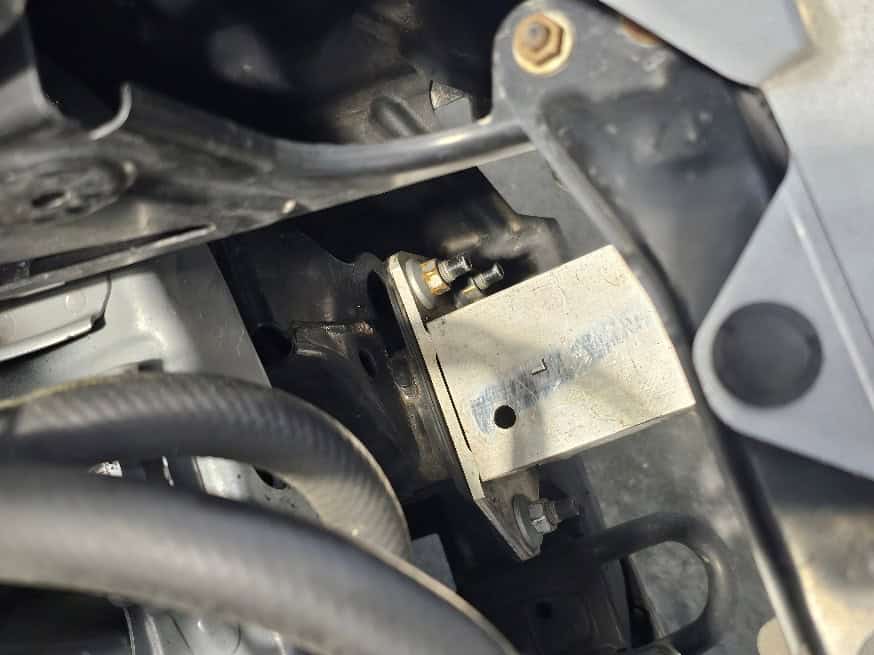
6. Fit the driver-side bracket loosely
Position the bracket on the crash bar and loosely refit its nuts. Leave it adjustable.
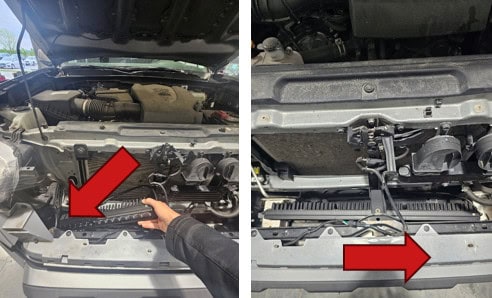
7. Position the lightbar
Feed the bar through the passenger-side fog-light opening with its harness toward the driver side. Lower it, then slide it toward the passenger side until centred.
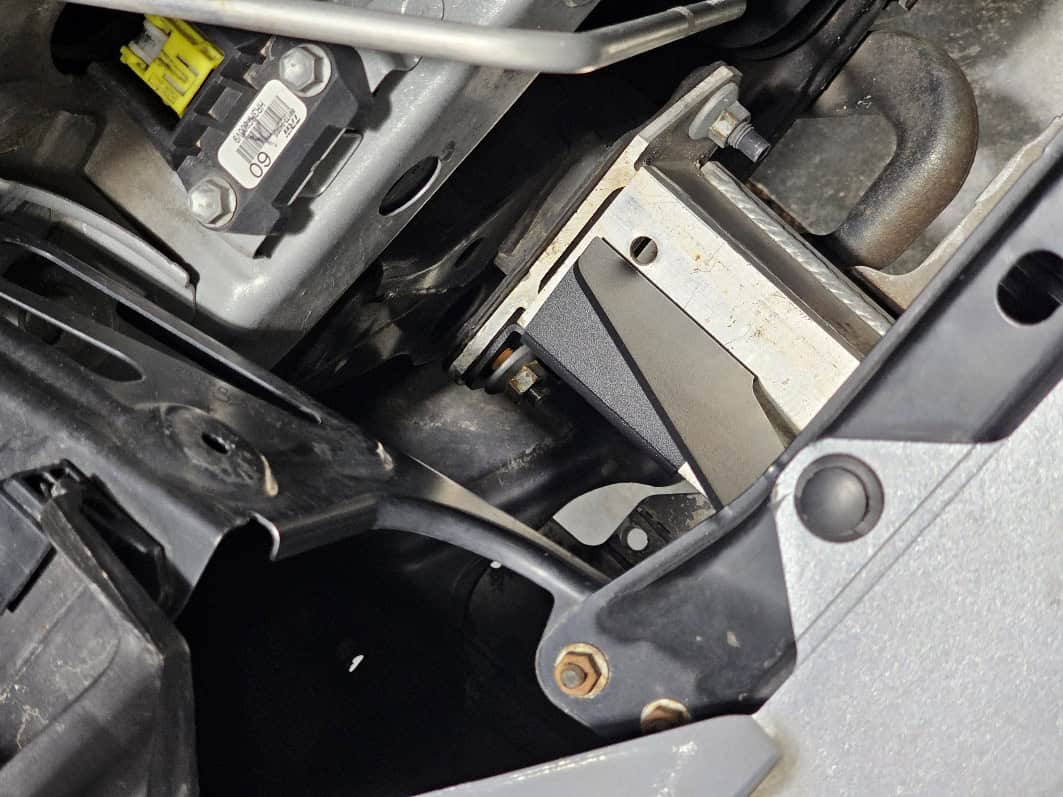
8. Fit the passenger-side bracket
Place the passenger-side bracket and loosely start its nuts.
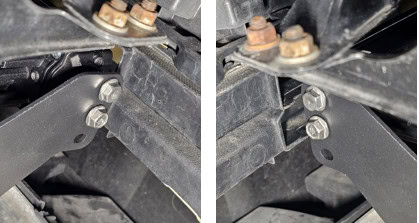
9. Attach the lightbar
Use the supplied hardware at the upper mounting holes. Keep the assembly loose for alignment; have another person support the bar.
10. Torque and aim
Tighten the crash-bar nuts to 43 ft-lb. Set the vertical aim, then tighten the lightbar mounting hardware with a 10 mm wrench. This torque is for the crash-bar nuts, not every bolt.
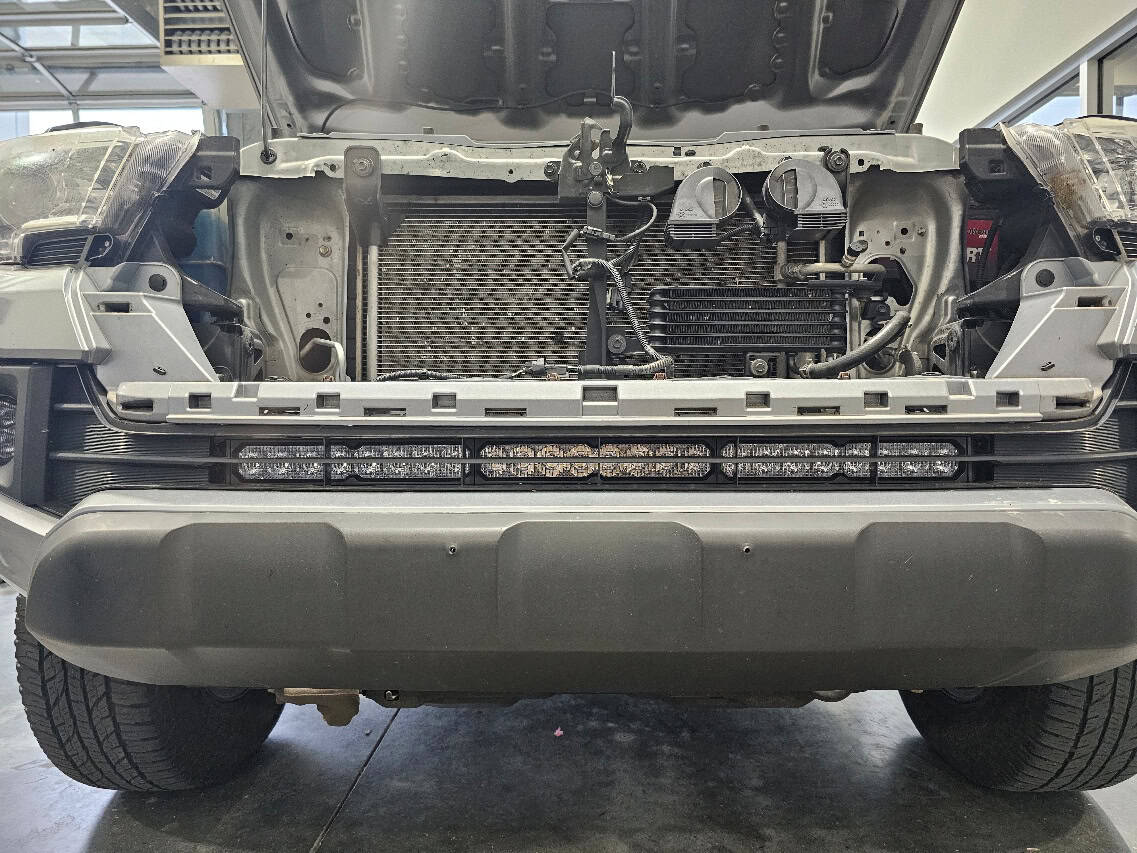
11. Route the pigtail
Bring the lightbar pigtail behind the headlight and up into the engine bay.
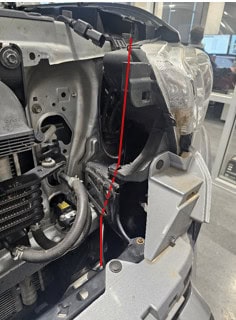
12. Trim the air deflectors if refitting
Optional: trim the deflectors as shown. The removed lower portions are not reused.
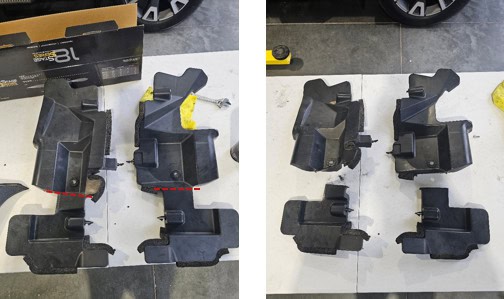
13. Refit the trimmed deflectors
If you chose to trim and reuse them, reinstall the retained deflectors in reverse removal order.
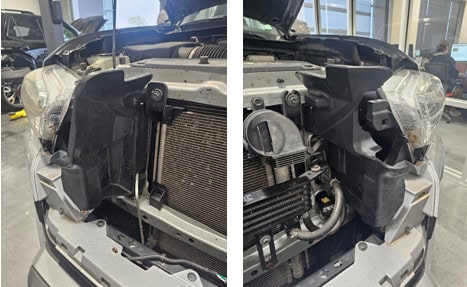
14. Connect the harness
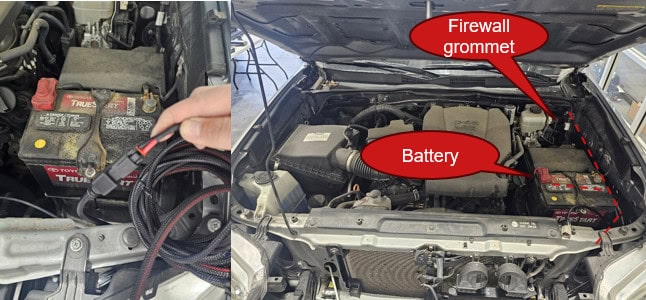
Connect the matching lightbar and power harness. Route toward the battery, using the factory firewall grommet where needed for switch wiring. Follow the wiring section for the current SS30 Standard system.
15. Refit and inspect the grille
Reinstall the grille, clips and upper bolts. Check cable clearance, operation and aim before use.
Current SS30 Standard wiring
The new SS30 has a DTP connector on a lead from the side of the bar. Use the matched high-current harness. Locate the relay near the battery; connect the red input to battery positive and black to battery negative or a suitable factory ground.
| Control method | Connection |
|---|---|
| Included switch | Route its wiring safely into the cabin. If fitting the supplied toggle, the general harness instructions specify a 3/4-inch mounting hole. Reconnect the red switch wire in the centre position. |
| Compatible auxiliary switch | Replace the switch lead at the white connector with the supplied auxiliary pigtail. Yellow triggers the main beam and blue triggers the backlight. The relay harness supplies lamp current from the battery. |
The yellow trigger wire on that auxiliary pigtail is not a universal colour code for every lamp wire. Follow the diagram supplied with your exact harness. Keep cables away from heat and moving parts, protect firewall passages and secure connections.
These Standard kits have a fixed main-beam colour and an amber backlight. No SmartSelect programming is required. Classic bars use their own matching harness and do not gain the new bar’s backlight circuit.
For a custom circuit, have the wire gauge, fuse and switch/relay capacity sized for the actual bar current and cable length. Sport is 120 W and Pro is 165 W; do not choose a harness from a lower-power pod example.
SS30 reference dimensions and hardware
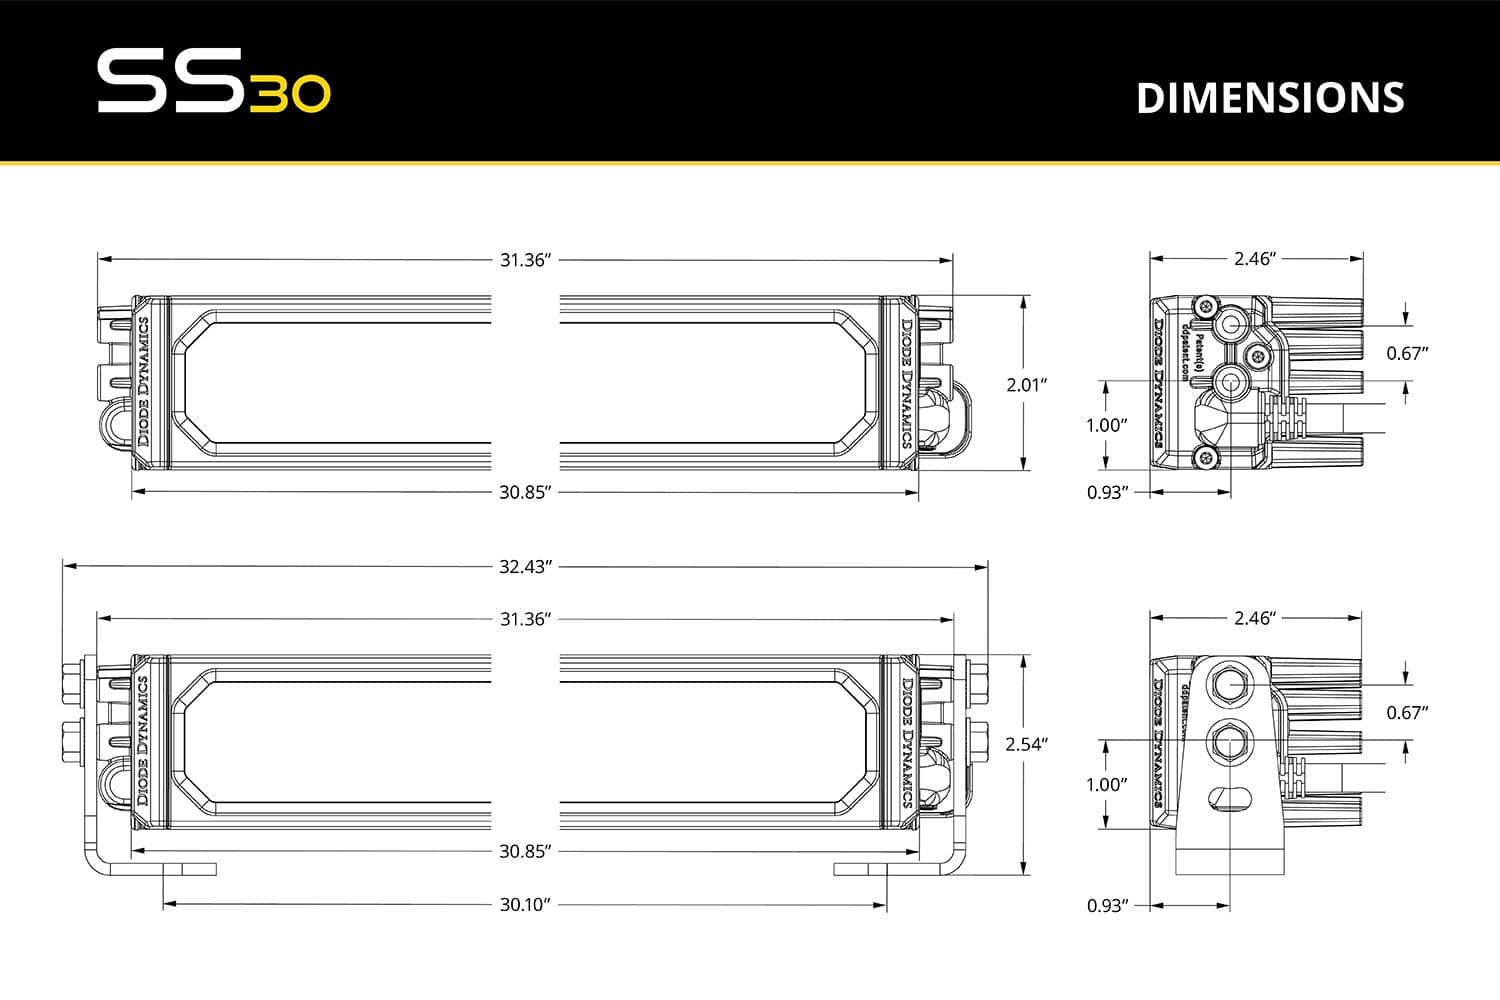
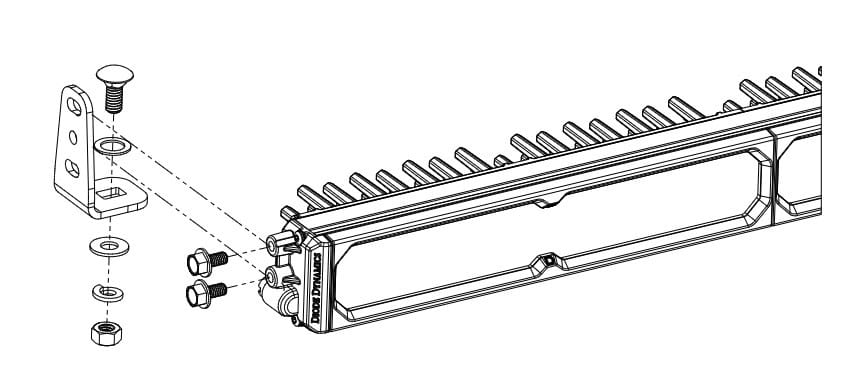
The universal bracket diagram is a component reference, not a replacement for the Tacoma mounting sequence. Classic dimensions and hardware differ.
Manufacturer installation demonstration
Filmed on a 2016–2019 Tacoma with the Classic lightbar. Use the current 2016–2023 written procedure above and the harness supplied with your bar.
Manuals and compatible products
Original Tacoma mounting instructions · Current Stage Series component and wiring instructions