

BTS installation guide
Install the JL eight-pod SS5 windshield bar
Fit the bracket spacers at the correct heights, route wiring behind the brackets, and adjust the CrossLink supports against the windshield frame.
Prepare the Jeep and linked bar
For 2018–2026 Jeep Wrangler JL. A 2018 Wrangler can be JK or JL; confirm the generation. Check aftermarket bumper, winch, fairlead and accessory clearance against the mounting diagram before ordering. Installation photos may show other lights that are not included.
Use a T40 Torx bit, ratchet and the hand tools supplied or specified for the CrossLink hardware. This guide explains the Wrangler JL installation; the original manufacturer article also covers the separate 2020–2026 Gladiator JT application.
Install the spacers and both windshield brackets
Remove the four driver-side cowl bolts with the T40 tool. Place the two longer spacers at the upper mounting points near the wiper, and the two shorter spacers at the lower points near the door hinge.
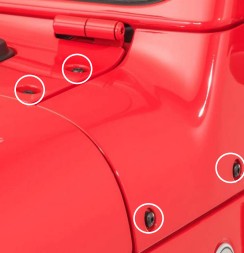
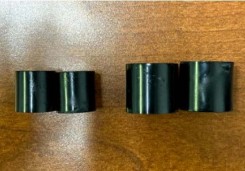
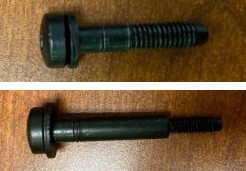
Route the harness behind the bracket before fitting it. Use the longer replacement bolts at the upper points and shorter bolts at the lower points. Repeat the same procedure on the passenger side.
Fit and support the eight-pod bar
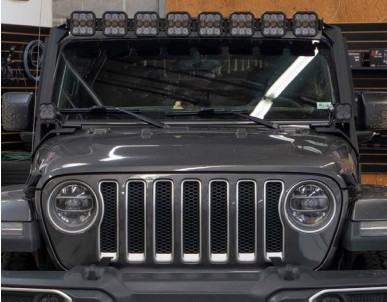
Assemble the bar using the SS5 CrossLink assembly, wiring and backlight guide. Mount it loosely to the windshield brackets with the supplied M6 hardware. Adjust its aim and set the support rubber bumpers against the windshield frame. With another person applying outward tension, tighten the CrossLink supports to reduce vibration, then tighten the remaining hardware.
Connect main beam and backlight separately
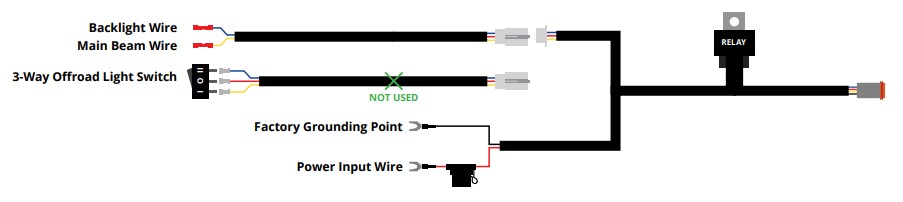
Route the supplied harness securely through the engine bay. For the factory AUX branch, connect the yellow main-beam control and blue backlight control to separate suitable switch leads. Follow the supplied relay-harness diagram for its fused main power input and ground. If no factory switch bank is fitted, use the included toggle-switch adapter. Test both functions and secure the loom clear of heat and movement.
White-lens kits produce a 6000K main beam and allow eight selectable backlight colours. Yellow-lens kits produce a 3000K main beam and Amber backlight only. Backlight programming changes the accent, not the main-beam colour. Use these auxiliary lights only where permitted.
Use the SS5 CrossLink assembly, wiring and backlight guide for the shared backlight programming and reset procedure.
Manufacturer vehicle-specific demonstration.
Select the kit and retain the original guide
Shop the eight-pod Sport windshield kit · Original manufacturer article