

BTS LIGHTING · INSTALLATION GUIDE
Morimoto White Rock Light Installation Guide
Plan the four-, six- or eight-pod layout, connect switched power and mount the lamps using the original Morimoto diagrams.
Choose the diagram for your kit
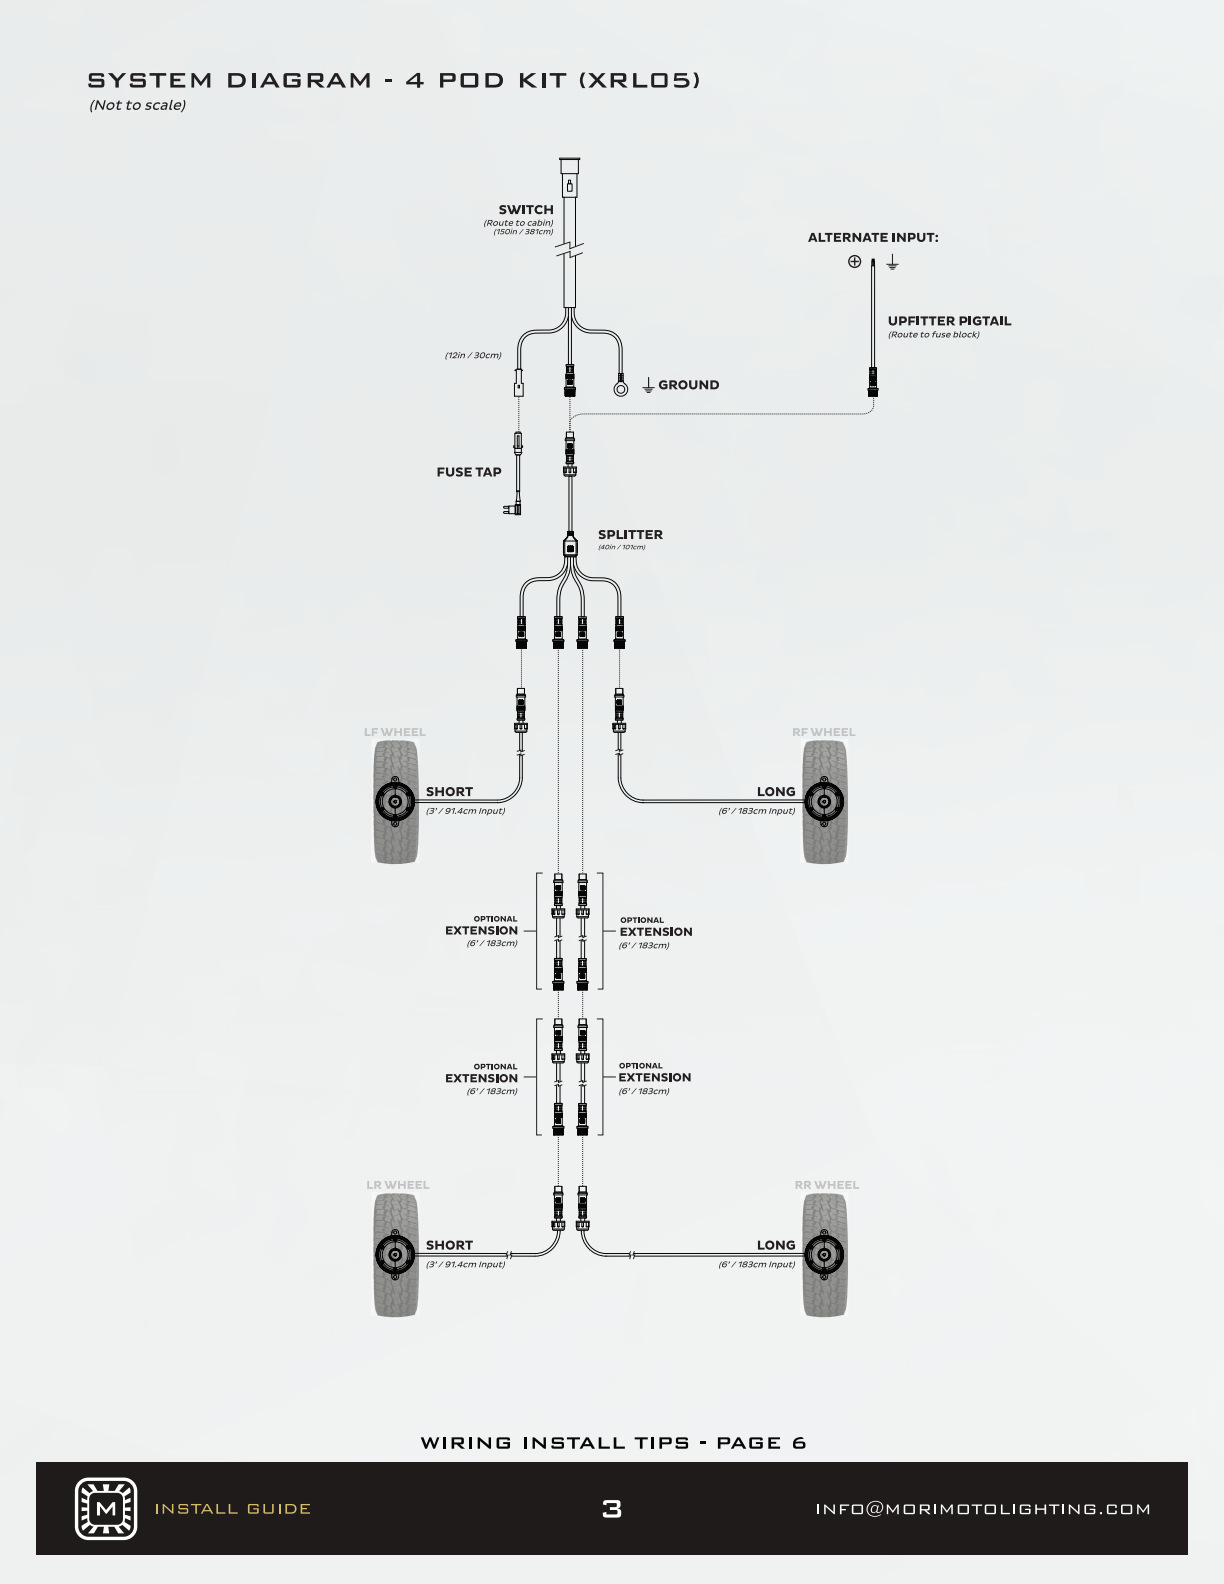
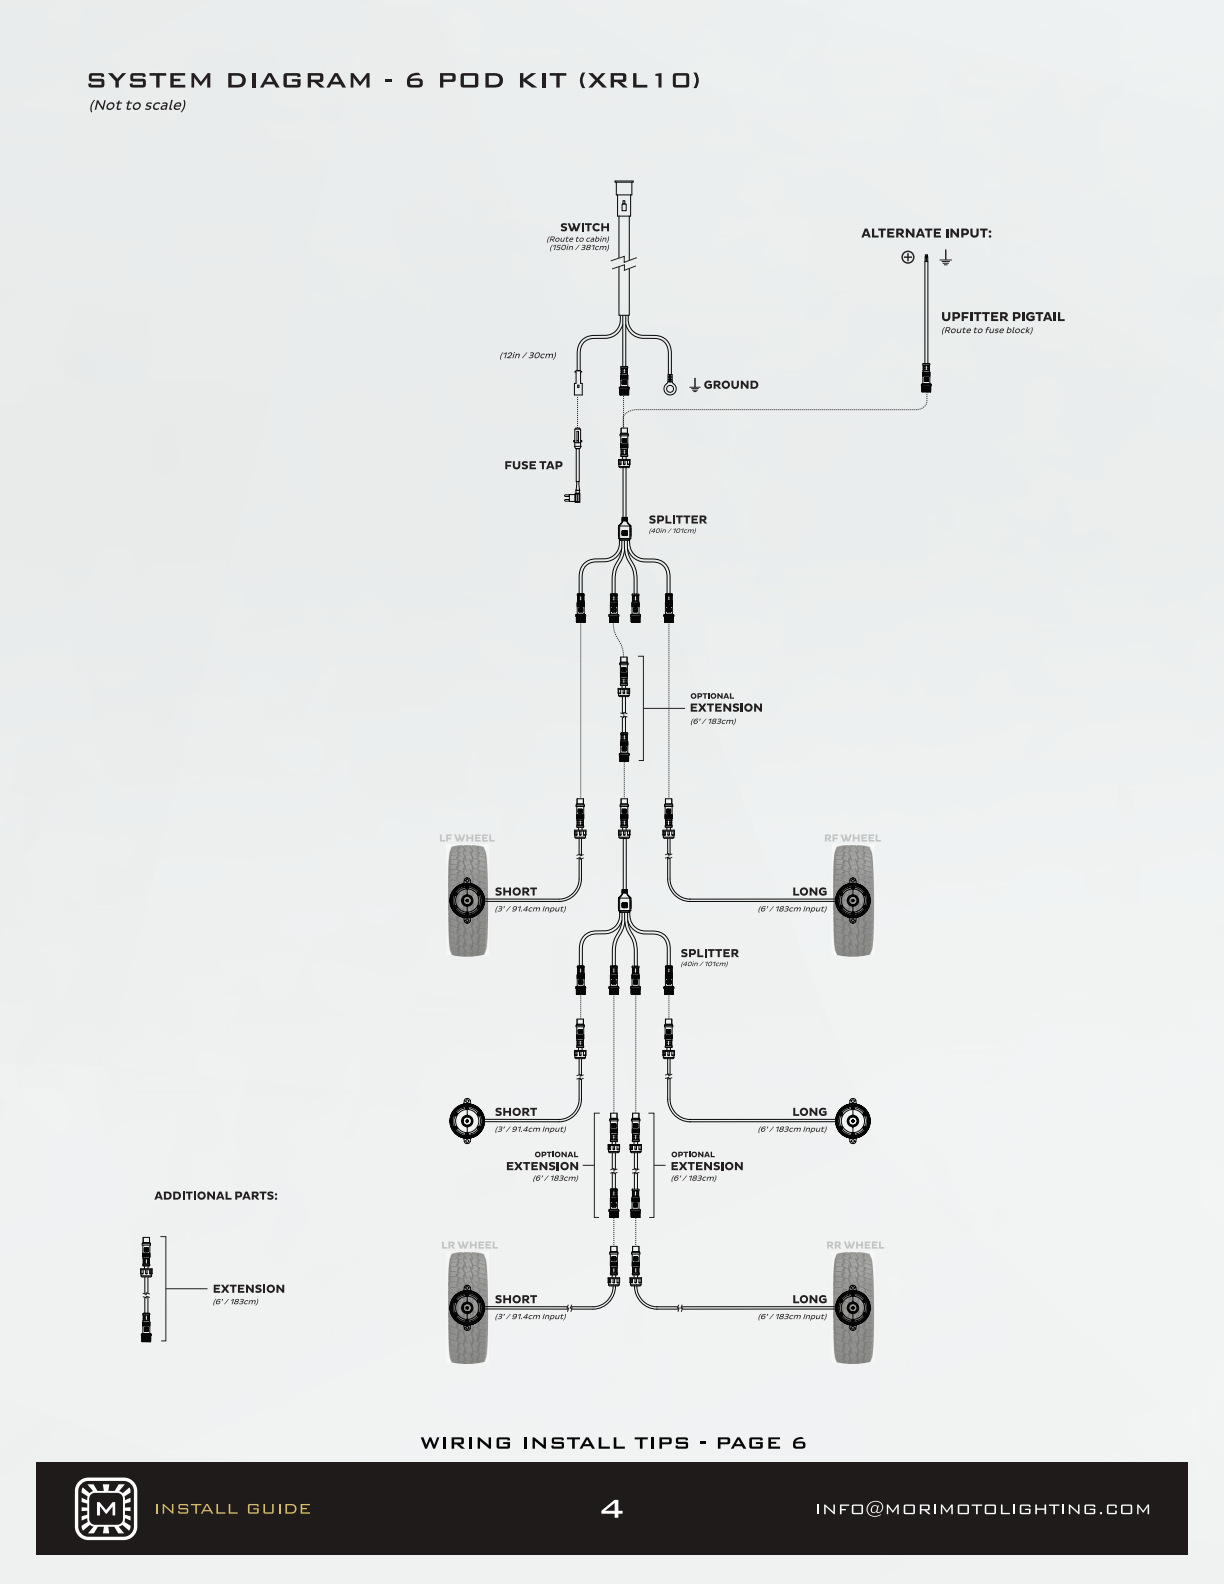
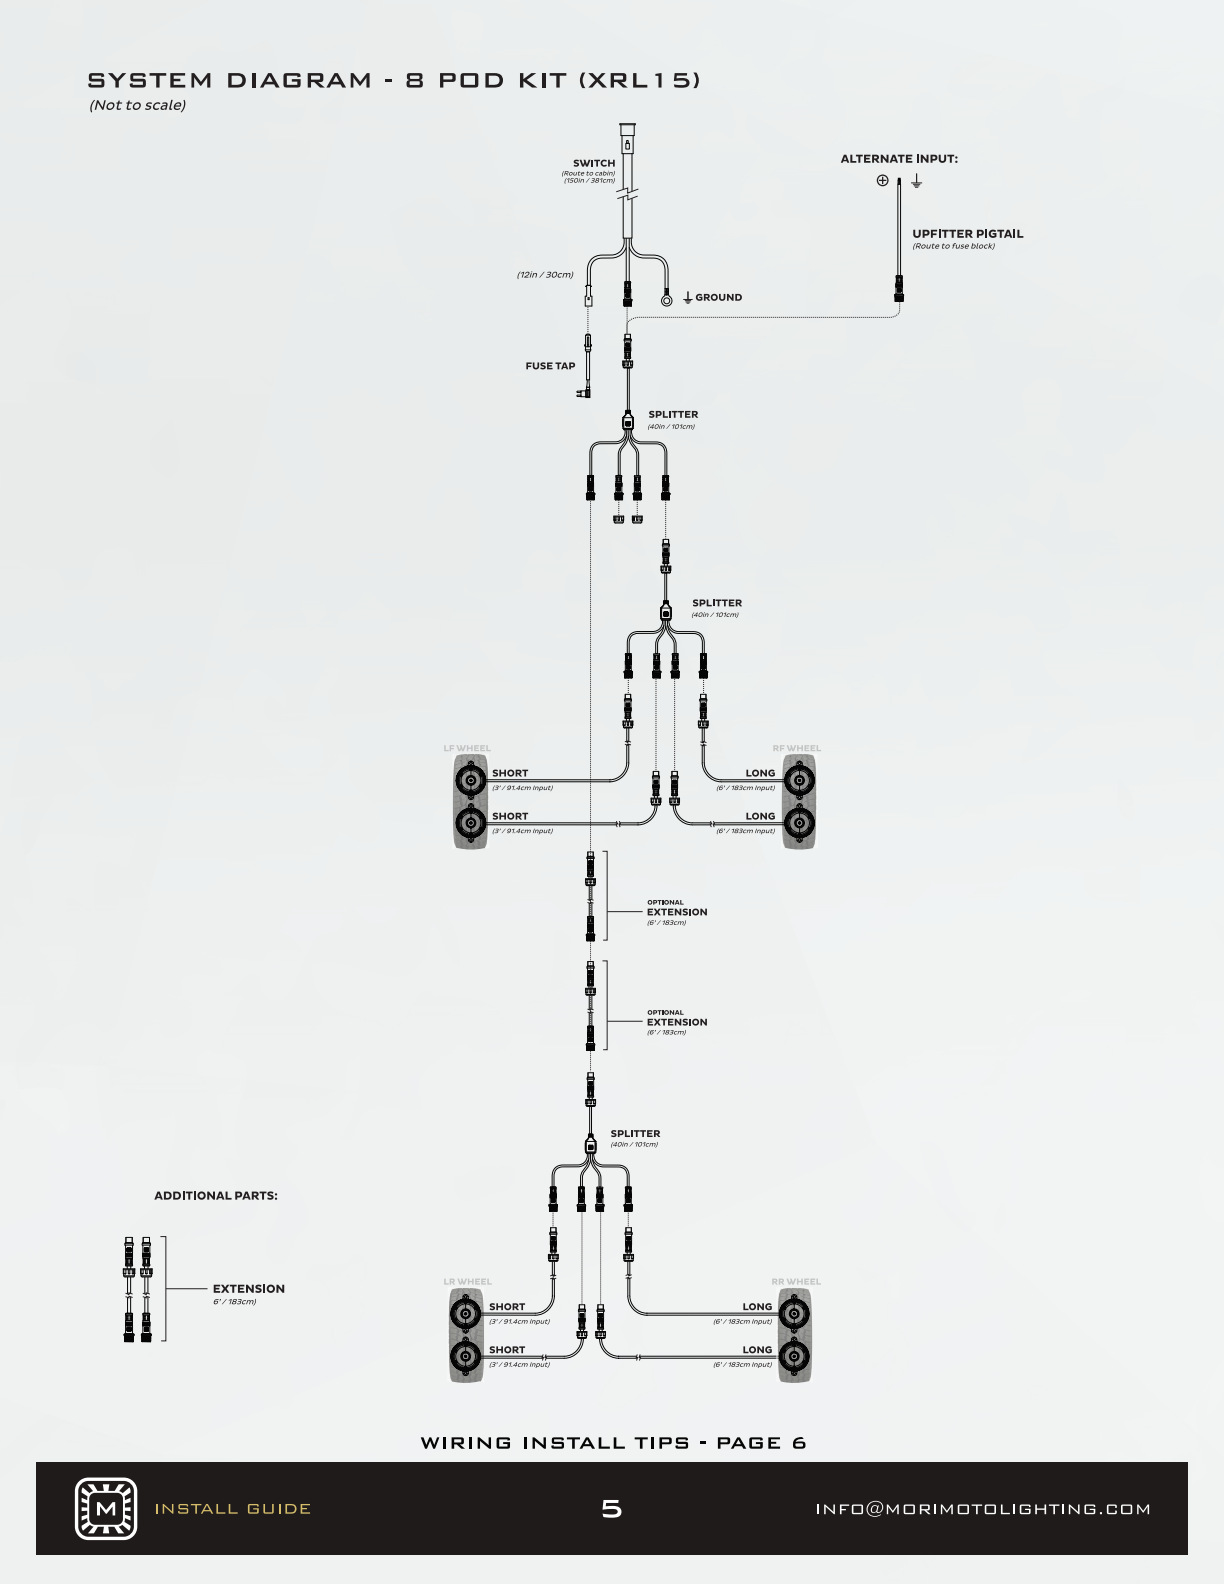
These universal kits use different splitter layouts for four, six and eight pods. Lay out the harness before mounting anything. Choose protected cable routes with clearance for steering, suspension travel, exhaust heat and sharp edges.
Have a 3 mm hex key or bit and a 12 V test light, voltmeter or multimeter available. Confirm the supplied parts against the kit in your hands: the current product lists and older illustrated package overview differ on some extension and magnet counts.
4-pod wiring layout
6-pod wiring layout
8-pod wiring layout
STEP 1
Join the barrel connectors
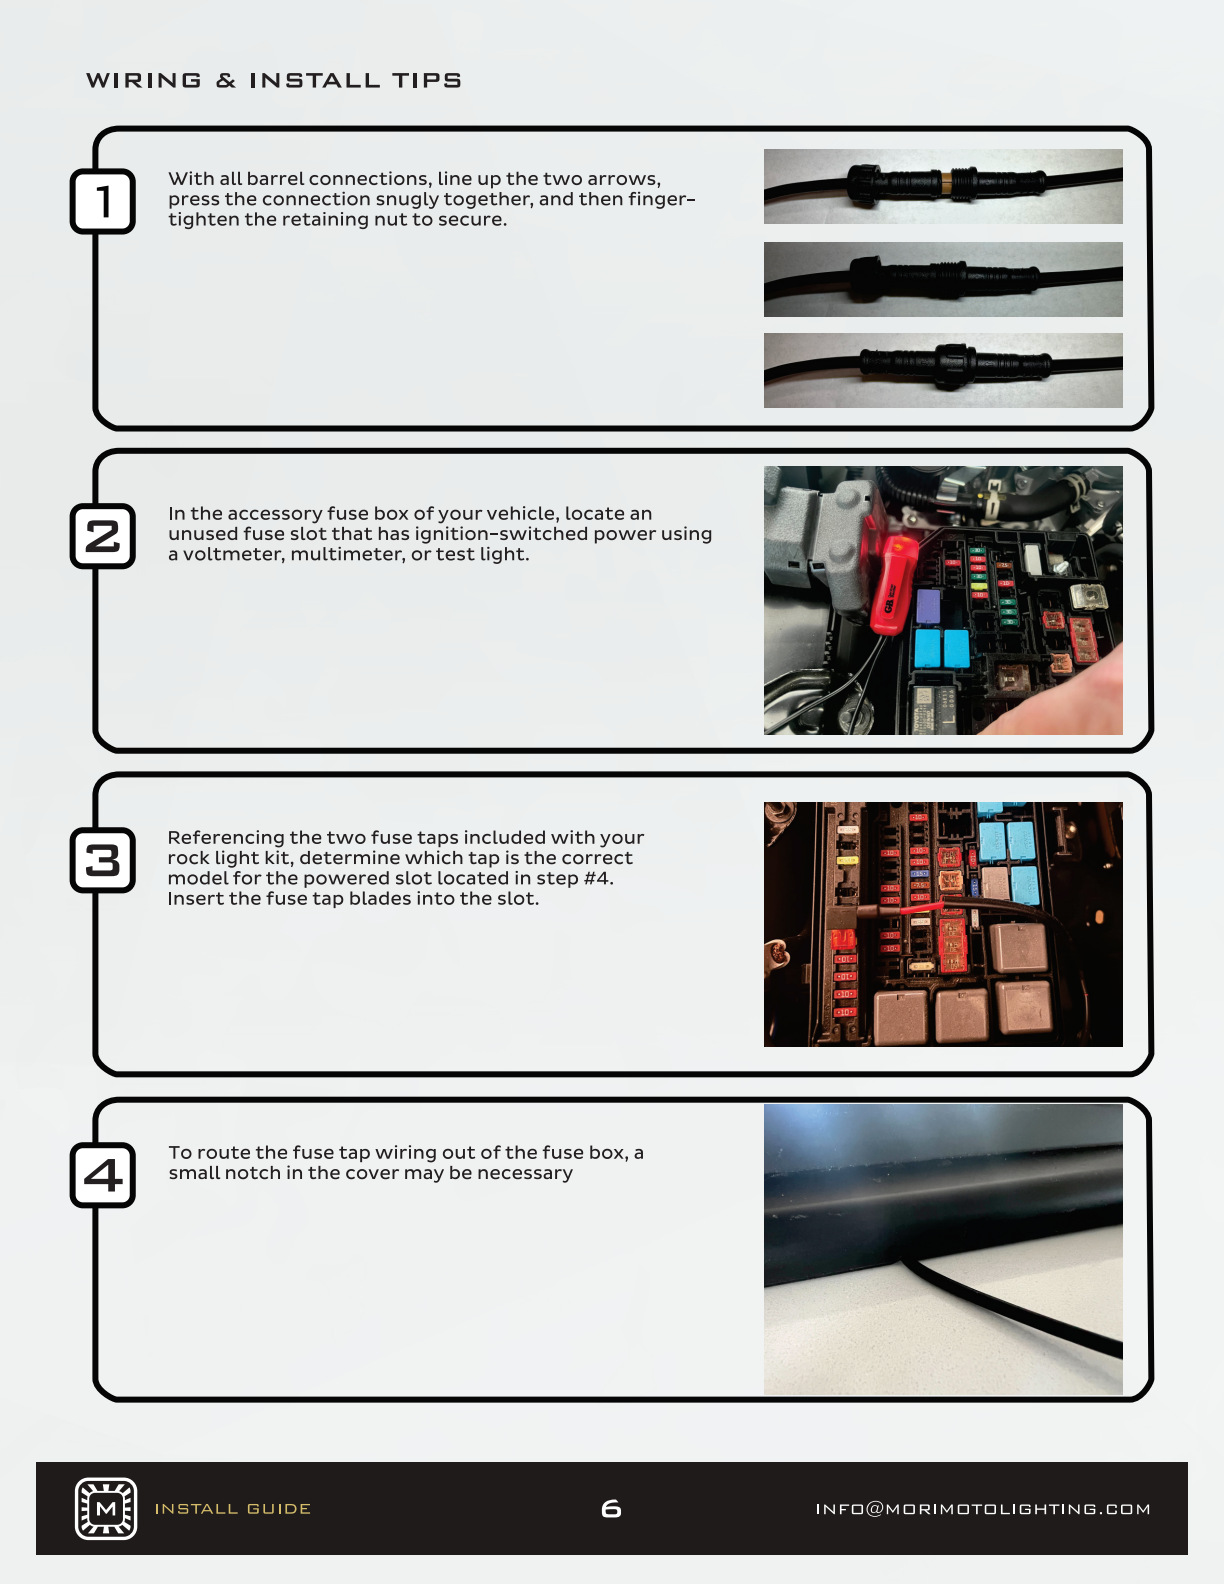
Align the two arrows, press each connection fully together, then finger-tighten the retaining nut. Keep the sealing surfaces clean.
STEP 2
Identify the switched supply
Use a meter or test light to find a suitable unused ignition-switched fuse position in the vehicle’s accessory fuse box. Use the correct Mini or Micro adapter supplied with the kit; do not guess from an unrelated vehicle photograph.
STEP 3
Route the fuse lead without pinching it
The manufacturer notes that a small notch in the fuse-box cover may be needed for the cable exit. Protect the lead, preserve the cover’s fit and keep the wiring clear of the latch.
STEP 4
Install the switch
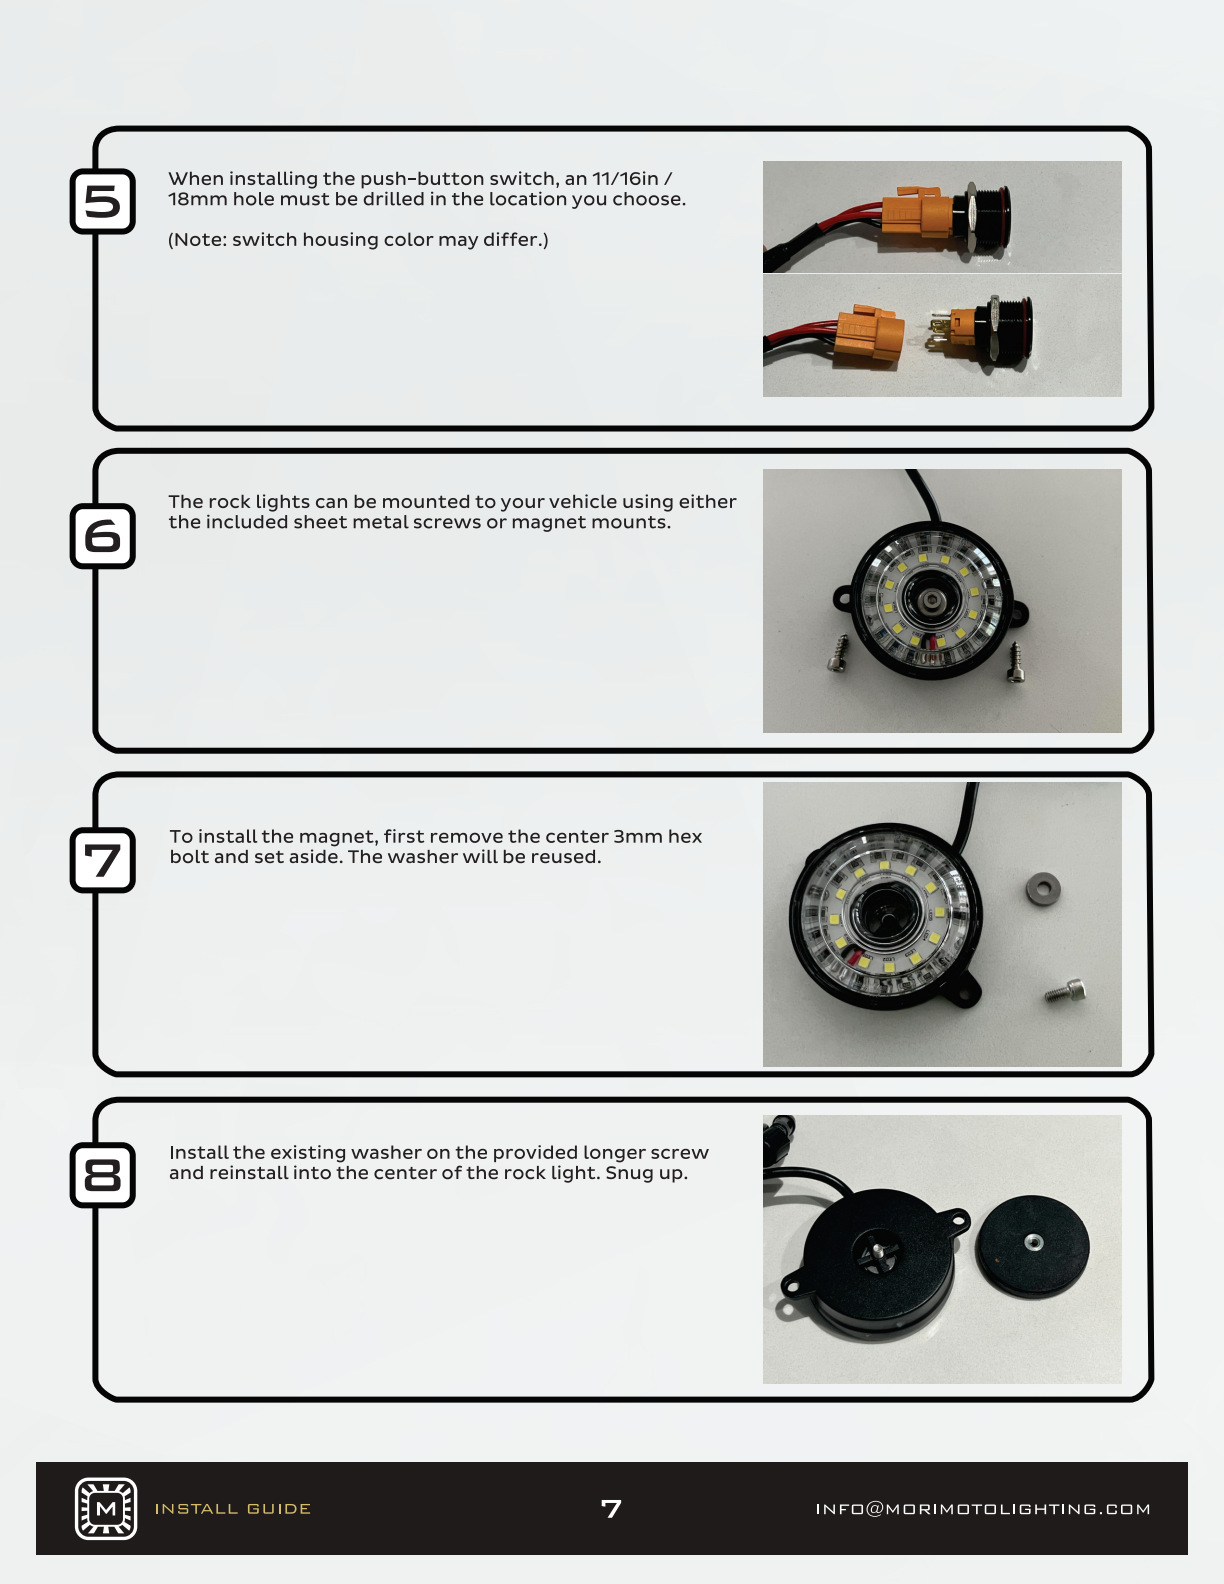
Choose an accessible cabin location with clear space behind it. The supplied push-button requires an 18 mm / 11⁄16-inch mounting opening. Switch housing colour can vary.
STEP 5
Choose screw or magnetic mounting
Use the lamp’s mounting points with appropriate supplied hardware, or assemble the magnetic mount. For magnetic mounting, remove and retain the centre washer, fit that washer to the longer supplied screw, and reinstall it snugly in the centre of the pod.
STEP 6
Secure the magnets and test
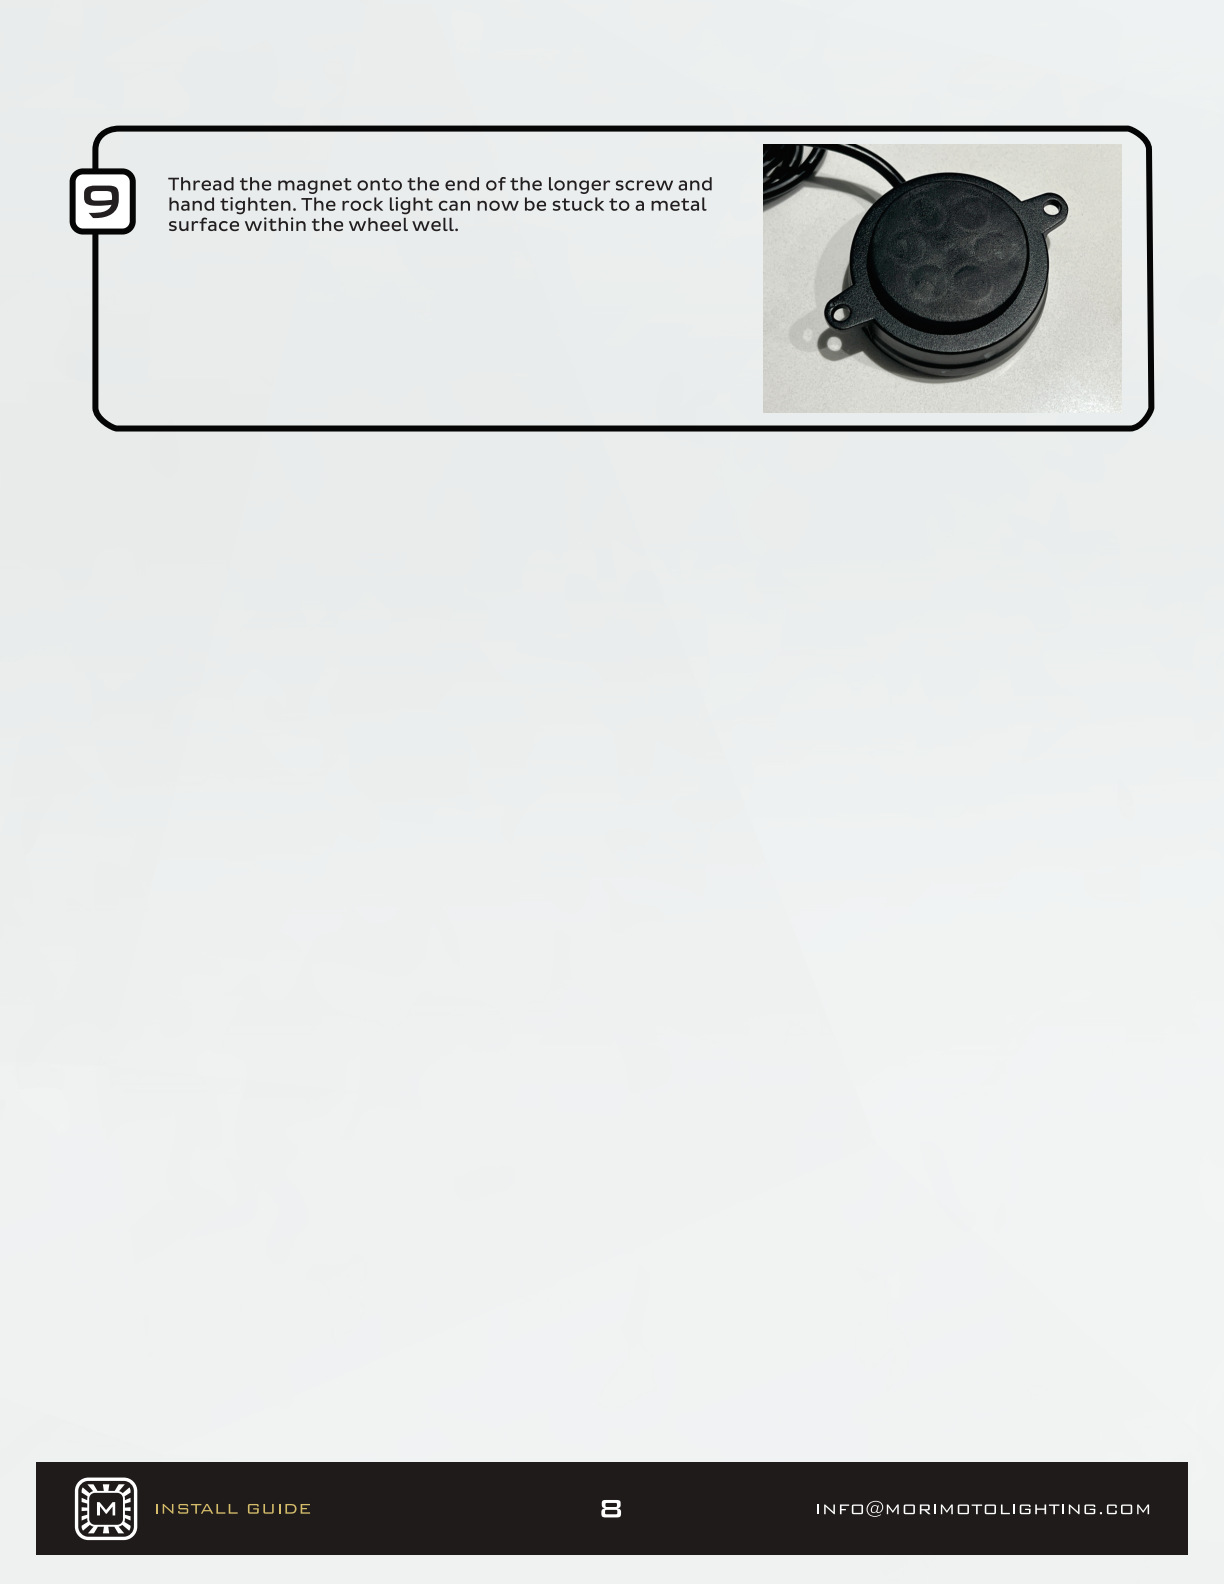
Thread each magnet onto the longer screw and hand-tighten. Check that the chosen metal surface holds securely. Secure the cables, operate the switch, and confirm every lamp works before finishing the installation.
Useful checks
Does the fuse-box photograph identify the Tacoma fuse position?
No. It illustrates the process. Verify the switched circuit on the actual vehicle with a meter.
Do all lights come with a magnet?
Use the current exact kit list. The current six- and eight-pod White pages list four magnetic mounts, so screw mounting may be needed for the other pods.
Can I add more lights?
Follow the correct harness diagram and manufacturer system limits. Extra splitters, extensions and pods are separate parts unless explicitly listed in the kit.
Return to the matching products
4-pod White rock-light kit
6-pod White rock-light kit
8-pod White rock-light kit
Manufacturer reference
Original diagrams and photographs: Morimoto. This BTS guide explains the supplied installation sequence in original wording. Reference checked 24 October 2026; the manufacturer PDF does not display a revision date.
Plan your Tacoma lighting
Explore the Tacoma lighting hub or use the Tacoma buying guide to compare the next upgrade.