

BTS LIGHTING · 2016–2023 TACOMA
Install Morimoto Tacoma XB tail lights
Fit the replacement pair, choose the amber signal pattern, and connect the optional Backup Light Boost Bar if you ordered it.
Before you start
This guide covers the Morimoto LF702.2 clear and LF703.2 red tail-light pairs for the 2016–2023 Tacoma. Have a 10mm socket or wrench ready. Lower the tailgate and switch the vehicle and lights off before unplugging connectors.
Check other turn-signal changes on your truck. Morimoto warns that non-original signal assemblies or LED bulbs elsewhere can cause hyperflash or interfere with sequential operation; test your complete lighting combination.
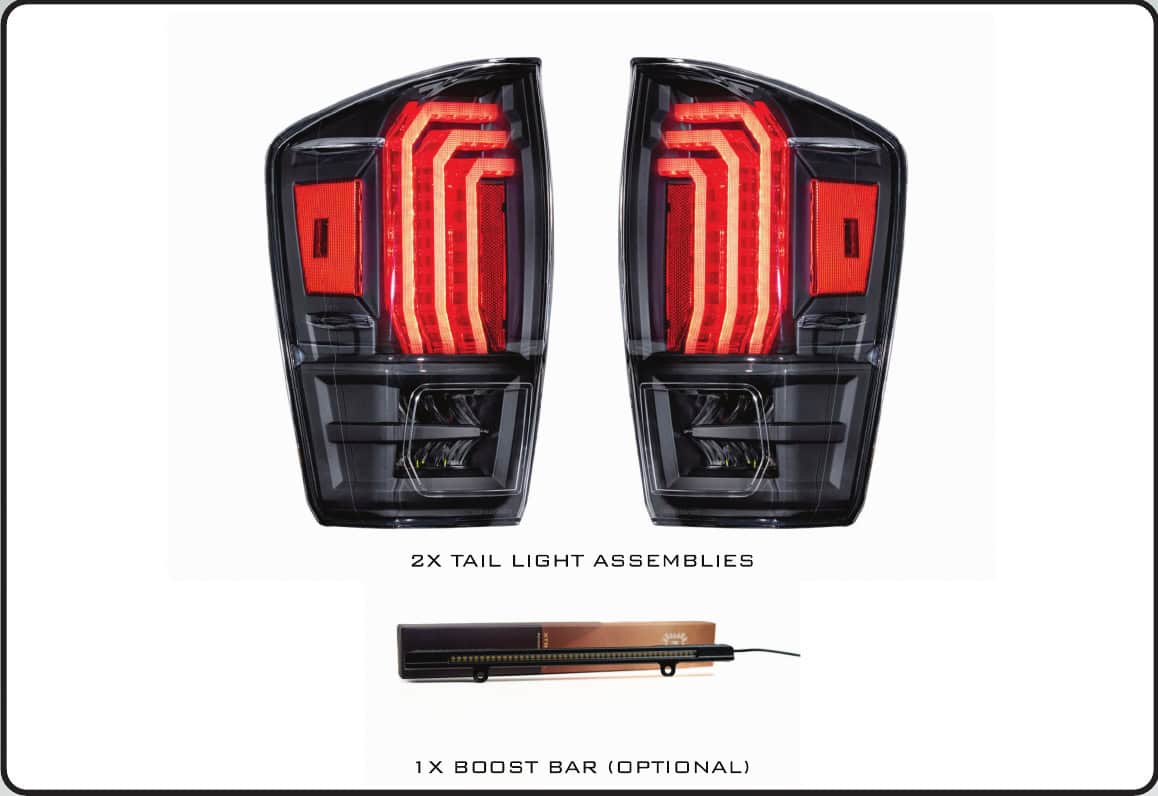
The Boost Bar is a separate accessory. Its installation needs a drill, cable ties and a cable opening through the bumper; it is not required for the tail lights’ built-in reverse lighting.
1. Release the original tail light
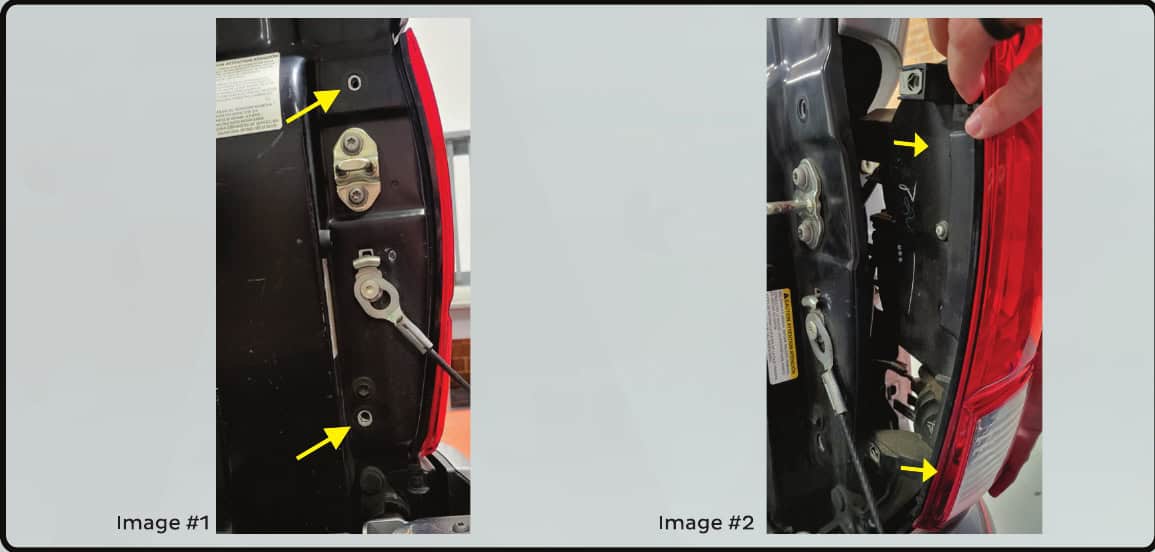
Remove the two 10mm bolts beside each lamp. Pull the lamp straight back and away from the truck to release its retaining points, supporting it so the wiring does not carry its weight.
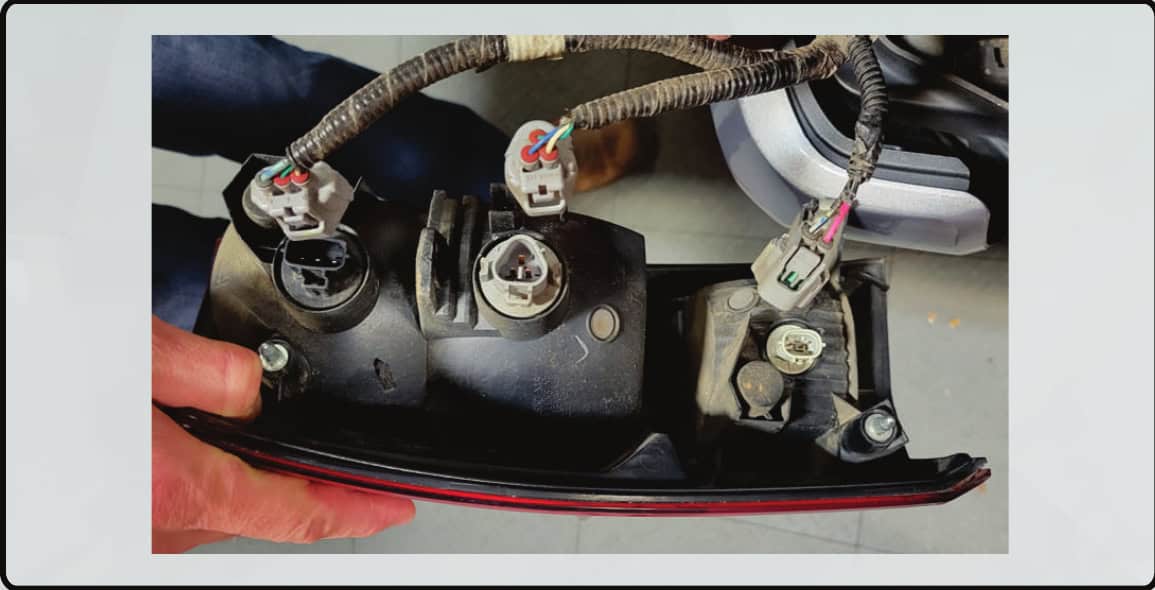
Press each connector’s release tab and unplug it from the original lamp. Keep the factory bolts for reassembly.
2. Choose the signal pattern, connect and test
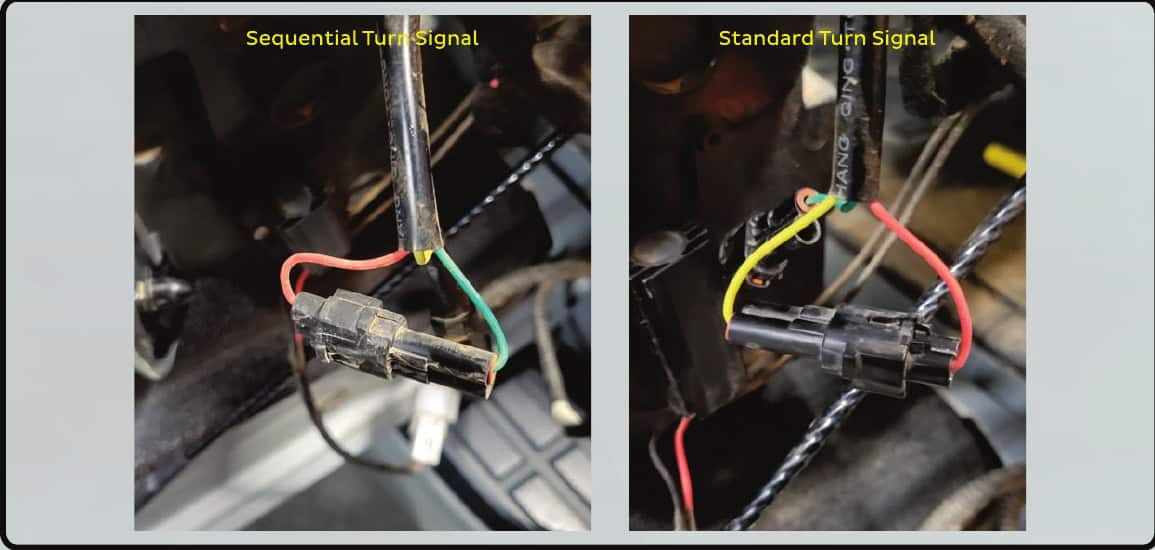
Set the rear signal connectors on both replacement lamps the same way:
- Sequential amber signal
- Join red and green.
- Standard amber on/off signal
- Join red and yellow.
Reconnect the matching factory plugs and seat each lamp at its original mounting points. Refit the 10mm bolts and hand-tighten as the manufacturer directs. Switch on the truck and check parking lights, brakes, left and right signals, hazards and reverse lighting before calling the installation complete.
Morimoto’s demonstration shows the tail-light functions:
3. Optional Backup Light Boost Bar
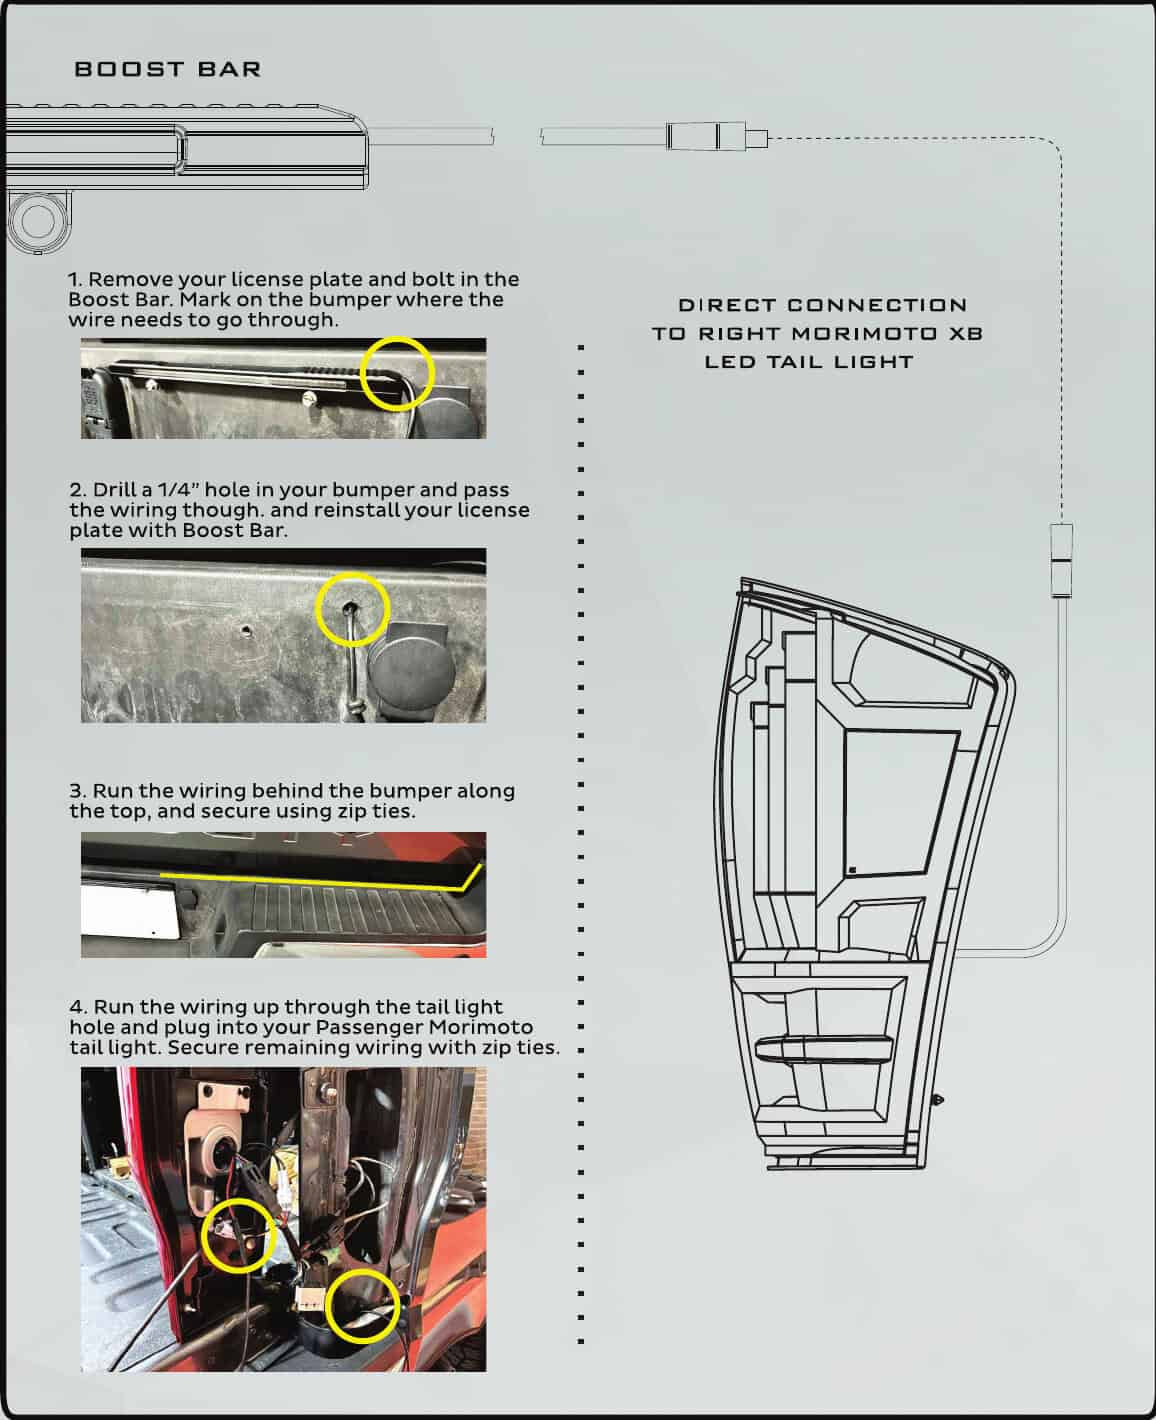
If you purchased the separate bar, follow the manufacturer’s illustrated route below:
- Remove the licence plate, position the bar and mark where its cable needs to pass through the bumper.
- Make the specified 1/4-inch cable hole and pass the wiring through. Reinstall the plate with the bar.
- Route the cable along the top behind the bumper and secure it with cable ties.
- Run it up through the right-hand tail-light opening, connect it to the passenger-side Morimoto lamp, and secure remaining wiring.
Check clearance behind the marked hole before drilling and keep the wire clear of sharp edges, heat and moving parts. Open the diagram for a full-size view.
Your Tacoma lighting
Clear-lens XB pair
LF702.2 with amber turn signals and integrated LED reverse lighting.
Explore Tacoma lighting upgrades
Original BTS walkthrough based on Morimoto’s 2016–23 Tacoma XB tail-light manual, retrieved October 24, 2026. Manufacturer illustrations retained. No revision date is printed. Manufacturer manual.